Lasagne Gardening

Putting the Garden to Bed, Lasagna Style!

By Faye

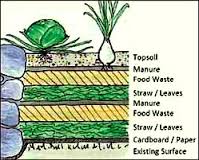
With shorter days, colder nights and the last glorious fall colours fluttering to the ground, my veggie beds are tucked in for their winter sleep. Most of us know about ‘lasagna gardening‘ (just Google it) for building new beds but I decided to use this method to give my hard-working soil an extra treat this year.

1. Lime and straw

After emptying out the remnants of summer bounty, and working around the areas still laden with carrots and beets, I limed the soil then topped the empty beds with a layer of straw.

2. Manure and leaves

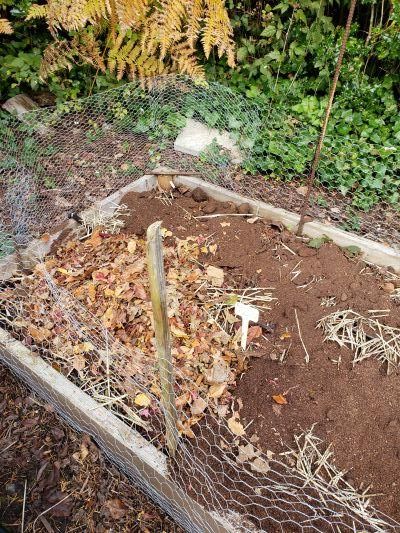
My first ‘green’ layer was well-aged chicken manure from Firbank Farms on Island View Road, then for the ‘brown’ ingredient, I added a thick layer of precious leaves. Lasagna gardening focuses on alternating layers of ‘green’ (nitrogenous) with thicker layers of ‘brown’ (dried, carboniferous) amendments. 

On top of the leaves, I put a 2-3″ layer of my own freshly dug compost. Having been too busy to dig it last spring, I left it and the summer warmth produced my best compost ever! Yes, good black compost is considered ‘green’, as is manure.

3. Top with compost and leaves

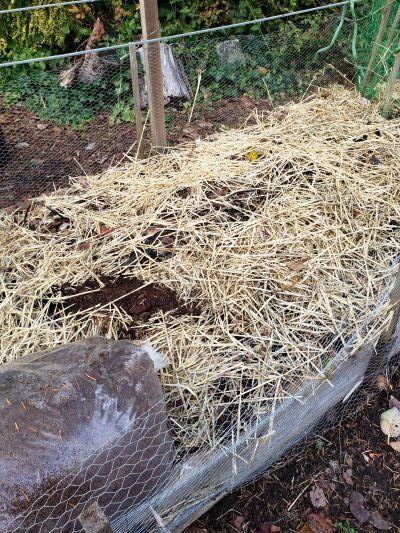
With a final, generous frosting of more autumn leaves, my soil beds are now piled higher than the raised beds themselves, but the army of microorganismsearthworms and their friends working beneath the surface will have this digested and shrunk down by planting time in mid-spring. What isn’t broken down by then will provide extra humus and help keep the soil moist all summer.

4. Bed ready for its winter sleep

I anticipate much gratitude from my newly-restored soil in the form of bountiful crops next year.

*NOTE: If you didn’t get to do this yet and winter arrives, save those leaves and start layering in the spring! It’s never too late. If done in spring, consider adding some topsoil so you can just plant right into the layers.

Winter veg bed

What to Do Now with Winter Veggie Beds?

By Faye

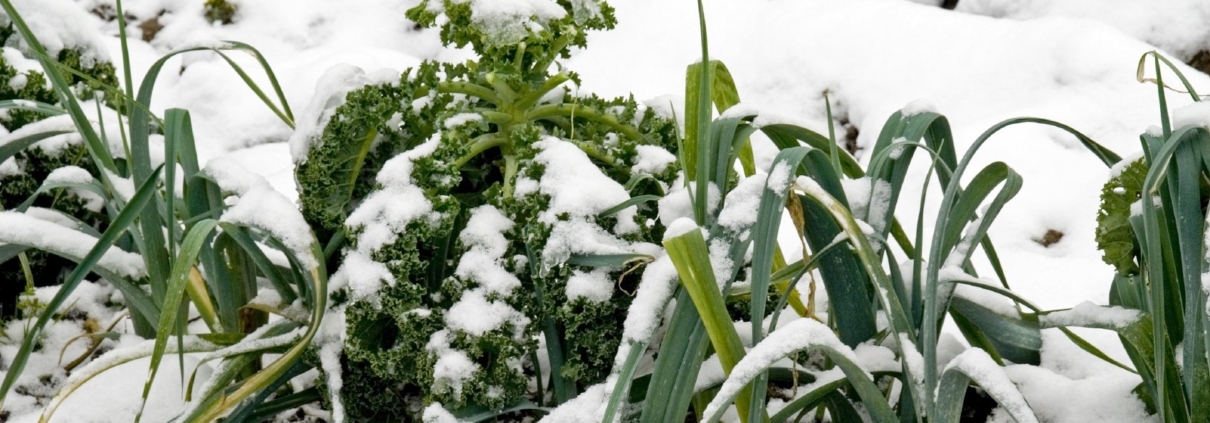
If you, like me, are admiring your nicely established winter crops in the garden, then it’s worth the little bit of time it takes now to make sure everything stays healthy throughout the cold season. Mulching and some staking are needed to protect winter crops from the elements.   It’s been a while since we’ve seen snow, but who knows what this winter will bring. Read on for details…

Winter rains are a welcome sight as our parched ground absorbs the needed moisture, but pounding rains are hard on the soil. Protecting the soil from erosion and leeching is very simple; just add a 6” top dressing of fluffy autumn leaves. This also prevents the splash-up of soil onto your plants, helping to keep them disease-free, in addition to giving some protection from slugs.

purple-sprouting-broccoli-snow

Purple sprouting broccoli is tough but it would be flattened if not staked

Don’t waste your compost; leave it in the bin, covered and relatively dry, to await spring warmth which is the wake-up call to the micro-organisms to start their work of digesting the organic waste, converting it to usable plant food. Spreading it on the garden in fall results in its goodness being leeched out and washed away in the rain.

Stake your brassicas. While kale and other brassicas are very hardy, they do tend to be brittle, while purple sprouting broccoli and Brussels sprouts are top heavy. A very sad sight is a tall vegetable toppled over in the wind, when it’s so easy to protect with a sturdy stake or two.

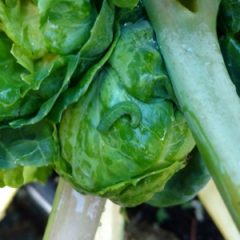
Watch out for caterpillars (still!) I neglected to net my Brussels sprouts with ProTekNet, and you can see the results here, the fat cabbage worm has been feasting. If you haven’t done so already (ideally in September), be sure to pinch out the top cluster of leaves, stimulating formation of the sprouts all along the stem. Leave the plants in the ground, and harvest sprouts as needed after frost, when they will be at their sweetest.

cabbage-worm-on-b-sprouts

Cabbage worm feasting!

Protect your shoulders. There is nothing better than pulling fresh carrots and beets during the winter, but if the shoulders get frozen they can turn to mush. When cold weather arrives, having a few inches of leaves in the bed will insulate the roots, and when it does get below freezing it’s easy enough to pull the leaves up and over the shoulders of the vegetables, especially the cylindrical beets which tend to push themselves up and out of the ground.

Stockpile mulches. Gather as many leaves as you possibly can; rake your own, take bags from the road side, do what you can to have a vast supply. Keep some for next summer in a plastic bag to keep them dry, adding to the compost alternately with layers of green. Put some in bins to decompose into leaf mold, truly black gold.

Lime the empty beds so they will be ready to plant by spring. While this can wait until spring, why not get it started now? Keep track of what beds you lime, and when; this needs doing only once a year, and never in beds that will be used for strawberries or potatoes.

Spinach and Chard have softer leaves, and can do with some winter protection during heavy rains and colder weather. I grow both in the greenhouse, but a tunnel or cold frame give protection from harsh conditions.

Plant garlic. Fall is the best time to plant garlic so the roots are well established for bulb growth in the spring.

Sit back and let Mother Nature do your watering, but keep an eye out for critter predation, slug damage, and extremes of temperature. Eat your veggies!

Tomato plants

Should I Prune My Tomatoes?

By Faye

The short answer is yes, and no. It depends on what kind of tomato you are growing. If it’s determinate then no pruning is required, but indeterminate tomatoes must be kept in check.

Determinate vs. Indeterminate
This is the key piece of information to look for on the tag when you purchase your tomato start or seed.

Determinate tomato plants have a pre-determined size (just like we do), according to their genetic make-up. They grow like bushes and need no pruning other than removing the leaves below the first flower cluster so that none touch the ground. They tend to ripen their fruit earliest, often all at once.

Indeterminates, grow like vines and will keep climbing and producing fruit, as long as they are alive. In our climate of course this is limited by the onset of cooler temperatures and shorter days.

Why is Pruning Important?
Like all plants, tomatoes depend on photosynthesis to grow. Pruning maximizes this process due to more sun exposure, while minimizing disease. Densely packed leaves take longer to dry, inviting all manner of bacterial and fungal intrusion. Allowing the sun to bless all of the leaves is the goal, especially in our relatively short growing season.

Tomato SuckerHow Do I Prune?
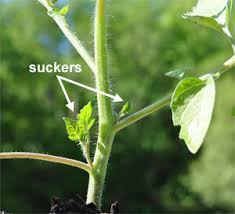
As the tomato plant grows, little side shoots (suckers) sprout up in the crotches, or axils, between the main stem and leaf branches. Each one of these has the potential to grow into a fruiting stem but the result would be a tangled mass of foliage with small fruit slowly ripening in its self-imposed shade. The ideal is to limit the plant to no more than 3-4 stems. Gently pinch off, the little suckers when they are small and easy to remove. (If you turn your back for a day or so, they can quickly grow to shocking proportions, so be vigilant!)

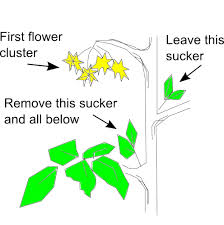
Cut oPrune Hereff all side stems below the first flower cluster then allow only the next two or three suckers above the first cluster to develop. Suckers higher up the plant will be weaker, so be sure to remove those later-developing ones.

If you have limited garden space or a lot of tomato plants that need to be planted close to each other, then limit growth to only one single vining stem, and tie it to a stake.

Planting Tip: Strip off all the bottom leaves, up to 6-8” above the root ball, and bury up to this point when planting. This long lower stem will grow roots, and the bigger the root system, the better the plant. So don’t worry if late-planted tomatoes are a little tall; just bury the excess length. (Or lay sideways in a trench, it will straighten itself out!)

What About Staking?
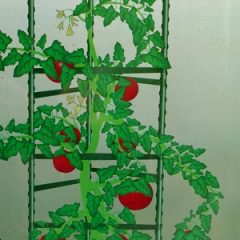
For the greatest yield, almost all tomatoes need support to improve air circulation and keep fruit and leaves off the ground where they are easy prey for disease and critters. Preferably install supports while the plant is still small so you won’t damage any spreading roots. There are many options:
– Cages
Still the simplest, the ubiquitous tomato cage has grown up a little, now available in taller and wider forms. They are perfect for determinate varieties, and with the addition of a sturdy stake or two, are fine for indeterminates too.
– Stakes
Easy to use for indeterminates and allow easy access for pruning. Simply hammer a 6’ cedar or metal (Rebar is good) stake about a foot into the ground, then tie the main stem to the stake, looping the tie completely around the stake first, then tie the plant to it.Tomato Ladder - web
– Ladders
New this year are 3-sided ladders made for tomatoes. I would probably anchor these with a go
od stake of Rebar, but the design is good for supporting those heavy stems of ripe and delicious tomatoes.
– Spirals
Very elegant, a tall metal spiral stake is set into the ground (past the first coil for stability), and you simply twine the vine around it, tying where needed.

End of Season Care
By about the end of August, gradually start to withhold water, which stresses the plants a little and encourages the fruit already on the vine to ripen. Also, cut off any immature flowers and ‘cap’ the plant by cutting off the ends of fruiting stems. This way, the fruit on the vine will ripen, not having to compete with any new ones forming. There is limited growing time left at this point, and new fruit won’t have time to ripen.

Soil

Soil Testing – What Can It Tell You?

By Faye

Most of us don’t speak the language of soil, so we rely upon our plants to interpret. But sometimes even the plants are unclear; “I’m not feeling well” is all we can read from them.

Having your soil tested is the sure way to know what’s happening underground, and it’s an easy process available locally.

There are two levels of testing, just pH or a full soil analysis. Soil pH is a measure of acidity and alkalinity in soils and can have a significant effect on plant health. A neutral pH of between 5.5 and 7 is the level at which nutrients in the soil are available for many of our landscape plants to absorb them. Our high rainfall tends to keep soil on the acidic end (lower pH) of the spectrum.

Most vegetable crops however, like soil to be more alkaline; beets for example are very sensitive to pH and won’t form bulbs if the pH is too low.

Adding lime to the soil is the best way to raise the pH but it helps to first know whether you NEED to do this, depending on what you are growing. Generally, lawns and veggie beds need lime every year, with the veggies preferably done in the fall, at a rate of 1 pound of dolomitic lime per square yard.

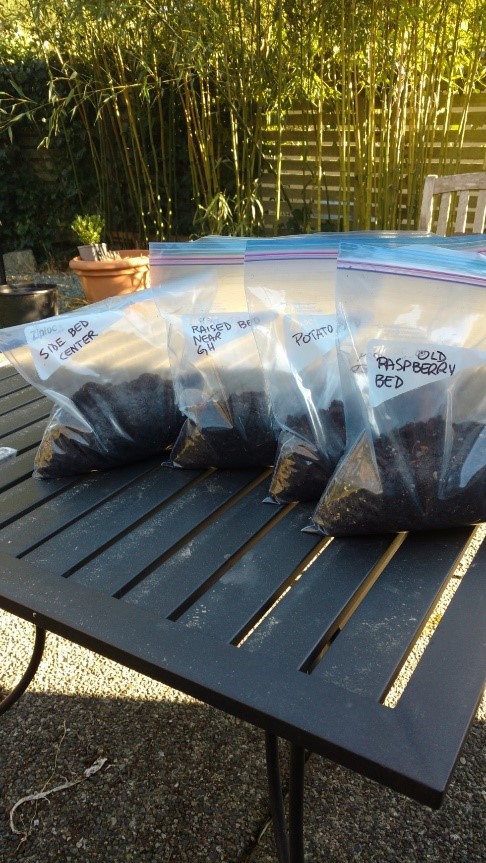
Bagged and labeled samples


A further analysis is also available, with a more detailed level of nutrient values. For most of us, just the Nitrogen, Phosphorus, and Potassium measurement is all we need. (This is the NPK you see on fertilizer packages.)


Collecting the soil samples is easy. The important thing is to gather it from the depth at which the plant roots will be reaching for nutrition, about 6-8″ down. In any given garden area, take several samples at this depth then mix them together in a bucket. Take about 2 cups of the mixed soil and put it in a clean plastic zip lock bag, one bag per area. The photo shows my samples taken from 4 beds. I was shocked to see how acidic my soil was, and it certainly explained those bulbless beets!


Where to take the samples?

Two choices are available locally:


  • MB LABS in the Sidney industrial area offers different levels of testing, either just pH which is 4 bags (areas) for $20, or NPK analysis with fertilizer recommendations for either organic ($48) or chemically ($37) fertilized soil. Email: info@mblabs.com or drop in at 2062 Henry Ave. W, Sidney.


  • Integrity Sales offers complete soil analysis for $60, including advice on what to do regarding fertilizer amendments and soil improvement. Located at 2180 Keating X Road, just take your soil samples in and the results will be available in 2-3 weeks.


We highly recommend both of these resources; they are reliable, accurate and your plants will thank you for testing your soil!

Tree flare diagram

Ten Tips For Successful Planting


The principle of ‘Do it once, do it right’ definitely applies to planting. Get new plants off to a good start by paying attention to the basics. You will be glad you did.

1. Plants Grow!  The most common planting mistake is not allowing enough space between plants. Read plant tags carefully to determine appropriate site and spacing.  

2. Soak plants well while still in their nursery pots.  Soak in a bucket or dribble with the hose.
3.Dig the planting hole the same depth as, and 2 to 3 times wider than the root ball.  Fill with water and let it drain away – more than once if it’s dry.
4. Tease and spread roots gently outward. Entwined roots need loosening – slice vertically and splay.  If the roots are a solid mass, slice an inch or so right off the bottom. Don’t skip this step!
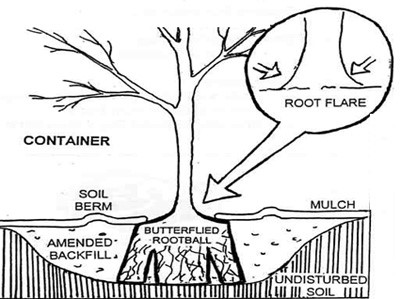
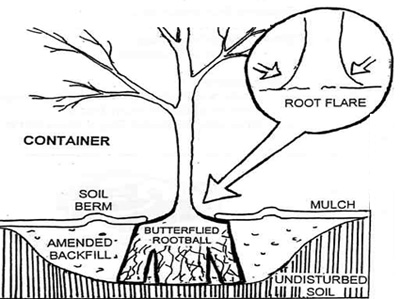
5. Find the root flare and place plants in the hole, make sure that the root flare is at grade.  Do not plant too deeply – the root flare should be at the soil surface.
6. Half fill the hole around the plant with native soil.  Add a handful of bone meal and no more than 25% of amendments like compost.   Exception is heavy clay – mix in one third gritty compost and/or bark mulch. Water the partly filled hole to settle the soil, then top up with the rest of the soil. 
7. Tamp down soil around plant, gently but firmly.
8. Mulch around plant with compost or bark mulch .  Avoid getting mulch close to woody stems or crown of plant.
9. Stake trees with a sturdy stake on either side of the root ball.
10. Water slowly and deeply.

Always water at planting time, even if the soil is wet and it’s raining. Watering settles the soil around the roots and eliminates air pockets.

Summer is the time to check your irrigation
It’s easier to see problems in the summer and fall, when shrubs are in leaf and perennials are full grown, than in spring when branches are bare and plants are dormant. Look for sprinklers that are blocked or areas that are being missed and either repair or make a list for spring.
Winter is the time to check your drainage
It’s hard to relate to poor drainage at this time of year, so make a point of touring the garden when it’s really wet, and looking for squishy spots. Make note of areas that need to be remediated or replanted with water tolerant plants.
Repotting 1

Repotting Large Containers

By Susan

Occasionally Japanese maples, roses, bamboo (especially bamboo!) and other large container plants need to be re-potted. How can you tell if it’s time? If you feel that a particular plant didn’t do so well last year, or that water ran right through the pot without being absorbed, then it probably is. Repotting doesn’t always mean going to a bigger pot. It could just be a case of trimming the roots and replanting into the same pot using fresh soil.

Handling big pots is easier than it looks if you know a few tricks and have someone to help. A day or two ahead of time check the moisture in the containers. It’s easiest to do if the soil is damp right through, but not soggy.

Before you start, you will need some fresh soil. We regularly recommend one of three options:

  1. The easiest is premixed potting soil that has a soil base – avoid light weight peat- based mixes. (We like Growell Sterilized Potting Soil).
  2. Alternatively, you can use a bagged soil like Grower’s Delight Garden Soil mixed 50/50 with bark.
  3. If you prefer to mix your own soi, a blend of equal parts finished compost, bark mulch and good garden soil is ideal.

N.B. Its best to always use sterilized soil for Japanese Maples, as garden soil can harbour harmful fungal spores.

Time to get started! Make clean-up easy by spreading out a tarp to work on.

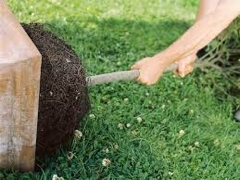
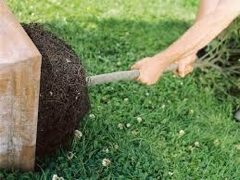
Run a long, sharp knife, like a bread knife, around the sides of the pot. When it seems loosened, lay the pot on its side and carefully pull the plant out. This is easiest if the container has straight sides, but will take much more effort if the sides are curved inwards (a good thing to remember if you are buying new pots). You don’t have to be too gentle at this stage, especially if the plant is dormant. Plants are tougher than you think.

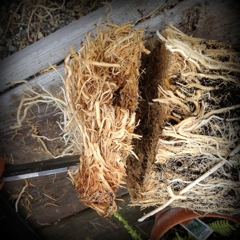
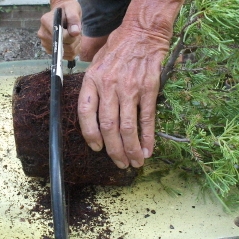
Tease the soil away from the roots with a small hand fork and trim long circling roots. If the root mass is solid, use an old knife, pruning saw or even a Saws All, to cut away a couple of inches from the sides and bottom.

Clean out the container and check that the drainage holes aren’t plugged. Cover them with some screening to keep them open. Mesh dry wall tape or old window screen work well.
Add fresh soil mix to the pot and reposition the plant so that the top of the root ball is at the same level it was before you started- not too deep or too high.
Fill in with the soil mix, to about two inches from the top. Tamp the soil down gently around the roots so there are no air pockets.

Return the pot to its permanent position. Top dress with a slow release fertilizer and water well. Lastly, prune for shape and to remove any damaged or inward growing branches.

If your containers are too big to move, scrape away what you can of the old soil and top up with some fresh soil mix instead. .


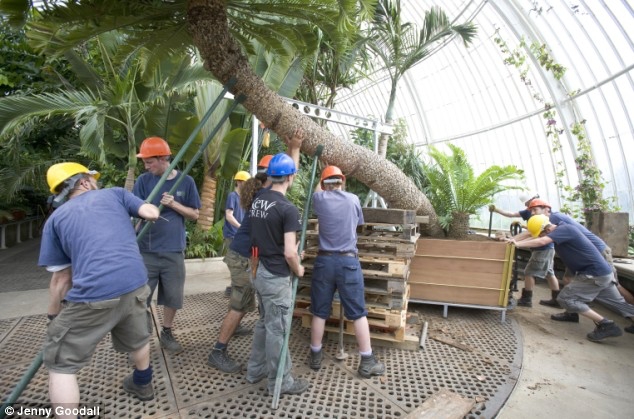
The oldest known potted tree

It’s possible to re-pot anything if you have enough help!

It took nine gardeners, a crane and three months of meticulous planning to place a one-tonne tree, believed to be the oldest potted plant in the world, into a new container.
The ancient cycad, a palm-like tree, was collected from South Africa on one of Captain Cook’s voyages and has been at Kew Gardens since 1775.
It has grown outwards and upwards at an inch a year and now reaches almost 15’. It grows at an angle and is propped up by stilts.

From The Daily Mail


Building layers

The Joy of Creating a Lasagna Bed

By Faye

Has your appetite for growing your own food expanded as mine has?
With the warmer weather these past few summers, harvests have been plentiful and deliciously sweet, but planting space had not kept up with my lust for more. I wanted more of what I’ve already grown, and more new crops as well.

Fall is a good time of year to take stock of your garden and decide if it’s meeting your needs. If not, make it happen. Building a new raised bed isn’t complicated, it’s simply a frame placed atop unused, weedy ground or even on top of lawn grass, in the sunniest spot you have. Cedar is the best material for this, but rocks would work, or even just a piled mound is fine. Don’t use pressure-treated wood. It should be at least 12 inches tall, with the bed no wider than 4 feet so you can reach from either side to weed and harvest. Once this is done, the rest is easy, fun and so rewarding.
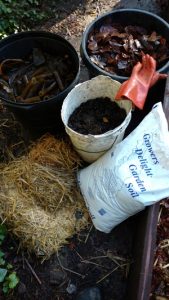
Raw materials at the ready

Raw materials at the ready

‘Lasagna Gardening’ was first coined in a book of that name by Patricia Lanza, and has become the natural way to build your own soil that is weed free, organic, with good tilth and rich in nutrients. It is moisture retentive and needs less fertilizer. Also called sheet composting, it’s simply a matter of layering organic materials which will ‘cook’ down to create the best soil you have ever crumbled between your fingers.

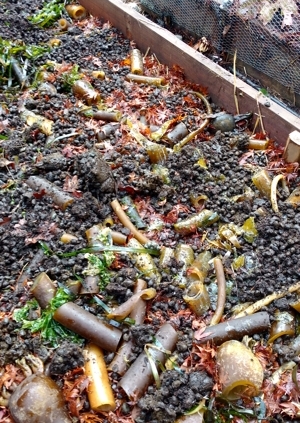
My layers started with about 7 sheets of newspaper, but cardboard is another option. This creates a moist and dark bottom layer that attracts earthworms, which will be your labour force to break down and aerate your new soil. On top of this I spread some of my own compost, then a good layer of leaves. This time of year falling leaves provide us with brown, red and gold bounty. It’s free, widely available, and oh so valuable, so get as much as you possibly can and layer it thickly.

The alternating layers will be either ‘brown’ like leaves and straw or ‘green’ layers such as garden clippings, uncooked veggie scraps including eggshells and coffee grounds, manure and seaweed. Make your ‘brown’ layers about twice as thick as the ‘green’ layers.
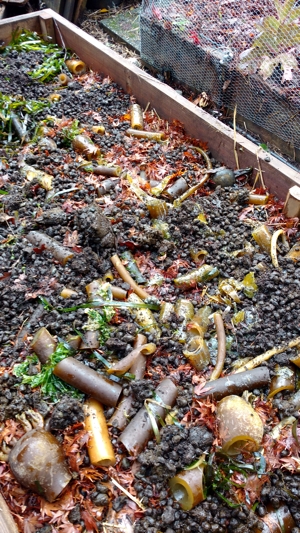
Manure and seaweed, now more leaves...

Manure and seaweed, now more leaves…

After the leaves, I joyously added a layer of llama manure, which I had shoveled into buckets as if collecting a treasure. Llama and sheep manure can be used ‘fresh’, although I tend to put these on the bottom layers only, due to the yuck factor. Well-aged cow, horse and chicken manure are also rich in nutrients and all the micro-organisms useful for breaking down the layers into good soil.

Then more leaves.

Giddy with pleasure, I headed to one of several beaches in my neighbourhood, and gathered a few buckets of seaweed. (I don’t rinse the seaweed; the rains wash away any residual salt.) Is there a better way to spend an hour or two in the autumn than at the seaside, with a root knife hacking up pieces of kelp?

NOTE: NEVER TAKE SEAWEED THAT IS STILL ATTACHED. ONLY TAKE WHAT HAS BEEN TOSSED UP IN A WIND STORM, AND TAKE ONLY WHAT YOU NEED.

Kelp meal is also available at the nursery, for those of us not up to the beach trek.

On top of the seaweed, I layered some straw (not hay!); I buy a bale of this every spring for around $11. and find it invaluable as a weed suppressant, slug deterrent and moisture retainer around my summer veggies.
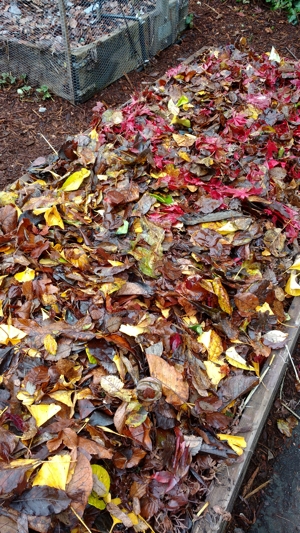
Ready to cook

Ready to cook

Keep layering, repeating until the pile is about 2 feet tall, which will break down to about half that, and be ready for planting by spring. I always include some garden soil in the mix, and finish with a final layer of leaves, like the frosting on a cake. The layers you choose can be fairly flexible, it’s not a hard and fast rule that you must use the same things as I did.

While fall is the best time to build a lasagna bed, as the winter rains and frost help to break down the layers, I have also done it in the spring and just parted the layers to accommodate seedlings. Garden soil and finished compost are important if starting in the spring.

Lasagna gardening is less work because you never need to dig again, weeds are almost non-existent, and plants will almost grow themselves.

While I have enjoyed the lasagna method for vegetable beds, there is no reason to limit it to just veggies. For more flowers and healthier plants in all areas of your garden, get layering!
Rhodo flower and leaf buds

Pruning Rhododendrons

By Susan


NZrhodoWell grown rhodos will be bushy, with leaves covering the whole plant. Poorly grown rhodos are often leggy and bare. The difference usually comes down to maintenance pruning, which should be done on an annual basis.

Plan to cut back about 10% of the plant every year. Cut back select branches to a growth point low down in the plant. Cut back other branches to growth points at various heights. You can see where the potential growth points are by determining where one year’s growth ends and another begins, even on old wood. Look down the stems for tiny buds and/or small ridges that go around the stems. Making cuts just slightly above those points will activate the latent buds.

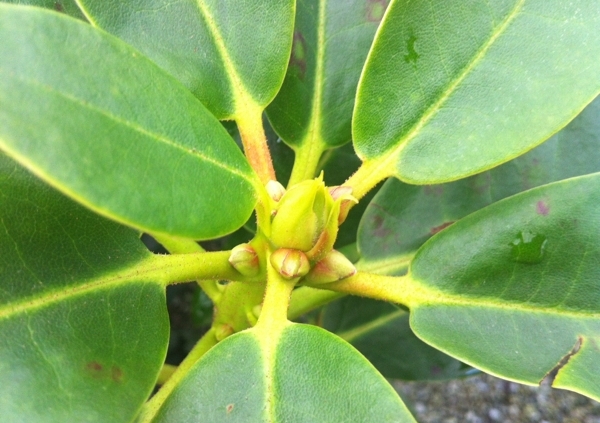
By May/June most rhodos have either flowered, or are about to. Have a good look at the buds and you will see that they aren’t all the same. The flower buds are plump and waiting for the right time to burst into bloom. Non-flowering buds, aka leaf buds, are small and insignificant. Both types of buds are surrounded by a whorl of leaves and tucked into the base of these leaves are the tiny buds that are future growth points.

Rhodo flower and leaf shoot

Rhodo flower and leaf shoot

When flowering is finished, these tiny buds will be stimulated to grow and where there was one shoot this year there could be as many as 4 or 5 next year. However, on the branches with non-flowering buds, i.e. leaf buds, it is unlikely that more than a single shoot will form. As time goes on, the flowering branches will be exponentially bushier, whereas without corrective pruning, the non-flowering branches will be become long and leggy.

This is where a technique called ‘leaf bud pruning’ comes in. By pinching out the non-flowering leaf buds, the tiny new buds, that would otherwise stay dormant, will grow. So instead of single shoots forming, several shoots will form.

Leaf bud pruning can be done from late fall up

Flower and leaf buds

Terminal growth point may be leaf or flower bud

until bloom time. Look carefully at your rhodos and see if you can tell which buds will form flowers. They will be larger and fuller than the non-flowering buds. If you aren’t sure, wait until they are more developed. Carefully pop out the leaf buds with your fingers. Usually you can flick them out with a thumbnail. Be careful not to damage the dormant buds lying around them.

When it’s time to deadhead, keep an eye out for long, single shoots and pinch them out at the same time. This will activate the dormant buds around them, which will help to produce a well-balanced and bushier plant.

Be vigilant about pruning, especially when the plants are young, and they will grow to be compact and well branched. The added bonus is that by encouraging fuller branching, one also increases the number of flowers.

Should major pruning be required, there are a couple of ways to go about it. Most rhodos will recover nicely from hard pruning. This can be done either all at once or over a period of two or three years. Normally the best time to prune rhodos is just after flowering, but if hard, renovation type pruning is required it is better to do it in early to mid spring, just before new growth starts.

After pruning fertilize, apply a loose layer of bark or leaf mulch and water well. If you have questions about rhodo pruning or would like to be shown what to look for, just come in and ask!

How To Save Your Back While Gardening

by Laurie

It’s that time of year when we get excited about spring, then look outside and see all the work to be done.  Gardening is a way better workout than the gym, but like the gym, I want to avoid any setbacks from injury or strain brought on by the physical aspects of gardening. Below are some of the recommendations from professional physio types about correct alignment and techniques that I remind myself of each and every time I reach for a shovel or pick up a heavy bucket.

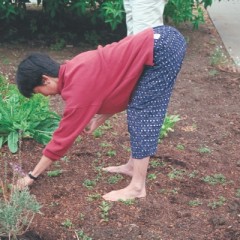
Correct Bending

Correct Bending

1.    Bending
Hinge at hip crease, not at waist. Get lower – bend knees slightly.  Stick bum out behind you. Spine long, not rounded. Wider stance, feet at least hip width apart.

2.    Lifting
Again – hinge at hip crease, not waist. Bum out behind with knees slightly bent.
Get close to object. Stiffen trunk to protect spine and provide more strength.  Lift   with hips, not knees or back. When carrying a heavy load keep torso stiff, rib cage over pelvis and no leaning back. Never twist when lifting.

3.    Digging
Stand with arms straight out on shovel handle, blade vertical when pushing down with foot. Lower stance with slightly bent legs, bum out behind as hands slide down shaft to lift shovel load. Use legs and arms to dig, with trunk not back.
Again – feet/hips/shoulders must always face same direction. Do not dig and then twist around to empty shovel.

4.    Weeding
 Get low – best to sit on bucket or kneel with pad. When sitting, bend at hip joint with flat back, legs wide apart, resting an arm on the leg above knee gives extra support.
Get close to weeds, never over reach.  No twisting – face area you are working in.
Remember pulling weeds is so much easier when the ground is a bit moist.

I am constantly correcting my alignment and technique as I work through various tasks in the garden. I now know to keep a water bottle handy and take breaks, pace myself, use long handled tools and switch jobs frequently.  I want to feel nicely fatigued but not pain after a good workout in the garden.

(Sources: K. Peper, consulting Restorative Exercise Specialist)

See these YouTube clips for more info: Gardening: avoiding back pain whilst weeding
Gardening without Back Pain – Part2: Digging and Shoveling

Pear Blister Mite

Start Now To Foil Next Season’s Pests

There is much we can do between now and spring to eliminate or lessen the damage from insects and disease.

We in southern BC are very fortunate to have food-growing expert, author and entymologist Linda Gilkeson, PhD in our midst. She has generously provided the information for this article.(www.lindgilkeson.ca)

TO DO NOW:

      1. Mulch, mulch, mulch! A clean and tidy garden does not provide habitat for the good guys. Leave the leaves in garden beds as a haven for ground beetles, rove beetles, and bumble bees. The largest mortality for winter moths is actually from ground beetles attacking the cocoons while they are still in the soil.
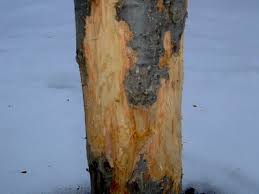
      2. Rabbit Damage

        Rabbit Damage

        Very important if you have rabbits around: protect the lower 2-3 feet of trunk on young trees with chicken wire or other tree guards. Bunnies can kill a whole orchard in a winter by ringing the bark.

      3. Put out safe slug bait containing iron. Slugs are very active in a warm wet winter.
      4. Rake up, remove and destroy all leaves from your roses if they had black spot this year. Do not compost. Rose hygiene is the best defense.
      5. Don’t allow potatoes to keep growing in the garden, that’s where late (tomato) blight can overwinter.
      6. Climbing cutworms are still active on leafy greens. Evening inspection, just after dark with a flashlight, will expose the critters. Pick off and destroy.
      7. People around Victoria should already have sticky tree bands up on their fruit trees and boulevard trees, especially Garry oak, birch, poplar, maple, willow and other broadleaf trees. If not done already, it is still worth doing asap.
      8. Pear Blister Mite

        Pear Leaf Mite

        If you do it right now, you can still spray lime sulphur on your pear trees for pear leaf blister mite, which cannot be reached by dormant sprays in winter. Also useful for peach leaf curl.

*** Please note, only do the lime sulphur treatment if you had problems with these diseases last year. There is no benefit at all treating trees that have not been infected.

*** Stay tuned, we’ll write again in early February with an update on what to do while the trees are dormant.