Tree flare diagram

Ten Tips For Successful Planting


The principle of ‘Do it once, do it right’ definitely applies to planting. Get new plants off to a good start by paying attention to the basics. You will be glad you did.

1. Plants Grow!  The most common planting mistake is not allowing enough space between plants. Read plant tags carefully to determine appropriate site and spacing.  

2. Soak plants well while still in their nursery pots.  Soak in a bucket or dribble with the hose.
3.Dig the planting hole the same depth as, and 2 to 3 times wider than the root ball.  Fill with water and let it drain away – more than once if it’s dry.
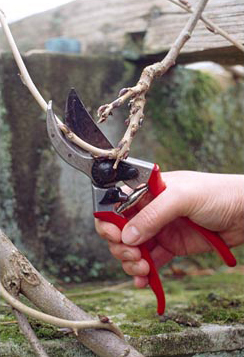
4. Tease and spread roots gently outward. Entwined roots need loosening – slice vertically and splay.  If the roots are a solid mass, slice an inch or so right off the bottom. Don’t skip this step!
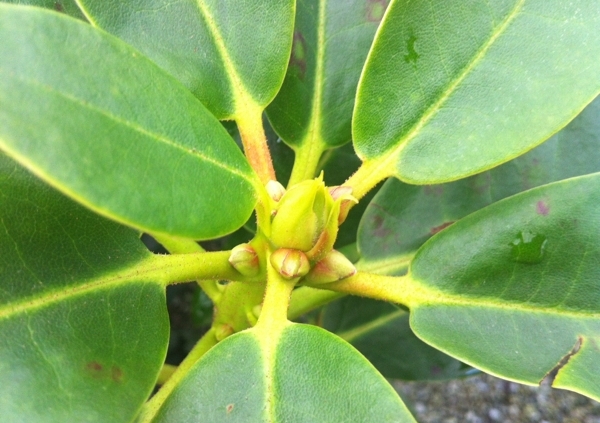
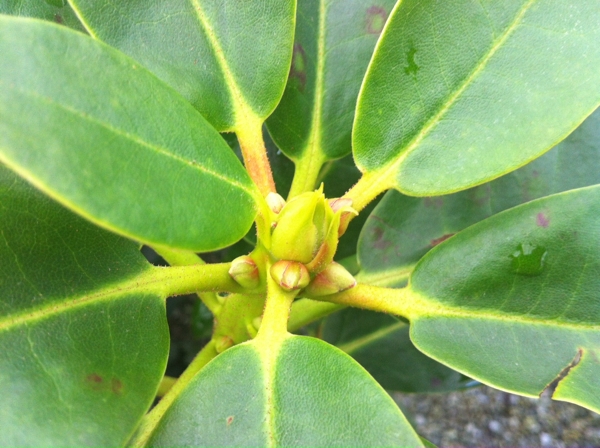
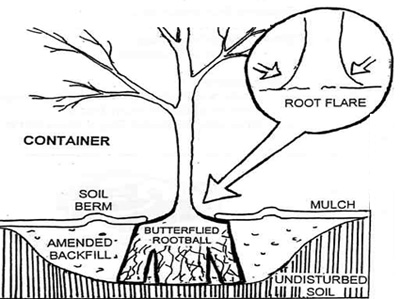
5. Find the root flare and place plants in the hole, make sure that the root flare is at grade.  Do not plant too deeply – the root flare should be at the soil surface.
6. Half fill the hole around the plant with native soil.  Add a handful of bone meal and no more than 25% of amendments like compost.   Exception is heavy clay – mix in one third gritty compost and/or bark mulch. Water the partly filled hole to settle the soil, then top up with the rest of the soil. 
7. Tamp down soil around plant, gently but firmly.
8. Mulch around plant with compost or bark mulch .  Avoid getting mulch close to woody stems or crown of plant.
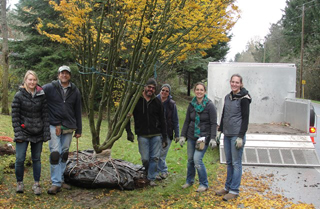
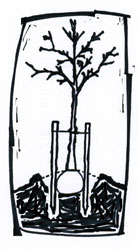
9. Stake trees with a sturdy stake on either side of the root ball.
10. Water slowly and deeply.

Always water at planting time, even if the soil is wet and it’s raining. Watering settles the soil around the roots and eliminates air pockets.

Summer is the time to check your irrigation
It’s easier to see problems in the summer and fall, when shrubs are in leaf and perennials are full grown, than in spring when branches are bare and plants are dormant. Look for sprinklers that are blocked or areas that are being missed and either repair or make a list for spring.
Winter is the time to check your drainage
It’s hard to relate to poor drainage at this time of year, so make a point of touring the garden when it’s really wet, and looking for squishy spots. Make note of areas that need to be remediated or replanted with water tolerant plants.
Rhodo flower and leaf buds

Pruning Rhododendrons

By Susan


NZrhodoWell grown rhodos will be bushy, with leaves covering the whole plant. Poorly grown rhodos are often leggy and bare. The difference usually comes down to maintenance pruning, which should be done on an annual basis.

Plan to cut back about 10% of the plant every year. Cut back select branches to a growth point low down in the plant. Cut back other branches to growth points at various heights. You can see where the potential growth points are by determining where one year’s growth ends and another begins, even on old wood. Look down the stems for tiny buds and/or small ridges that go around the stems. Making cuts just slightly above those points will activate the latent buds.

By May/June most rhodos have either flowered, or are about to. Have a good look at the buds and you will see that they aren’t all the same. The flower buds are plump and waiting for the right time to burst into bloom. Non-flowering buds, aka leaf buds, are small and insignificant. Both types of buds are surrounded by a whorl of leaves and tucked into the base of these leaves are the tiny buds that are future growth points.

Rhodo flower and leaf shoot

Rhodo flower and leaf shoot

When flowering is finished, these tiny buds will be stimulated to grow and where there was one shoot this year there could be as many as 4 or 5 next year. However, on the branches with non-flowering buds, i.e. leaf buds, it is unlikely that more than a single shoot will form. As time goes on, the flowering branches will be exponentially bushier, whereas without corrective pruning, the non-flowering branches will be become long and leggy.

This is where a technique called ‘leaf bud pruning’ comes in. By pinching out the non-flowering leaf buds, the tiny new buds, that would otherwise stay dormant, will grow. So instead of single shoots forming, several shoots will form.

Leaf bud pruning can be done from late fall up

Flower and leaf buds

Terminal growth point may be leaf or flower bud

until bloom time. Look carefully at your rhodos and see if you can tell which buds will form flowers. They will be larger and fuller than the non-flowering buds. If you aren’t sure, wait until they are more developed. Carefully pop out the leaf buds with your fingers. Usually you can flick them out with a thumbnail. Be careful not to damage the dormant buds lying around them.

When it’s time to deadhead, keep an eye out for long, single shoots and pinch them out at the same time. This will activate the dormant buds around them, which will help to produce a well-balanced and bushier plant.

Be vigilant about pruning, especially when the plants are young, and they will grow to be compact and well branched. The added bonus is that by encouraging fuller branching, one also increases the number of flowers.

Should major pruning be required, there are a couple of ways to go about it. Most rhodos will recover nicely from hard pruning. This can be done either all at once or over a period of two or three years. Normally the best time to prune rhodos is just after flowering, but if hard, renovation type pruning is required it is better to do it in early to mid spring, just before new growth starts.

After pruning fertilize, apply a loose layer of bark or leaf mulch and water well. If you have questions about rhodo pruning or would like to be shown what to look for, just come in and ask!

Hakonecloa Aureola

Simple Containers

 by Susan Tice

Colourful containers sprouted up everywhere when we moved to our current home and we suddenly had lots of sun. My long pent up desire for pots overflowing with petunias and other summer beauties could be indulged almost endlessly. A few years later, the novelty wore off a little – it was a lot of work to plant up all those pots every year; time to look at alternatives. Perhaps a single, perfect specimen instead of a riot of colour…

Hydrangea 'Paris'

Hydrangea ‘Paris’

A single specimen plant in a beautiful container has an elegance and grace all its own. For a single plant to shine it should have more than one ornamental feature and look great over more than one season. The size of the plant should be in proportion to the size of the container.   The shape of the plant, whether it be tall and upright, softly weeping or a formal round ball, should complement the shape of the container.

Hydrangea 'Bombshell'

Hydrangea ‘Bombshell’

Among other things, grasses, ferns and hydrangeas are particularly well suited to container growing and look more spectacular with each passing year.   Any of the new easy care, long blooming hydrangeas would look great in a nice pot. Try ’Limelight’, Little Lime’, ‘Bombshell’, ‘Pistachio’ or ‘Adria for example.

Hakonecloa 'Aureola'

Hakonecloa ‘Aureola’

Many grasses show well in containers with Japanese forest grass (Hakonecloa), fountain grass (Pennisetum) and feather reed grass (Calamagrostis) being particular favourites.   Evergreen ferns like sword ferns and Japanese Tassel Fern (Polystichum polyblepharum) take time to fill in, but are worth the wait.

Hosta 'Empress Wu'

Hosta ‘Empress Wu’

Consider perennials like Crocosmia or Kniphofia which have spiky foliage all season and showy flowers in mid-summer. I’ve always had hostas in pots and they look stunning when elevated and a small grouping can make quite a statement.

Specimen plants in containers can adorn a porch or patio or define an entry way. When placed around the garden or tucked into a bed, they become instant focal points.   Plus, you can move them around to cover up bare patches. A well-placed container looks like art and can hide all manner of problems!

There will always be petunias in my summer garden, but the pots filled with special plants will be there year after year, like reliable old friends.

Ready to transport

Sharpen Your Shovels, it’s Time to Transplant!

By Brian Russell

Established woody plants (trees, shrubs and conifers) are best moved when they are fully dormant. In our climate, this means November, December, January or early February. In theory you can move just about anything if you have enough determination and manpower (or womanpower!)

The tree in these photos is an Acer palmatum ‘Shishigashira’ that has been in our roadside planting for almost 25 years.   It has long been too big for the space and rather than cut it down we decided to try to move it. It was a big job that required several people, a tractor and a sturdy trailer.   Hopefully it will survive the move and settle in to its new home in the garden of one of our staff.

The spade must be sharp to cut the roots

The spade must be sharp to cut the roots

It’s important, and a lot easier, to use a sharp shovel or spade because you need to sever the roots cleanly. A dull edge will leave a lot of damaged, torn roots, making it much harder for the plant to re-root. Use a coarse flat file to hone a nice sharp edge on your spade. If you have access to a bench grinder, all the better. If you are planning to do a lot of transplanting, you might want to keep one nice, sharp, clean garden spade just for transplanting. The ones with a square edge and a short sturdy handle with a “D” shaped grip are best.

Severing-roots

Starting to severe the roots

Before you start digging, tie up the branches to get them out of the way and to protect them from breakage. You can use rope or twine as long as it is reasonably soft and won’t damage the bark. Almost any large shrub or small tree will be easier to dig and maneuver into its new home if the branches are wrapped.

Clear away all the leaves and debris around the base of the plant and then start slicing your way through the roots, angling inwards as much as downwards. You should be digging at an angle so that you will end up with a cone-shaped root ball. The rule of thumb for determining the size of the root ball to dig is as follows: allow ten to twelve inches of root ball diameter for every one inch of trunk calliper.

Close up of root severing

Close up of root severing

For small plants, you might be able to dig a nice root ball out with just six or eight “slices” of your razor sharp shovel blade. For larger plants, you will need a larger root ball but the shovel’s blade won’t be long enough to get all the way under the plant the first time around.

Tipping the tree to cut the final roots

Tipping the tree to cut the final roots

First, dig a full shovel depth all the way around the plant and then get a helper to use another shovel as a lever to lift, very slightly, the partially severed root ball so that you can get in and slice the remaining roots. At this point it’s not usually possible to use your foot on the shovel anymore because it’s so deep in the soil. Just push it in by hand and slice through the rest of the roots until the plant is ready to lift.

Protect the root ball by lifting it carefully onto a tarp and dragging the tarp to the plant’s new home. Ideally it should be replanted as soon as possible to minimize transplant shock. If you can’t plant it right away then you should wrap up the root ball entirely with burlap (or an old towel or part of a bed sheet) and secure it tightly with twine. Treated like this, it can be heeled into a holding bed and kept there for weeks or even months before it is planted out again.

Ready to transport

Ready to transport

When replanting, ensure that you are planting at exactly the same depth: no higher or lower than the original location. Add bonemeal to the back fill soil to stimulate new root growth, water in well to dislodge air pockets, untie the poor thing and prune off the broken branches (there will surely be some).

Tree-on-way-to-new-home

The tree all ready for the journey to its new home!

A significant portion of that plant’s roots stayed at its former location, and the roots that remain will need to receive more moisture than usual, with mid to late summer being the most critical time. You won’t really know if the plant has survived the transplant process for at least a full year. Treat it like a new planting and pamper it a bit more than usual. Mulching will help, and so will building a little soil ‘donut’ or basin around the plant where you can put your hose on “trickle” three times a week.

Berberis

Seasonal Stars in the Garden

Do you find that there are times of year when your garden fades, when there is nothing stellar to notice and you have to say to guests “wait until fall (spring, winter or summer); my garden really looks good THEN!”
The secret to having a year-round beautiful landscape lies in planning ahead, cultivating plants which will shine during various seasons. There are few plants that truly are wonderful for all four seasons, but each time of year features those divas, stars, and yes even stalwart back-stage workers, to make yours a garden you can be proud of for 12 months of the year. The following is a list of only a few of our favourites. Please check with us for current availability. Trees may be tagged to hold for when they are ready in the fall.

SPRING

  • Alchemilla mollis (Lady’s Mantle) blooms are lime green in spring. Fresh foliage holds water droplets like diamonds.
  • Amelanchier alnifolia (Saskatoon Berry) native shrub, delicate white flowers, edible fruit.
  • Amelanchier x grandiflora ‘Autumn Brilliance’ a tree with four season interest, beautiful white flowers in spring, tasty black berries in summer, brilliant autumn colour.
  • Aronia (Chokeberry) three seasons of interest — spring flowers become black berries in summer, then outstanding fall foliage.
  • Berberis shrubs have four season interest.
  • Brunnera ‘Jack Frost’ and ‘Looking Glass’ have showy blue flowers and gorgeous foliage.
  • Calamagrostis ‘Karl Foerster’ interesting upright, polite grass
  • The brilliant chartreuse flowers of many Euphorbias brighten the spring landscape.
  • Exochorda (Pearl Bush) pearl-like buds studded along branches.
  • Fothergilla flowering shrub, bright foliage in fall as well.
  • Grevillia ‘Canberra gem’ fresh new growth is very striking.
  • Magnolia stellata varieties bloom before leaves arrive.
  • Polygonatum (Solomon’s Seal) beautiful from spring until the last stems finally fade out in fall.
  • Spireas especially ‘Goldflame’ which has bright orange/gold foliage.
  • Viburnum plicatum varieties — a good structural shrub.

SUMMER

  • Adiantum pedatum (Maidenhair fern) delicate fronds atop wiry black stems.
  • Astilbe flowers add colour to shady areas.
  • Buddleia shrubs attract butterflies, hummingbirds and bees.
  • Cercis Canadensis (Forest Pansy) small tree with burgundy heart-shaped foliage.
  • Crocosmia many varieties, flowers are rich and vibrant shades of orange/yellow/red
  • Fuchsia many hardy varieties; all provide long lasting flowers in shade.
Hakonechloa (Japanese Forest Grass) varieties give colour and lovely texture in shade.
  • Hostas check out some of the newer varieties for pure zing!
  • Hydrangeas are at their best in late summer; many varieties to choose from.
  • Kirengeshoma collector’s plant, lovely in woodland settings.
  • Lilium; plant several varieties for continuous show of colour.
  • Magnolia ‘Oyama’ best magnolia foliage, later blooming.
  • Monarda ‘Jacob Cline’ (Bee balm); showy red blooms attract wildlife
  • Nepetas have grey mounding foliage and soft blue flowers. Cut back for second flush of
bloom.
  • Paeonia (Peony) summer flowers, autumn foliage colour, and deer proof too.
  • Philadelphus (Mock Orange) fragrant flowers in early summer.
Physocarpus (Ninebark) strong structure, colourful foliage.
  • Pyrus salicifolia (Weeping ornamental pear)
  • Robinia pseudoacacia ‘Frisia’ (Golden Locust) bright chartreuse foliage. We often sell out of this tree long before it’s ready to leave the nursery in September.
  • Rudbeckia (Black-eyed Susan, Gloriosa Daisy) a classic, old fashioned and tough. Many varieties.
  • Sambucus nigra ‘Black Lace’or ‘Black Beauty’ (Elderberry) shrub with glossy purple-black foliage.
  • Sedum ‘Dazzleberry’ has purple foliage and dark pink flowers
  • Spanish Olive shiny black olives, attractive leaves.
  • Stewartia considered a four-season tree.
  • Styrax japonicus ‘Emerald Pagoda’ (Japanese Snowbell Tree) graceful habit, good foliage and white blossoms in summer, followed by little green pear-shaped seeds.
  • Zanthoxylum piperitum (Japanese Pepper Shrub) interesting, fragrant foliage and deer resistant.

AUTUMN

  • Acer rubrum or for a smaller tree, the Japanese Maples; what can be more lovely in fall than a red-leafed maple?
  • Aconitum ‘Arendsii’ (Monkshood) has tall, saturated-blue flower spires that deer do not eat.
  • Anemone japonica perennial with tall stems of simple elegant flowers, spreads nicely in garden bed. A classic.
  • Aronia (Chokeberry) autumn leaves are like red embers in a campfire.
  • Blueberry not just for berries, this has gorgeous fall foliage.
  • Ceratostigma plumbaginoides (Dwarf Plumbago) blue flowers over red-tinged foliage.
  • Cercidiphyllum japonicum (Katsura Tree) a favourite for its fragrance of burnt sugar as the leaves dry in late summer.
  • Clematis terniflora (Sweet Autumn Clematis)
Cotinus very colourful fall foliage after a summer of beauty as well.
  • Euphorbia ‘Glacier Blue’ has lovely creamy foliage year round.
  • Fothergilla two seasons of intense beauty, shade tolerant shrub.
  • Helenium (Sneezeweed) brilliant red and rusty flowers from August through September.
  • Miscanthus sinensis ‘Morning Light’ elegant silver foliage grass. Miscanthus ‘Strictus’ has brightly banded foliage for an exotic look.
  • Pennisetum ‘Burgundy Bunny’ and ‘Piglet’ grasses have great “bunny tail” blooms from fall through winter.
  • Passiflora caerulea (Passion Flower Vine) very complex flowers, a must-see!
  • Perovskia (Russian sage) striking, ghost like foliage.
  • Schizostylus happy little spreading clump, flowers well into early winter.

WINTER

  • Acer griseum (Paperbark Maple) cinnamon coloured bark peels all winter, good contrast with evergreen shrubs and conifers. This is truly a four-season tree.
  • Betula (Birch) both Heritage and Fox Valley colourful, peeling bark that shows well in winter.
  • Cornus alba ‘Elegantissima’ (Red twigged dogwood) variegated leaves in summer, bright red twiggy stems all winter.
  • Corylus ‘Contorta’ (Harry Lauder’s Walking Stick) truly best in winter, with contorted and twisted bare stems wonderful in floral arrangements.
  • Cryptomeria interesting conifer with red-tinged soft foliage.
  • Epimedium surprisingly tough for such a delicate looking plant. Leaves take reddish hue in cold weather and make good cuttings at Christmas for arrangements.
Evergreen ferns Sword fern, Deer fern, Japanese tassel fern, and others add green to winter woodland.
Grasses left standing provide seeds for the birds as well as architectural interest in the landscape.
  • Grevillea ‘Victoria’s soft orange blooms attract hummingbirds in winter.
  • Hamamelis ‘Jelena’ (Witch Hazel) graceful shrub/tree for warm orange blooms in the darkest days of winter.
  • Hellebores blooms are unforgettable in winter, and they keep on flowering.
  • Mahonia ‘Charity’ and ‘Winter Sun’ taller shrub versions of Mahonia, tolerant of a variety of conditions, flowers in November.
  • Stewartia interesting branch structure when leafless.
  • Symphoricarpos ‘Alba’ (native snowberry) and ‘Amethyst’ purple berries.

By ensuring that there are a few outstanding plant varieties for each season, your garden will return your devotion and give you pleasure the whole year long.

mulching

Planting Trees and Shrubs

He that plants a tree loves others beside himself – Thomas Fuller

1.  Before Planting. Take a moment to consider something that could make a huge difference in the health of your plant. What kind of soil and drainage does the site have? Most failures of new plantings in coastal BC are due to waterlogged soils. If you have heavy, clay soil, one way to avoid problems is by raising the planting area. Planting in a beam or slightly raised mound is an excellent way to get the roots out oaf a wet area. If, when digging the planting hole, you run into clay, it is better to stop digging and instead make that the bottom of your planting hole. Mound soil up around the root ball, starting well away from the plant, to achieve the proper planting height.

shrub pixel size2.  The Planting Hole. Dig the hole the depth of the root ball, but at least twice its width. Loosen the soil around the hole with a shovel or spade fork. Most roots spread away from the plant in the top six inches and this is why it is important to dig a shallow, wide hole so that the roots can travel more easily.

3.  Planting Container Trees and Shrubs. Remove the plant from the container and set the root ball on its side. Handle carefully, especially if the plant is not well rooted. If root-bound, carefully loosen the root ball. If the roots circle the inside of the pot, use a sharp, clean knife to make four vertical cuts, about a half an inch deep, into the lower half of the root ball (about half way down the side and across the bottom). Place the plant in the hole and ensure that it is planted at the proper height. The first major root flare should be just below the surface of the soil. Not deeper (the roots may suffocate).
Planting Balled and Burlapped Trees and Shrubs. Set the root ball into the hole and check to see if the planting height is correct. The first major root flare should end up just below the surface of the finished soil level. Note that the burlap is usually tied around the trunk at a point much higher than the original soil level. Once the root ball is at the proper height, cut the strings and fold the top part of the burlap down the side of the root ball. Do not try to remove the burlap – the root ball can easily fall apart. Be sure to remove all twine or wire from around the trunk and top of the root ball.

4.  Backfilling. Once your container or balled and burlapped plant is in place, fill the hole gently, but firmly, making sure that all gaps and air spaces are filled with soil. Good, rich native soil is best, but very poor soils can be amended with compost or rotted manure. Add a few handfuls of bone meal to the backfill soil and mix well; it will help promote new root growth. Do not apply a high nitrogen fertilizer at planting time – it may burn the roots. Wait at least three weeks before fertilizing and do not fertilize if planting after August 15th.

tree planted139x2505.  Staking Trees. If the tree is too tall to stand alone, it must be staked to avoid shifting in heavy wind or rain. Use two strong stakes, driven into the ground just outside the root ball. Staking must be done carefully with soft strapping material or wire padded inside old hose. Stake at the lower third of the trunk (a 12 foot tree would be staked at four feet above ground). Do not stake to rigidly – leave enough slack to allow some movement. Remove the stakes when the tree is firmly rooted – no longer than one year after planting. Staking is important. We will not guarantee any of our trees if they have not been staked.

6.  Watering. Water well, with a slow soaking to the full depth of the root ball. Build up a ring of soil to make a saucer right over the root ball. This allows good, deep irrigation with your hose on trickle, and is especially important for balled and burlapped plants. Water new plantings adequately, especially in the heat of summer. Keep the soil moist but not soaked, as over watering can cause leaves to turn yellow or fall off. When the soil is dry 3-4 inches below the surface, it is time to water.Staking Trees. If the tree is too tall to stand alone, it must be staked to avoid shifting in heavy wind or rain. Use two strong stakes, driven into the ground just outside the root ball. Staking must be done carefully with soft strapping material or wire padded inside old hose. Stake at the lower third of the trunk (a 12 foot tree would be staked at four feet above ground). Do not stake to rigidly – leave enough slack to allow some movement. Remove the stakes when the tree is firmly rooted – no longer than one year after planting. Staking is important. We will not guarantee any of our trees if they have not been staked.

mulching

    7.  Mulching. Mulch the area around the plant to at least its drip line. Ground bark (but not cedar), compost, or leaf mold is good choices. A mulch layer 3 or 4 inches thick insulates the roots from heat and cold, suppresses weeds, and reduces the amount of watering required. To avoid crown rot keep the mulch from direct contact with the lower trunk. This part of a plant likes to be high and dry.


big fat hydrangea buds

Strategic Pruning for Better Bloom

Improper or badly timed pruning is often the reason that flowering shrubs bloom poorly or not at all. A little insight into a plant’s growth and flowering habits can be used to plan how and when to prune. Only a few pieces of key information are presented here, so consult a good pruning book for more detail. Highly recommended: Christopher Brickell’s Pruning & Training (republished in 2011) and Cass Turnbull’s Guide to Pruning).

These old favourites often suffer from pruning improprieties:

Abelia: Is a pretty summer flowering shrub that more often than not is planted in a spot that is too small for it. It has an open arching habit and sends up long new shoots from the base in the spring. Abelia flowers on new wood and when these new shoots are cut off in an attempt to keep the plant tidy, you are left with the older branches that don’t flower well. Ideally the older branches should be cut out after flowering, and the new ones allowed to develop in their place.

Chaenomeles: (Flowering Quince) Flower best when ‘spur pruned’, just like apple trees. (A spur is short bit of branch 0n which most of the flowering and fruiting buds are concentrated.) Encourage flowering spurs with pruning in late spring or early summer. Free standing specimens bloom best when new growth is cut back to five or six leaves. Cut back side shoots on espaliered or wall trained shrubs to 2-3 leaves. Cut back any shoots that develop later in the season the same way.

Erica: (Winter Heather) Heathers should be sheared back, every year or two, right after flowering. For a more natural look use secateurs. They won’t break from old wood, so only cut into wood that still has leaves on it. The next year’s flower buds start forming by late summer, so late pruning will reduce flowering.

Big fat hydrangea buds

Big fat hydrangea buds

Hydrangeas: Know your hydrangeas! There is no simple rule for hydrangea pruning. If you know the cultivar name of your hydrangeas Google can be very helpful in trying to figure out what to do with them. In general, older varieties of macrophylla types (mophead or lacecap) bloom on old wood. Spring pruning should consist of cutting out weak growth and cutting some of the oldest stems at ground level. Cut back remaining stems by about 12″ to pairs of fat buds. Some varieties bloom only on buds produced at the very tips of their branches, so be wary of cutting them off.   A lot of the newer varieties of hydrangeas bloom on both old and new wood and can be pruned as needed to keep the size in check. Paniculata and arborescent types bloom on current season’s growth and can be cut back hard to a main framework without losing bloom. They can also be pinched back a couple of times early in the season to make them bushier.

Flowering-Spurs-on-Wisteria

Flowering spurs on Wisteria

Philadelphus: (Mock Orange) Blooms on previous season’s wood. Flowering diminishes on stems more than four years old.   Cut back about ¼ of the older stems right to the ground every year to keep the plant young and floriferous.   Trim side shoots to improve the shape.

Syringa: (Lilac) Prune after flowering. Cut off old flower heads and cut back long leggy growth. Before cutting woody branches look carefully at the pairs of leaves on the branch. Leaves that are directly opposite each other have flower buds in their axils. Leaf pairs that are offset from one another don’t. Cutting just above the flowering buds will encourage more blooms.

Wisteria: The main reason that wisteria doesn’t bloom is that it is not pruned properly. It also blooms on spurs that are developed by pruning. All that long whippy growth that comes in over the summer should not be cut out completely, but should be cut back to about 5-6 buds. In the winter cut those same stems back again, this time to 2-3 buds. These will become the spurs that produce the next year’s blooms.