Red Russian Garlic

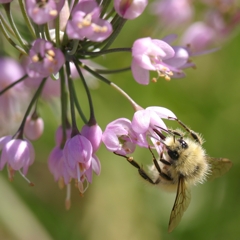
Garlic – The Great Traveler

Garlic IntolerantThe history of garlic can almost be described as the history of human migration.  Garlic is native to Central Asia, specifically the Caucasus region between the Black and the Caspian Seas, and over many millennia it has been carried to almost all corners of the world. Garlic flavours many of the world’s cuisines. It is steeped in folk lore and legend. (Everyone knows that wearing garlic is the best way to keep vampires at bay!) Folk wisdom attributes garlic with a variety of curative properties, many of which have been proven by contemporary science. Garlic is mentioned in ancient Egyptian, Greek, Indian, and Chinese writings as well as the Bible and Koran.

Garlic was first brought to North America by immigrants from Poland, Germany and Italy, but most of the varieties we use now came into the US in 1989.  In the 1980’s the USDA tried to get permission to collect new garlics in the Caucasus region, then part of the Soviet Union, but were denied because of military installations in the area.
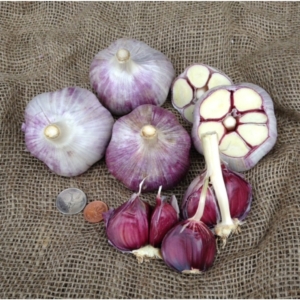
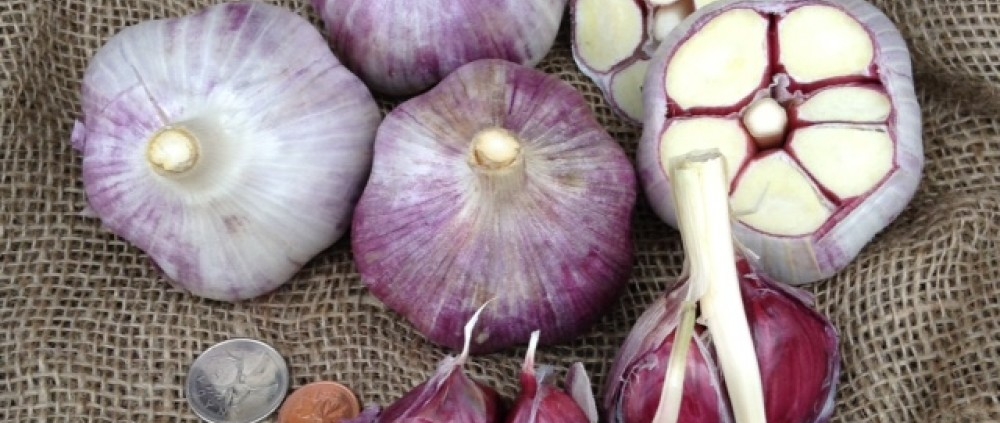
Red Russian garlic

Red Russian garlic

In 1989 the Americans were finally granted permission to enter the region, but were heavily guarded and allowed to travel only at night. They travelled along the old Silk Road and purchased garlics from local markets, often naming them for the towns and villages they were found in.   (Red Russian garlic, one of our most popular varieties, was actually brought into BC by the Dukhobors in the early 1900’s and is now considered to be a BC heritage variety.)

Garlic, or Allium sativum, comes in two basic types – hardneck and softneck. Hardneck varieties (var. ophioscorodon) usually grow a woody flower stalk or scape out of the centre of the bulb.  They do best in cold, damp climates.  Typically a bulb develops four to ten large cloves. Flavours are strong and often spicy and complex.  Most hardneck garlic does not store well and is best used fresh. Hardneck varieties come in three different types: Rocamboles, which have thin parchment-like skins, and are easy to peel, Porcelains which have thick tough skin and do store well, and Purple Striped, named for their distinctive colouring.Garlic Types

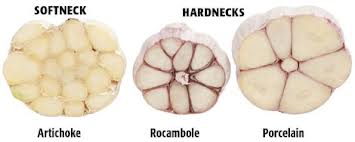
Softneck garlic (var, sativum) evolved from hard-neck varieties and grows best in warmer climates.  Bulbs keep well and typically contain multiple cloves.  They don’t produce flower stalks unless they are stressed.  Softneck varieties come in two different types: Silverskin and Artichoke.  Silverskins have soft pliable necks that lend themselves to braiding, lots of small cloves and spicy flavours.  Artichoke garlic has larger but fewer cloves and a milder flavour.  Most of the commercially grown garlics found in the grocery store are soft neck varieties.

Elephant garlic (Allium ampeloprasum) is actually more closely related to leeks than to garlic. It produces a small number of very large cloves of mild flavour. It needs a good, long, warm growing season to grow well.

Tips for Growing Good Garlic

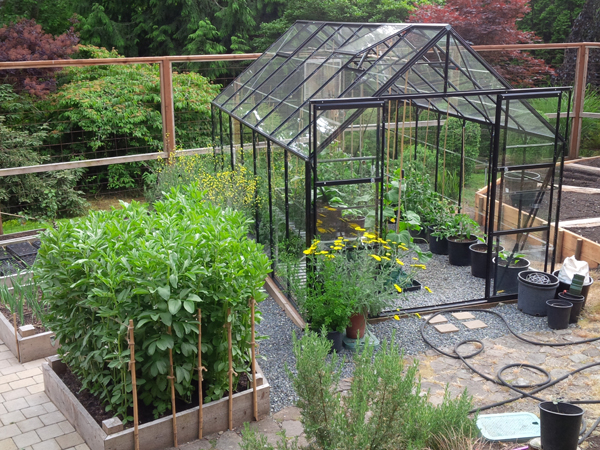
Choose an open, sunny site with light, well-drained soil.  Incorporate lots of organic matter, such as well rotted manure or good compost into the soil.  Garlic won’t thrive in acid soils (below 5.5pH) so be sure to apply lime if your soil is acidic.

Plant garlic in October so it can develop good roots before the winter.
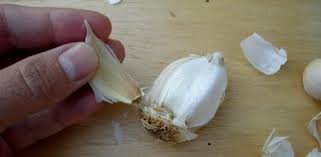
Separate the cloves

Separate the cloves

Break up the bulb carefully into individual segments prior to planting. Try to leave the skins intact.

Make sure that the cloves are planted the right way up: the flatter basal plate should be facing downwards

Allow about 4” between individual cloves and 1 foot between rows. Plant the cloves so the tips are one inch below the soil surface.

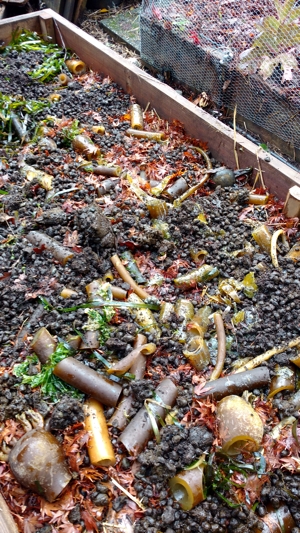
If your soil is heavy and wet you could start your garlic off in small pots, or divided trays in the fall, overwinter them in a cold frame and plant them out in the spring.
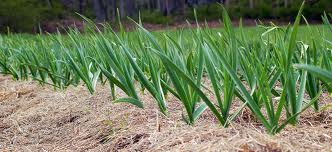
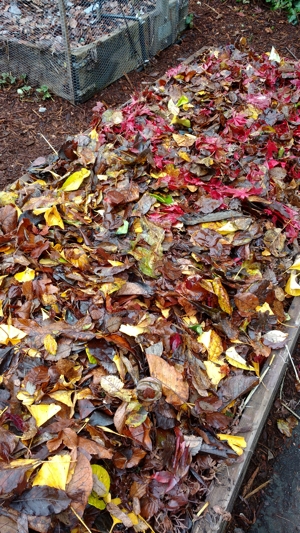
Mulched garlic

Mulched garlic

Over the growing season hand weed regularly.  Hoeing can be tricky as the bulbs are so close to the surface.   Mulching, with shredded leaves or straw, will help with weed suppression.

Hardneck garlic cultivars readily produce flower stalks which should be cut off as soon as they appear. They are delicious in stir fries!
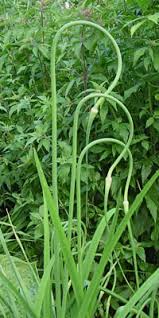
Garlic scapes

Garlic scapes

Garlic matures between the end of July and early August. Stop watering a few weeks before harvesting to allow the bulbs to cure. Harvest when 1/2-3/4 of the leaves have turned yellow (depending on variety). Don’t delay as the bulbs open up and won’t store as well if lifted late.

Lift the bulbs with a fork. Handle gently as bruising also reduces their storage potential.

Dry the bulbs thoroughly, spread out in a single layer in the sun or in a dry, well-ventilated shed or similar environment.  Drying will take two to four weeks depending on the weather. When the foliage is dry cut off the stalks and store the bulbs in a cool dry place.  Do not store in the refrigerator. This will induce sprouting, changing the garlic’s texture and flavour.

It’s interesting how idle thoughts, in this case, “I wonder why the names of garlic cultivars are so exotic”, can lead to a voyage of discovery. The story of garlic is fascinating, and I’ve barely scratched the surface here.  If you’d like to learn more, these websites are particularly informative:

http://www.gourmetgarlicgardens.com/overview.htm

Copy this URL to look at an in-depth report on garlic growing in BC put out by the Ministry of Agriculture:

https://www.al.gov.bc.ca/speccrop/publications/documents/garlic.pdf


Winter veg bed

What to Do Now with Winter Veggie Beds?

By Faye

If you, like me, are admiring your nicely established winter crops in the garden, then it’s worth the little bit of time it takes now to make sure everything stays healthy throughout the cold season. Mulching and some staking are needed to protect winter crops from the elements.   It’s been a while since we’ve seen snow, but who knows what this winter will bring. Read on for details…

Winter rains are a welcome sight as our parched ground absorbs the needed moisture, but pounding rains are hard on the soil. Protecting the soil from erosion and leeching is very simple; just add a 6” top dressing of fluffy autumn leaves. This also prevents the splash-up of soil onto your plants, helping to keep them disease-free, in addition to giving some protection from slugs.

purple-sprouting-broccoli-snow

Purple sprouting broccoli is tough but it would be flattened if not staked

Don’t waste your compost; leave it in the bin, covered and relatively dry, to await spring warmth which is the wake-up call to the micro-organisms to start their work of digesting the organic waste, converting it to usable plant food. Spreading it on the garden in fall results in its goodness being leeched out and washed away in the rain.

Stake your brassicas. While kale and other brassicas are very hardy, they do tend to be brittle, while purple sprouting broccoli and Brussels sprouts are top heavy. A very sad sight is a tall vegetable toppled over in the wind, when it’s so easy to protect with a sturdy stake or two.

Watch out for caterpillars (still!) I neglected to net my Brussels sprouts with ProTekNet, and you can see the results here, the fat cabbage worm has been feasting. If you haven’t done so already (ideally in September), be sure to pinch out the top cluster of leaves, stimulating formation of the sprouts all along the stem. Leave the plants in the ground, and harvest sprouts as needed after frost, when they will be at their sweetest.

cabbage-worm-on-b-sprouts

Cabbage worm feasting!

Protect your shoulders. There is nothing better than pulling fresh carrots and beets during the winter, but if the shoulders get frozen they can turn to mush. When cold weather arrives, having a few inches of leaves in the bed will insulate the roots, and when it does get below freezing it’s easy enough to pull the leaves up and over the shoulders of the vegetables, especially the cylindrical beets which tend to push themselves up and out of the ground.

Stockpile mulches. Gather as many leaves as you possibly can; rake your own, take bags from the road side, do what you can to have a vast supply. Keep some for next summer in a plastic bag to keep them dry, adding to the compost alternately with layers of green. Put some in bins to decompose into leaf mold, truly black gold.

Lime the empty beds so they will be ready to plant by spring. While this can wait until spring, why not get it started now? Keep track of what beds you lime, and when; this needs doing only once a year, and never in beds that will be used for strawberries or potatoes.

Spinach and Chard have softer leaves, and can do with some winter protection during heavy rains and colder weather. I grow both in the greenhouse, but a tunnel or cold frame give protection from harsh conditions.

Plant garlic. Fall is the best time to plant garlic so the roots are well established for bulb growth in the spring.

Sit back and let Mother Nature do your watering, but keep an eye out for critter predation, slug damage, and extremes of temperature. Eat your veggies!

purple sprouting broccoli

Heads Up, It’s Time To Think About Winter Veggies

By Faye

How strange to be writing an article about growing vegetables in winter in the same newsletter as one on pruning tomatoes, but the reality is that now is definitely the time to start planning what, where and when to grow. Read on…

Definition of Winter Vegetable Gardening:
When we talk about growing vegetables in winter, we don’t mean planting in winter, we mean planting in the summer, and eating in the fall, winter or early spring. There are two types of winter gardening:

Summer planting, fall and winter harvest.
Such crops as kale, chard, carrots, beets, parsnips, lettuce, arugula, leeks and salad greens can be enjoyed all summer with harvests continuing during the winter. Root veggies are perfectly happy to stay in the ground until early next spring, and such things as kale, corn salad (Mache) and Brussels sprouts are even sweeter after having been kissed by frost. Brussels sprouts seeded now will be ready by fall, but only if you get the seeds in very soon.

Purple Sprouting Broccoli Ready to Harvest

Purple Sprouting Broccoli Ready to Harvest

Summer planting, spring harvest.
The most important overwintered crop is Purple Sprouting Broccoli, a true biennial, which needs winter cold to finish its life cycle in the spring. Its delicious side shoots are actually its attempt to make flowers and set seed, but as long as we keep harvesting, we can prolong the life of the plant until March or April, after which it is time to let it properly go to flower and finish.

Technically all of the brassicas, leeks, carrots and beets are biennials too, but we normally harvest them before this final stage of their life.

Spinach is really in a class of its own, but the main harvest is in the spring so I will include it here. Spinach bolts to seed with long daylight hours or with extreme heat. That is why it’s so hard to grow a long crop of spinach in the spring, as it will always bolt by May or June, no matter how healthy it is. Having tried many times, my best success was to plant in September, keep it in the greenhouse (or coldframe) all winter, and wait for the explosion of gorgeous green growth in the spring. I’ll never grow spinach any other way now.

Are there pests to look out for?
Unfortunately, there are serious pests that can frustrate even the most dedicated gardener. Mainly there is the Carrot Rust Fly and the Imported Cabbageworm; both of which can be kept at bay with ProtekNet, a very fine mesh netting that excludes these critters from laying their eggs on our crops. Slugs can be a problem in wet winters, but they are easily controlled.

Starting your winter crops in summer gives them time to become full sized plants by Halloween, which gives them the strength to withstand the challenges of winter and reward you with the most delicious food you have ever tasted. Winter vegs starts are available in early August, but if you prefer to grow from seed, it’s time to start some of them. Check out Linda Gilkeson’s Planting Guide

Harvesting all year is a luxury that we on the west coast are fortunate to have, so we need to get growing!

If you are serious about growing your own vegetables, then Linda Gilkesen’s web site and books are great resources. Even if you are more experienced, have a look at her latest publication, a magazine style update on newly discovered pests with practical advice on dealing with our new climate realities. All of Linda’s books are available at the nursery.


Bee on Echinacea

Plants To Entice Bees To Your Garden

rudibeckia,-sedum,-grass-w

Rudbeckia, sedums and grass

*** It’s very important to have flowers all season long, from February to frost, to satisfy the early Masons right through to the late season foragers. Plant several of each, as bees like to ensconce themselves in a big patch of their favourite flowers and just hang out, gathering pollen and sipping nectar in the sun.

***Bees are classified according to their tongue length! A variety of flower shapes from flat daisies to large convoluted and tubular blossoms will keep them all happy.

***Let your herbs and veggies (especially brassicas) go to flower; all kinds of bees and beneficial insects will thank you.

***Try to keep all pollinator plants watered in times of drought. They may survive well without water, but their nectar supply dwindles, dries up without regular water, depriving the bees of an important source of carbohydrate.

***Bees and all insects need a source of water. Bird baths are good, but the pollinators all need a perch to stand on, put a large flat rock in with the water. Even the smaller birds will find this helpful. An interesting fact is that conifers planted in the garden hold the morning dew amongst their needles, providing a drink for the smaller critters.

The list below is far from a comprehensive list, but highlights of some of the best.

EARLY SEASON

Oregon Grape (Mahonia); our native Mason bees, bumble bees

Pieris; all varieties flower early, loved by Mason bees

Red-flowering currant (Ribes) important source for Masons

Winter heathers (Erica); often seen swarming with bumbles and honey bees here at the nursery

Sweetbox (Sarcococca); shrub, flowers early and loved by emerging bumblebees

Clover in the lawn, allowed to flower, attracts many bees. Wear shoes!

Bluebells; while somewhat weedy, they are great for long-tongued bees

Foxgloves (Digitalis); big clumsy bumbles love them, also Masons and others

Camas; important early source of pollen for queen bumblebees

Shooting star (Dodecatheon); native, bees hang upside down to access nectar and pollen; an important bumble bee plant


Shasta and bee

Shasta and bee

MID to LATE SEASON

Blanket flower (Gaillardia) has 32% sugar content in nectar, a stellar bee plant

Gayfeather (Liatris); late blooming honey plant; large swath for best effect

Hyssop (Agastache); special value to native bees, and significant to bumblebees

Lavender; another plant that is always swarmed at the nursery

Coneflower (Echinacea) attracts many different bees with its vibrant colour petals

Sunflower; one of the best for all summer bees, attracting from a long distance

Ocean Spray (Holodiscus); native shrub, good for butterfly larvae and native bees

Russian Sage (Perovskia); purple colour loved by honey bees and bumble Queens

Catmint (Nepeta); honey bees and bumble bees collect both pollen and nectar

Goldenrod (Solidago) draws native bees and bumblebees, acid yellow colour

Vine Maple (Acer Circinatum) native tree for native bees, host for Swallowtail

Wild rose (Rosa nutkana) loved by leafcutter bees, host for many butterflies.

Aster; fall source of pollen and nectar, a very important plant for bees

Sneezeweed (Helenium); always covered in honeybees!

Joe-Pye Weed (Eupatorium); fall honey plant, also native bees and butterflies

Sedum, especially Autumn Joy, is covered with honey bees in late summer and fall

To really see which plants are pollinator favourites, just walk through the nursery at any time of year. The bees will tell you!


Tomato plants

Should I Prune My Tomatoes?

By Faye

The short answer is yes, and no. It depends on what kind of tomato you are growing. If it’s determinate then no pruning is required, but indeterminate tomatoes must be kept in check.

Determinate vs. Indeterminate
This is the key piece of information to look for on the tag when you purchase your tomato start or seed.

Determinate tomato plants have a pre-determined size (just like we do), according to their genetic make-up. They grow like bushes and need no pruning other than removing the leaves below the first flower cluster so that none touch the ground. They tend to ripen their fruit earliest, often all at once.

Indeterminates, grow like vines and will keep climbing and producing fruit, as long as they are alive. In our climate of course this is limited by the onset of cooler temperatures and shorter days.

Why is Pruning Important?
Like all plants, tomatoes depend on photosynthesis to grow. Pruning maximizes this process due to more sun exposure, while minimizing disease. Densely packed leaves take longer to dry, inviting all manner of bacterial and fungal intrusion. Allowing the sun to bless all of the leaves is the goal, especially in our relatively short growing season.

Tomato SuckerHow Do I Prune?
As the tomato plant grows, little side shoots (suckers) sprout up in the crotches, or axils, between the main stem and leaf branches. Each one of these has the potential to grow into a fruiting stem but the result would be a tangled mass of foliage with small fruit slowly ripening in its self-imposed shade. The ideal is to limit the plant to no more than 3-4 stems. Gently pinch off, the little suckers when they are small and easy to remove. (If you turn your back for a day or so, they can quickly grow to shocking proportions, so be vigilant!)

Cut oPrune Hereff all side stems below the first flower cluster then allow only the next two or three suckers above the first cluster to develop. Suckers higher up the plant will be weaker, so be sure to remove those later-developing ones.

If you have limited garden space or a lot of tomato plants that need to be planted close to each other, then limit growth to only one single vining stem, and tie it to a stake.

Planting Tip: Strip off all the bottom leaves, up to 6-8” above the root ball, and bury up to this point when planting. This long lower stem will grow roots, and the bigger the root system, the better the plant. So don’t worry if late-planted tomatoes are a little tall; just bury the excess length. (Or lay sideways in a trench, it will straighten itself out!)

What About Staking?
For the greatest yield, almost all tomatoes need support to improve air circulation and keep fruit and leaves off the ground where they are easy prey for disease and critters. Preferably install supports while the plant is still small so you won’t damage any spreading roots. There are many options:
– Cages
Still the simplest, the ubiquitous tomato cage has grown up a little, now available in taller and wider forms. They are perfect for determinate varieties, and with the addition of a sturdy stake or two, are fine for indeterminates too.
– Stakes
Easy to use for indeterminates and allow easy access for pruning. Simply hammer a 6’ cedar or metal (Rebar is good) stake about a foot into the ground, then tie the main stem to the stake, looping the tie completely around the stake first, then tie the plant to it.Tomato Ladder - web
– Ladders
New this year are 3-sided ladders made for tomatoes. I would probably anchor these with a go
od stake of Rebar, but the design is good for supporting those heavy stems of ripe and delicious tomatoes.
– Spirals
Very elegant, a tall metal spiral stake is set into the ground (past the first coil for stability), and you simply twine the vine around it, tying where needed.

End of Season Care
By about the end of August, gradually start to withhold water, which stresses the plants a little and encourages the fruit already on the vine to ripen. Also, cut off any immature flowers and ‘cap’ the plant by cutting off the ends of fruiting stems. This way, the fruit on the vine will ripen, not having to compete with any new ones forming. There is limited growing time left at this point, and new fruit won’t have time to ripen.

Bee napping on flower scaled

Plants For Bumblebees

Courtesy of Lori Weidenhammer

A link to Lori’s Blog.

* Denotes a medicinal plant for bees

BOLD denotes special interest for bumblebee plants (buzz pollinated, longer corollas or special relationships, ie trip pollination)

Native and Near Native Shrubs: Willow (Salix spp.) maybe the most important plant for honeybees and significant for bumblebee queens, Red Osier Dogwood (Cornus sericea) is another good one for weavers, Snowberry (Symphoricarpos albus) also an essential bee plant because it blooms over a period of months, Black Twinberry (Lonicera involucrata) Loads of nectar, berries used for dye, Hairy Manzanita (Arctostaphylos columbiana)

June Gap: Ninebark (Physocarpus spp.) native species is Pacific Ninebark (Physocarpus capitatus), Spirea spp., native is Spirea douglassi, Mock Orange (Philadelphus lewisii), Native Roses

Edible/Drinkable Shrubs: Salmonberry (Rubus spectabilis), Oregon Grape (Berberis spp.), Kinnikinnik (Arctostaphylos uva-ursi), Blueberries (Vaccinium spp.),  Evergreen Huckleberry  (Vaccinium ovatum), Wood’s Rose (Rosa Woodsii), Prickly Rose (R. acicularis), Blueberry Vaccinium spp.Potentilla spp.

Sumac (Rhus spp.), Blue Elderberry (Sambucus cerulea), Currants (Ribes spp.) clove currant and red-flowering don’t plant European black currants, Raspberry (Rubus spp.) Thimbleberry (Rubus parviflorus)High Bush Cranberry (Viburnum trilobum)Labrador tea (Rhododendron groenlandicum),

Native and Near-Native Trees: Arbutus (Arbutus menziesii), Chokecherry, Crabapple the native is Pacific Crabapple (Malus fusca), Pincherry, Saskatoon, Western Mountain Ash (Sorbus scopulina)

Native Vines: Virgin’s Bower Clematis (Clematis ligustifolium) beware of invasive look-alikes, Trumpet honeysuckle (Lonicera ciliosa)

Exotic Trees: Redbuds (Cercis spp.), Hawthorn (Crataegus spp.), Linden (Tilia spp.) avoid silver linden (Tilia tomentosa); Stone Fruit Trees: apple, cherry, peach, apricot, pear, quince, and plum

Exotic Shrubs: Spirea spp., Climbing roses, Potentilla spp. important late-blooming shrub

Edible Native Perennials: Native violets, Nodding onion (Allium cernuum) and other native alliums

Early Shade-tolerant Perennials: Bleeding heart (Dicentra spp.) toxic, Solomon’s Seal (Polygonatum spp.), Canadian Columbine (Aquilegia canadensis) and other Aquilegia spp. toxic 

Native and Near Native Perennials: Spring-gold (Lomatium utriculatum) an early-blooming umbel esp. important for short-tongued bees like the Western Bumblebee

Deltoid Balsamroot (Balsamorhiza deltoidea), Large-leafed Avens (Geum macrifolium) and other Geum spp.

Broad-leafed Shooting Star (Dodecatheon hendersonii)Milk Vetch (Astragalus spp.), Native Silvery Lupin (Lupinus argenteus) and other Lupinus spp., Blue-eyed Mary (Collinsia spp.), Broomrape (Orobanche spp.) Yellow Rattle (Rhinanthus minor)Native Larkspurs (Delphium menziesii ) HIGH toxicity warning

Penstemon spp., Canadian Milk Vetch (Astragalus Canadensis and other native spp.), Blue Gentian (Gentiana spp.)Monkey Flower (Mimulus sp.)

Camassia spp., Woodland Strawberry (Fragraria vesca), Yarrow (Achillea Millefolium), Potentilla spp. native species and cultivars are great, Common Harebell (Campanula rotundifolia and other native and exotic spp.),

Plains Prickly Pear (Opuntia polyacantha)Gumweed (Grindelia spp.), Rocky Mountain Bee Plant (Cleome serrulata), Anise Hyssop (Agastache foeniculum), Erigeron spp., Native Lilies (Erythronium spp.), Jacob’s Ladder (Polemonium spp.), Cranesbill Geranium (Geranium spp.)

Near Native Annual: Bienenfreunde aka Lacy Phacelia (Phacelia tanacetifolia) very important bee pasture plant for nectar and pollen—stagger-plant this throughout the growing season. Good for honeybees and bumblebees.

Late-Blooming Native and Near-Native Asteraceae: Joe Pye Weed (Eutrochium spp.) Blanket Flower (Gaillardia spp.), Tickseed (Coreopsis spp.), Pearly Everlasting (Anaphalis margaritaceae), Asters (Symphyotrichum spp.), Goldenrod (Solidago spp.)Coneflowers (Echinacea spp.), Coneflowers (Ratibida spp.), Black-eyed Susan (Rudbeckia spp.), Gold Star (Crocidium multicaule)

Medicinal Exotic Perennials: *Turtlehead: (Chelone glabra), *Sage (Salvia spp.) *Meadow Sage (Salvia pratensis), *Oregano, *Thyme, *Dragonhead (Dracocephalum spp.), *Lavender (Lavandula spp.)

Exotic Perennials: Catmint (Nepeta cultivars) N. cataria can be invasive. Very important long-blooming plant for honeybees and bumblebees

California poppies (Eschscholzia californicacan be weedy, Liatris spp.Comfrey (Symphytum spp.), Red Clover (Trifolium pratense)Cardoon (Cynara cardunculus) comes with an invasive warning, Hollyhocks (and other Malva spp.), Wine Cup (Callirhoe involucrata), Russian Sage (Perovskia atriplicifolia), Sea Holly (Eryngeum spp.), Globe Thistle (Echinops ritro), Caterpillar Flower (Phacelia bolerandi) works in dappled shade, Masterwort (Astrantia major), Sneezeweed (Helenium autumnale), Verbena spp.,

Exotic Annuals: Borage (Borago officinalis) NB for nectar, Hairy Vetch (Vicia villosacan be weedy, Moroccan Toadflax (Linaria maroccana) plant instead of invasive toadflax spp., Blue Shrimp Plant (Cerinthe major), Globe Gilia (Gilia capitata), Zinnias (choose the large ones) Calendula (Calendula officinalis) long-blooming and open access,

Edible Exotic AnnualsScarlet Runner Beans, squash (Cucurbitae)

Medicinal Exotic Annuals: *Buckwheat (Fagopyrum esculentum), *Tobacco (Nicotiana rustica), 

*Nightshades (Tomato, Pepper, Eggplant, Potato), 

Exotic Tubers: Dahlias (Avoid doubles)

Extra Edibles: Let some of your veggies bloom for bees: radishes, kale, leeks, carrots, parsnips

Extra bee-friendly herbage: cilantro, fennel and dill

comparison of tomatos

How Not to Kill your Seedlings

By Faye

Killing your seedlings is easy, but so is growing them to become strong and vibrant young plants!

Whether you sow your own seeds or buy starts from the nursery, your seedlings will go through a vulnerable stage of babyhood, when you must meet their every need. Some simple guidelines and lessons learned along the way:

*Use a sterilized soilless seed starting mix when sowing seeds.

* Seeds need heat, seedlings need light. A heat mat and grow lights will be the single most effective investment you can make if you really want to get into seeding. Once the seeds germinate, keep light about an inch above the seedlings, and only turned on for 12-16 hours a day.

* Don’t over crowd. Use scissors to snip off excess seedlings if they are too close to separate.

* Once they have 2 sets of true leaves, start to fertilize. Use a weak solution of liquid fish or seaweed.

* Always water from the bottom. Your seeds will have been sown into a tray or cell-packs with drainage. Put these into a non-draining tray, add water to bottom tray, removing excess water after half an hour or so. Watering the top of the soil encourages damping off, a fatal fungal disease of seedlings. Watering from below also encourages roots to grow downward seeking moisture.
If you want to be extra kind, water with room-temperature saved rainwater or de-chlorinate your tap water by leaving it sitting out for a day or so before using.

Tomato seedlings on right were moved out to greenhouse earlier than the ones on the left.

* Pot on! Don’t allow roots to become over crowded and tangled, move plants up to 4” pots. Hot-weather crops like tomatoes, eggplant and peppers will need to be started early yet moved to successively larger pots before planting out.

* Grasp by leaves only. Seedling stems are very fragile and easily damaged. If you need to separate seedlings that have been grown together in trays, tease roots apart gently with fork or fingers.

* Label everything! You think you will remember which flat is which, but you won’t. Trust me.

* Pinch back. When plants are 3-4” tall, with 2 or 3 sets of true leaves, nip out the top leaves to encourage branching, more flowers and fruit. Technical bit: plant hormone AUXIN is in terminal (end) bud, and causes vertical growth but suppresses side growth, so you want to interrupt this cycle. Don’t pinch back tomatoes!

* Rough ‘em up. Brush your hands gently over the tops of the little plants; this toughens up the cells and prepares them for the great outdoors.

* Harden off. Very important, the little plants need to be gradually acclimated to cold, wind, rain, sun. Direct sun can burn leaves if not properly hardened off.
Give them partial days in dappled shade, bring in for the night, gradually expose to more weather and more sun. A coldframe or cool greenhouse makes this transition easier, but be careful on sunny days.

* Leaving the nest. When it’s time to move the seedlings to the garden, be wary of critters; slugs love the tender young shoots. Safer’s Slug Bait is my best defense, along with rabbit fencing of course. Checking after dark sometimes uncovers cutworms too, be vigilant.

* Label everything! Did I mention this already? Knowing the variety and date you planted is helpful when planning next year’s crops. Many good growers maintain a notebook listing plants, date seeded, when planted out, and result.

* Enjoy the harvest!! You’ll be glad you got your babies off to a good start, and they will thank you with delicious produce.

Peas

PEAS TO PERFECTION

By Faye

Few garden crops rival the perfection of crisp peas in late spring. Getting them started early is the secret, as they prefer to grow in cooler temperatures.

Read in “Peas in Particular” to see a foolproof way to beat cold weather, critters, and rot.
Since writing that article a few years ago, I have become more sophisticated and now use well-draining trays for my damp vermiculite instead of milk cartons, on a heat mat with grow lights suspended from the ceiling; faster and easier, in limited space. I currently let them get to about 4” tall before planting outside, as the starch is used up from the seed, and the varmints aren’t so interested in this ‘food source’. I am careful to harden them off before moving them out to the cold.

Don’t have a heat mat and grow light? Peas aren’t fussy, they are fine at room temperature, but will be slower. Once germinated, they don’t need heat, so a cool greenhouse, sunroom or even outside in a spot protected from weather and predation is fine. At this stage bright light is paramount.

We are often asked “What is the difference between Snap peas and Snow peas?” It’s hard to remember which is the flat one and which is the one with peas in it? The way I remember is that snow lies flat on the ground, and Snow peas are the flat edible pods. Snap peas, aka Sugar Snap, have fully formed peas inside. Both kinds have edible pods, ‘mangetout’ or ‘eat it all’.

Dwarf Peas

While I’ve always grown both Tall Telephone and Sugar Snap Pole (in the ground at home, and in large pots with bamboo poles at the nursery), another option is to grow dwarf peas, not needing a trellis. Allegedly they produce more peas per square foot, and would be ideal for smaller gardens, patios and balconies.
Plant them in a block, not in rows, so you can just reach down into the branches and harvest.

Cornus twigs for pea support

I’m trying Little Marvel at the nursery in a large pot, planted densely all over the soil, with pretty red Cornus twigs to give them something to climb on. Come and check out their progress!

Some of the many good varieties of dwarf peas are: Sugar Ann, Little Marvel, Sugar Lace II, Lincoln Homesteader, Dwarf Grey Sugar.

Whichever pea variety you love best, no one will ever have to remind you to “Eat your peas!”

Building layers

The Joy of Creating a Lasagna Bed

By Faye

Has your appetite for growing your own food expanded as mine has?
With the warmer weather these past few summers, harvests have been plentiful and deliciously sweet, but planting space had not kept up with my lust for more. I wanted more of what I’ve already grown, and more new crops as well.

Fall is a good time of year to take stock of your garden and decide if it’s meeting your needs. If not, make it happen. Building a new raised bed isn’t complicated, it’s simply a frame placed atop unused, weedy ground or even on top of lawn grass, in the sunniest spot you have. Cedar is the best material for this, but rocks would work, or even just a piled mound is fine. Don’t use pressure-treated wood. It should be at least 12 inches tall, with the bed no wider than 4 feet so you can reach from either side to weed and harvest. Once this is done, the rest is easy, fun and so rewarding.

Raw materials at the ready

Raw materials at the ready

‘Lasagna Gardening’ was first coined in a book of that name by Patricia Lanza, and has become the natural way to build your own soil that is weed free, organic, with good tilth and rich in nutrients. It is moisture retentive and needs less fertilizer. Also called sheet composting, it’s simply a matter of layering organic materials which will ‘cook’ down to create the best soil you have ever crumbled between your fingers.

My layers started with about 7 sheets of newspaper, but cardboard is another option. This creates a moist and dark bottom layer that attracts earthworms, which will be your labour force to break down and aerate your new soil. On top of this I spread some of my own compost, then a good layer of leaves. This time of year falling leaves provide us with brown, red and gold bounty. It’s free, widely available, and oh so valuable, so get as much as you possibly can and layer it thickly.

The alternating layers will be either ‘brown’ like leaves and straw or ‘green’ layers such as garden clippings, uncooked veggie scraps including eggshells and coffee grounds, manure and seaweed. Make your ‘brown’ layers about twice as thick as the ‘green’ layers.

Manure and seaweed, now more leaves...

Manure and seaweed, now more leaves…

After the leaves, I joyously added a layer of llama manure, which I had shoveled into buckets as if collecting a treasure. Llama and sheep manure can be used ‘fresh’, although I tend to put these on the bottom layers only, due to the yuck factor. Well-aged cow, horse and chicken manure are also rich in nutrients and all the micro-organisms useful for breaking down the layers into good soil.

Then more leaves.

Giddy with pleasure, I headed to one of several beaches in my neighbourhood, and gathered a few buckets of seaweed. (I don’t rinse the seaweed; the rains wash away any residual salt.) Is there a better way to spend an hour or two in the autumn than at the seaside, with a root knife hacking up pieces of kelp?

NOTE: NEVER TAKE SEAWEED THAT IS STILL ATTACHED. ONLY TAKE WHAT HAS BEEN TOSSED UP IN A WIND STORM, AND TAKE ONLY WHAT YOU NEED.

Kelp meal is also available at the nursery, for those of us not up to the beach trek.

On top of the seaweed, I layered some straw (not hay!); I buy a bale of this every spring for around $11. and find it invaluable as a weed suppressant, slug deterrent and moisture retainer around my summer veggies.

Ready to cook

Ready to cook

Keep layering, repeating until the pile is about 2 feet tall, which will break down to about half that, and be ready for planting by spring. I always include some garden soil in the mix, and finish with a final layer of leaves, like the frosting on a cake. The layers you choose can be fairly flexible, it’s not a hard and fast rule that you must use the same things as I did.

While fall is the best time to build a lasagna bed, as the winter rains and frost help to break down the layers, I have also done it in the spring and just parted the layers to accommodate seedlings. Garden soil and finished compost are important if starting in the spring.

Lasagna gardening is less work because you never need to dig again, weeds are almost non-existent, and plants will almost grow themselves.

While I have enjoyed the lasagna method for vegetable beds, there is no reason to limit it to just veggies. For more flowers and healthier plants in all areas of your garden, get layering!

New Facebook Page For Greenhouse Enthusiasts

Are you one of those lucky gardeners who have a greenhouse? If so you might be interested in a new local Magnum-in-black&-veggie-Gar facebook group set up by one of our customers – Salish Sea Greenhouse Gardeners. “This group is for people on Vancouver Island, especially its southern part, who are growing food and flowers in greenhouses.  It is a place to share information (eg. about best seed varieties, pest control etc.), describe lessons learned and ask questions. It is a place to share photographs, links to helpful websites, videos and articles.”  Help get this site ‘growing’ by contributing your experiences either as an expert or a novice.