Should I Prune My Tomatoes?
By Faye
The short answer is yes, and no. It depends on what kind of tomato you are growing. If it’s determinate then no pruning is required, but indeterminate tomatoes must be kept in check.
Determinate vs. Indeterminate
This is the key piece of information to look for on the tag when you purchase your tomato start or seed.
Determinate tomato plants have a pre-determined size (just like we do), according to their genetic make-up. They grow like bushes and need no pruning other than removing the leaves below the first flower cluster so that none touch the ground. They tend to ripen their fruit earliest, often all at once.
Indeterminates, grow like vines and will keep climbing and producing fruit, as long as they are alive. In our climate of course this is limited by the onset of cooler temperatures and shorter days.
Why is Pruning Important?
Like all plants, tomatoes depend on photosynthesis to grow. Pruning maximizes this process due to more sun exposure, while minimizing disease. Densely packed leaves take longer to dry, inviting all manner of bacterial and fungal intrusion. Allowing the sun to bless all of the leaves is the goal, especially in our relatively short growing season.
 How Do I Prune?
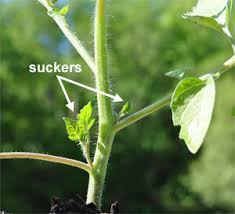
As the tomato plant grows, little side shoots (suckers) sprout up in the crotches, or axils, between the main stem and leaf branches. Each one of these has the potential to grow into a fruiting stem but the result would be a tangled mass of foliage with small fruit slowly ripening in its self-imposed shade. The ideal is to limit the plant to no more than 3-4 stems. Gently pinch off, the little suckers when they are small and easy to remove. (If you turn your back for a day or so, they can quickly grow to shocking proportions, so be vigilant!)
Cut o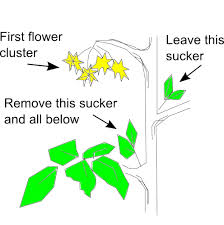 ff all side stems below the first flower cluster then allow only the next two or three suckers above the first cluster to develop. Suckers higher up the plant will be weaker, so be sure to remove those later-developing ones.
If you have limited garden space or a lot of tomato plants that need to be planted close to each other, then limit growth to only one single vining stem, and tie it to a stake.
Planting Tip: Strip off all the bottom leaves, up to 6-8” above the root ball, and bury up to this point when planting. This long lower stem will grow roots, and the bigger the root system, the better the plant. So don’t worry if late-planted tomatoes are a little tall; just bury the excess length. (Or lay sideways in a trench, it will straighten itself out!)
What About Staking?
For the greatest yield, almost all tomatoes need support to improve air circulation and keep fruit and leaves off the ground where they are easy prey for disease and critters. Preferably install supports while the plant is still small so you won’t damage any spreading roots. There are many options:
– Cages
Still the simplest, the ubiquitous tomato cage has grown up a little, now available in taller and wider forms. They are perfect for determinate varieties, and with the addition of a sturdy stake or two, are fine for indeterminates too.
– Stakes
Easy to use for indeterminates and allow easy access for pruning. Simply hammer a 6’ cedar or metal (Rebar is good) stake about a foot into the ground, then tie the main stem to the stake, looping the tie completely around the stake first, then tie the plant to it.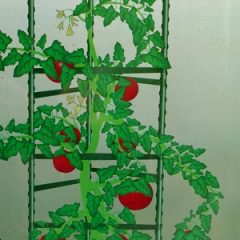
– Ladders
New this year are 3-sided ladders made for tomatoes. I would probably anchor these with a go
od stake of Rebar, but the design is good for supporting those heavy stems of ripe and delicious tomatoes.
– Spirals
Very elegant, a tall metal spiral stake is set into the ground (past the first coil for stability), and you simply twine the vine around it, tying where needed.
End of Season Care
By about the end of August, gradually start to withhold water, which stresses the plants a little and encourages the fruit already on the vine to ripen. Also, cut off any immature flowers and ‘cap’ the plant by cutting off the ends of fruiting stems. This way, the fruit on the vine will ripen, not having to compete with any new ones forming. There is limited growing time left at this point, and new fruit won’t have time to ripen.
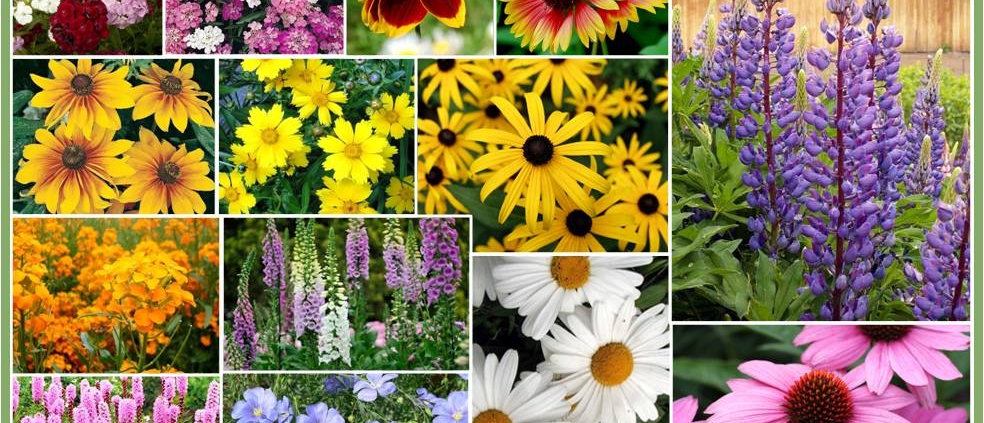
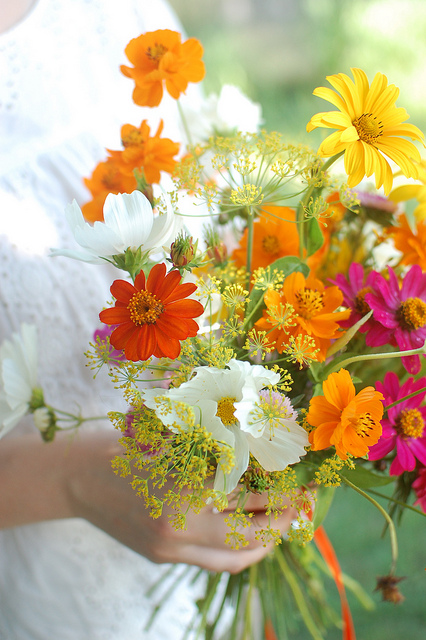 Most of us want to bring the beauty and fragrance of flowers into our homes, but worry about plundering the garden beds by cutting off blooms. The solution? Plant a cutting garden! It needn’t be large but, if well planned, will reward you with glorious bouquets all season long. A few guidelines and suggestions to help you get started.
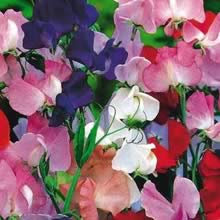 Annuals: Often started from seed, so they are inexpensive to experiment with. Try one new thing each year, just for fun!
 Perennials