Tag Archive for: veggies

Red Russian Garlic

Garlic – The Great Traveler

Garlic IntolerantThe history of garlic can almost be described as the history of human migration.  Garlic is native to Central Asia, specifically the Caucasus region between the Black and the Caspian Seas, and over many millennia it has been carried to almost all corners of the world. Garlic flavours many of the world’s cuisines. It is steeped in folk lore and legend. (Everyone knows that wearing garlic is the best way to keep vampires at bay!) Folk wisdom attributes garlic with a variety of curative properties, many of which have been proven by contemporary science. Garlic is mentioned in ancient Egyptian, Greek, Indian, and Chinese writings as well as the Bible and Koran.

Garlic was first brought to North America by immigrants from Poland, Germany and Italy, but most of the varieties we use now came into the US in 1989.  In the 1980’s the USDA tried to get permission to collect new garlics in the Caucasus region, then part of the Soviet Union, but were denied because of military installations in the area.
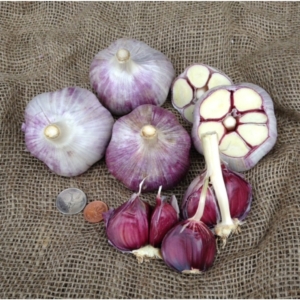
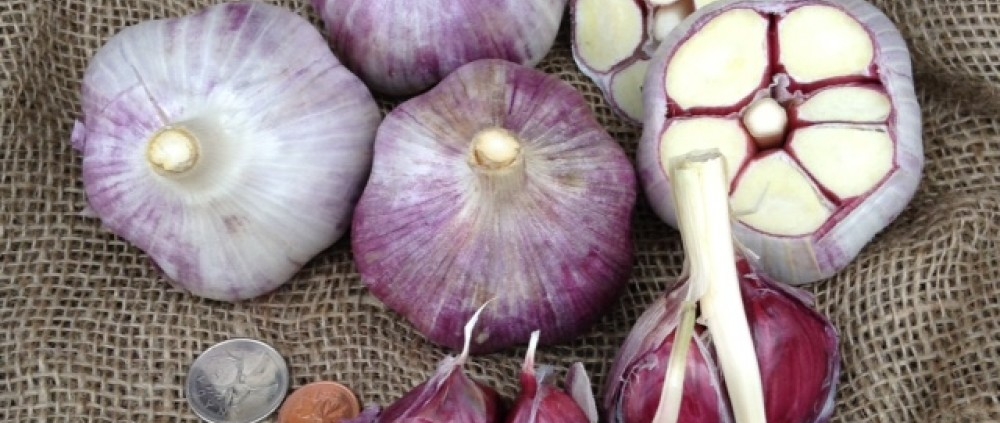
Red Russian garlic

Red Russian garlic

In 1989 the Americans were finally granted permission to enter the region, but were heavily guarded and allowed to travel only at night. They travelled along the old Silk Road and purchased garlics from local markets, often naming them for the towns and villages they were found in.   (Red Russian garlic, one of our most popular varieties, was actually brought into BC by the Dukhobors in the early 1900’s and is now considered to be a BC heritage variety.)

Garlic, or Allium sativum, comes in two basic types – hardneck and softneck. Hardneck varieties (var. ophioscorodon) usually grow a woody flower stalk or scape out of the centre of the bulb.  They do best in cold, damp climates.  Typically a bulb develops four to ten large cloves. Flavours are strong and often spicy and complex.  Most hardneck garlic does not store well and is best used fresh. Hardneck varieties come in three different types: Rocamboles, which have thin parchment-like skins, and are easy to peel, Porcelains which have thick tough skin and do store well, and Purple Striped, named for their distinctive colouring.Garlic Types
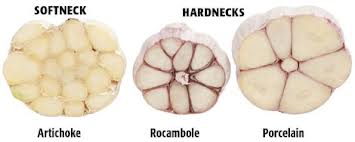
Softneck garlic (var, sativum) evolved from hard-neck varieties and grows best in warmer climates.  Bulbs keep well and typically contain multiple cloves.  They don’t produce flower stalks unless they are stressed.  Softneck varieties come in two different types: Silverskin and Artichoke.  Silverskins have soft pliable necks that lend themselves to braiding, lots of small cloves and spicy flavours.  Artichoke garlic has larger but fewer cloves and a milder flavour.  Most of the commercially grown garlics found in the grocery store are soft neck varieties.

Elephant garlic (Allium ampeloprasum) is actually more closely related to leeks than to garlic. It produces a small number of very large cloves of mild flavour. It needs a good, long, warm growing season to grow well.

Tips for Growing Good Garlic

Choose an open, sunny site with light, well-drained soil.  Incorporate lots of organic matter, such as well rotted manure or good compost into the soil.  Garlic won’t thrive in acid soils (below 5.5pH) so be sure to apply lime if your soil is acidic.

Plant garlic in October so it can develop good roots before the winter.
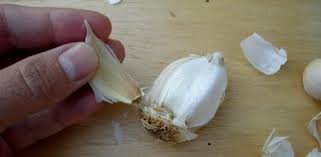
Separate the cloves

Separate the cloves

Break up the bulb carefully into individual segments prior to planting. Try to leave the skins intact.

Make sure that the cloves are planted the right way up: the flatter basal plate should be facing downwards

Allow about 4” between individual cloves and 1 foot between rows. Plant the cloves so the tips are one inch below the soil surface.

If your soil is heavy and wet you could start your garlic off in small pots, or divided trays in the fall, overwinter them in a cold frame and plant them out in the spring.
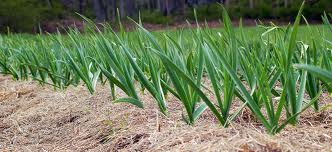
Mulched garlic

Mulched garlic

Over the growing season hand weed regularly.  Hoeing can be tricky as the bulbs are so close to the surface.   Mulching, with shredded leaves or straw, will help with weed suppression.

Hardneck garlic cultivars readily produce flower stalks which should be cut off as soon as they appear. They are delicious in stir fries!
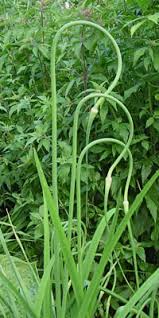
Garlic scapes

Garlic scapes

Garlic matures between the end of July and early August. Stop watering a few weeks before harvesting to allow the bulbs to cure. Harvest when 1/2-3/4 of the leaves have turned yellow (depending on variety). Don’t delay as the bulbs open up and won’t store as well if lifted late.

Lift the bulbs with a fork. Handle gently as bruising also reduces their storage potential.

Dry the bulbs thoroughly, spread out in a single layer in the sun or in a dry, well-ventilated shed or similar environment.  Drying will take two to four weeks depending on the weather. When the foliage is dry cut off the stalks and store the bulbs in a cool dry place.  Do not store in the refrigerator. This will induce sprouting, changing the garlic’s texture and flavour.

It’s interesting how idle thoughts, in this case, “I wonder why the names of garlic cultivars are so exotic”, can lead to a voyage of discovery. The story of garlic is fascinating, and I’ve barely scratched the surface here.  If you’d like to learn more, these websites are particularly informative:

http://www.gourmetgarlicgardens.com/overview.htm

Copy this URL to look at an in-depth report on garlic growing in BC put out by the Ministry of Agriculture:

https://www.al.gov.bc.ca/speccrop/publications/documents/garlic.pdf
 

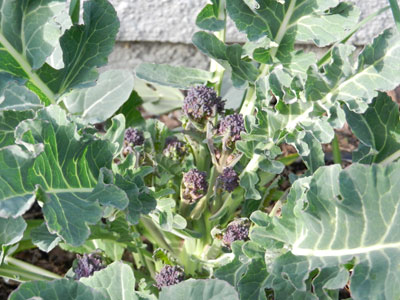
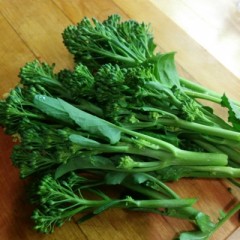
purple sprouting broccoli

Heads Up, It’s Time To Think About Winter Veggies

By Faye

How strange to be writing an article about growing vegetables in winter in the same newsletter as one on pruning tomatoes, but the reality is that now is definitely the time to start planning what, where and when to grow. Read on…

Definition of Winter Vegetable Gardening:
When we talk about growing vegetables in winter, we don’t mean planting in winter, we mean planting in the summer, and eating in the fall, winter or early spring. There are two types of winter gardening:

Summer planting, fall and winter harvest.
Such crops as kale, chard, carrots, beets, parsnips, lettuce, arugula, leeks and salad greens can be enjoyed all summer with harvests continuing during the winter. Root veggies are perfectly happy to stay in the ground until early next spring, and such things as kale, corn salad (Mache) and Brussels sprouts are even sweeter after having been kissed by frost. Brussels sprouts seeded now will be ready by fall, but only if you get the seeds in very soon.

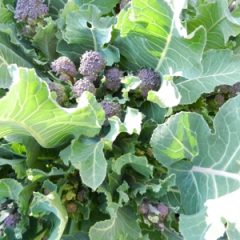
Purple Sprouting Broccoli Ready to Harvest

Purple Sprouting Broccoli Ready to Harvest

Summer planting, spring harvest.
The most important overwintered crop is Purple Sprouting Broccoli, a true biennial, which needs winter cold to finish its life cycle in the spring. Its delicious side shoots are actually its attempt to make flowers and set seed, but as long as we keep harvesting, we can prolong the life of the plant until March or April, after which it is time to let it properly go to flower and finish.

Technically all of the brassicas, leeks, carrots and beets are biennials too, but we normally harvest them before this final stage of their life.

Spinach is really in a class of its own, but the main harvest is in the spring so I will include it here. Spinach bolts to seed with long daylight hours or with extreme heat. That is why it’s so hard to grow a long crop of spinach in the spring, as it will always bolt by May or June, no matter how healthy it is. Having tried many times, my best success was to plant in September, keep it in the greenhouse (or coldframe) all winter, and wait for the explosion of gorgeous green growth in the spring. I’ll never grow spinach any other way now.

Are there pests to look out for?
Unfortunately, there are serious pests that can frustrate even the most dedicated gardener. Mainly there is the Carrot Rust Fly and the Imported Cabbageworm; both of which can be kept at bay with ProtekNet, a very fine mesh netting that excludes these critters from laying their eggs on our crops. Slugs can be a problem in wet winters, but they are easily controlled.

Starting your winter crops in summer gives them time to become full sized plants by Halloween, which gives them the strength to withstand the challenges of winter and reward you with the most delicious food you have ever tasted. Winter vegs starts are available in early August, but if you prefer to grow from seed, it’s time to start some of them. Check out Linda Gilkeson’s Planting Guide

Harvesting all year is a luxury that we on the west coast are fortunate to have, so we need to get growing!

If you are serious about growing your own vegetables, then Linda Gilkesen’s web site and books are great resources. Even if you are more experienced, have a look at her latest publication, a magazine style update on newly discovered pests with practical advice on dealing with our new climate realities. All of Linda’s books are available at the nursery.


comparison of tomatos

How Not to Kill your Seedlings

By Faye

Killing your seedlings is easy, but so is growing them to become strong and vibrant young plants!

Whether you sow your own seeds or buy starts from the nursery, your seedlings will go through a vulnerable stage of babyhood, when you must meet their every need. Some simple guidelines and lessons learned along the way:

*Use a sterilized soilless seed starting mix when sowing seeds.

* Seeds need heat, seedlings need light. A heat mat and grow lights will be the single most effective investment you can make if you really want to get into seeding. Once the seeds germinate, keep light about an inch above the seedlings, and only turned on for 12-16 hours a day.

* Don’t over crowd. Use scissors to snip off excess seedlings if they are too close to separate.

* Once they have 2 sets of true leaves, start to fertilize. Use a weak solution of liquid fish or seaweed.

* Always water from the bottom. Your seeds will have been sown into a tray or cell-packs with drainage. Put these into a non-draining tray, add water to bottom tray, removing excess water after half an hour or so. Watering the top of the soil encourages damping off, a fatal fungal disease of seedlings. Watering from below also encourages roots to grow downward seeking moisture.
If you want to be extra kind, water with room-temperature saved rainwater or de-chlorinate your tap water by leaving it sitting out for a day or so before using.

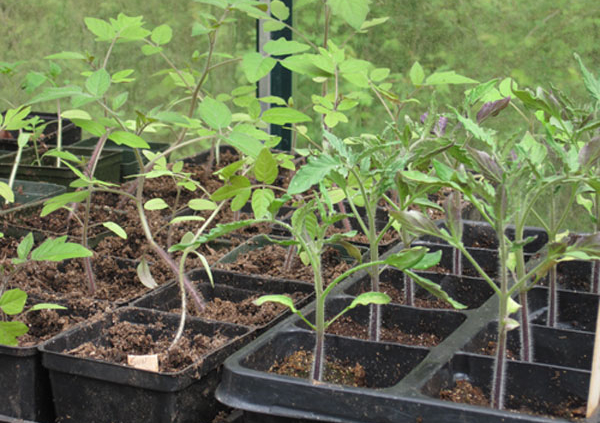
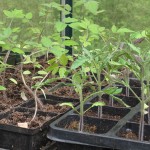
Tomato seedlings on right were moved out to greenhouse earlier than the ones on the left.

* Pot on! Don’t allow roots to become over crowded and tangled, move plants up to 4” pots. Hot-weather crops like tomatoes, eggplant and peppers will need to be started early yet moved to successively larger pots before planting out.

* Grasp by leaves only. Seedling stems are very fragile and easily damaged. If you need to separate seedlings that have been grown together in trays, tease roots apart gently with fork or fingers.

* Label everything! You think you will remember which flat is which, but you won’t. Trust me.

* Pinch back. When plants are 3-4” tall, with 2 or 3 sets of true leaves, nip out the top leaves to encourage branching, more flowers and fruit. Technical bit: plant hormone AUXIN is in terminal (end) bud, and causes vertical growth but suppresses side growth, so you want to interrupt this cycle. Don’t pinch back tomatoes!

* Rough ‘em up. Brush your hands gently over the tops of the little plants; this toughens up the cells and prepares them for the great outdoors.

* Harden off. Very important, the little plants need to be gradually acclimated to cold, wind, rain, sun. Direct sun can burn leaves if not properly hardened off.
Give them partial days in dappled shade, bring in for the night, gradually expose to more weather and more sun. A coldframe or cool greenhouse makes this transition easier, but be careful on sunny days.

* Leaving the nest. When it’s time to move the seedlings to the garden, be wary of critters; slugs love the tender young shoots. Safer’s Slug Bait is my best defense, along with rabbit fencing of course. Checking after dark sometimes uncovers cutworms too, be vigilant.

* Label everything! Did I mention this already? Knowing the variety and date you planted is helpful when planning next year’s crops. Many good growers maintain a notebook listing plants, date seeded, when planted out, and result.

* Enjoy the harvest!! You’ll be glad you got your babies off to a good start, and they will thank you with delicious produce.

Peas

PEAS TO PERFECTION

By Faye

Few garden crops rival the perfection of crisp peas in late spring. Getting them started early is the secret, as they prefer to grow in cooler temperatures.

Read in “Peas in Particular” to see a foolproof way to beat cold weather, critters, and rot.
Since writing that article a few years ago, I have become more sophisticated and now use well-draining trays for my damp vermiculite instead of milk cartons, on a heat mat with grow lights suspended from the ceiling; faster and easier, in limited space. I currently let them get to about 4” tall before planting outside, as the starch is used up from the seed, and the varmints aren’t so interested in this ‘food source’. I am careful to harden them off before moving them out to the cold.

Don’t have a heat mat and grow light? Peas aren’t fussy, they are fine at room temperature, but will be slower. Once germinated, they don’t need heat, so a cool greenhouse, sunroom or even outside in a spot protected from weather and predation is fine. At this stage bright light is paramount.

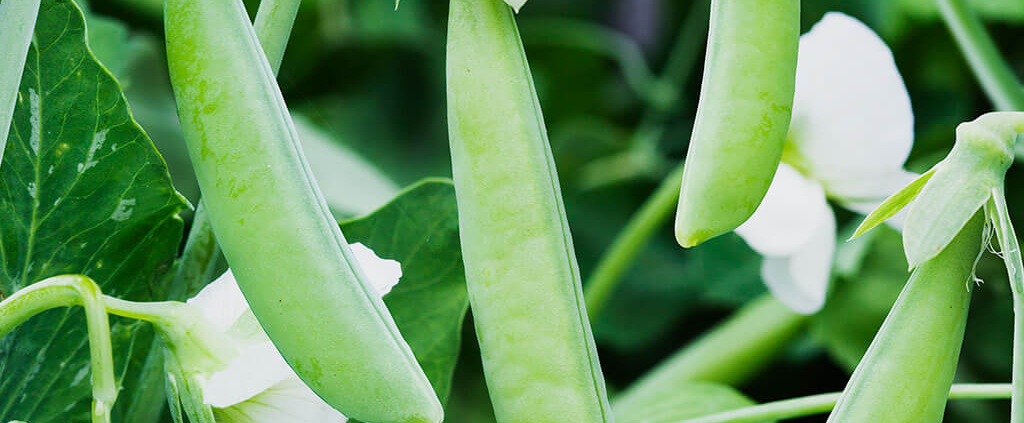
We are often asked “What is the difference between Snap peas and Snow peas?” It’s hard to remember which is the flat one and which is the one with peas in it? The way I remember is that snow lies flat on the ground, and Snow peas are the flat edible pods. Snap peas, aka Sugar Snap, have fully formed peas inside. Both kinds have edible pods, ‘mangetout’ or ‘eat it all’.

Dwarf Peas

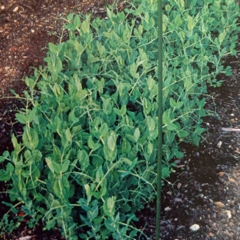
While I’ve always grown both Tall Telephone and Sugar Snap Pole (in the ground at home, and in large pots with bamboo poles at the nursery), another option is to grow dwarf peas, not needing a trellis. Allegedly they produce more peas per square foot, and would be ideal for smaller gardens, patios and balconies.
Plant them in a block, not in rows, so you can just reach down into the branches and harvest.

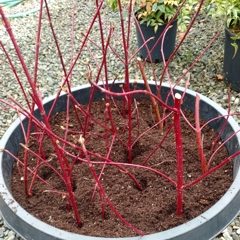
Cornus twigs for pea support

I’m trying Little Marvel at the nursery in a large pot, planted densely all over the soil, with pretty red Cornus twigs to give them something to climb on. Come and check out their progress!

Some of the many good varieties of dwarf peas are: Sugar Ann, Little Marvel, Sugar Lace II, Lincoln Homesteader, Dwarf Grey Sugar.

Whichever pea variety you love best, no one will ever have to remind you to “Eat your peas!”

harvest Aug 23 2014 1

Seven Ways To Grow More Food In Less Space

By Faye

Having a small garden is no reason not to have generous harvests of your favourite fresh vegetables, all year long.  There are many ways to boost production, and get the most out of whatever little plot of land you may have, even if it’s just a few pots on the patio!

harvest-Aug-23-2014The one question we get asked frequently is “what should I grow?” Frankly, there is only one answer to this: grow what you enjoy eating. It’s that simple.  If you don’t like kale, don’t grow it just because it’s the ‘in’ veggie!

By following a few simple guidelines, you too will have an abundance of nutritious and delicious vegetables from your own back yard.

1. Grow successfully. Firstly, the more sun the better.
Secondly, grow in soil that promotes high yield, and your harvest will be bountiful. “Feed the soil, and the soil feeds you.” Healthy, fertile soil with lots of organic matter, and well-balanced fertilizers produce the best crops. We like to use organic fertilizer blends, with the addition of liquid seaweed and fish.
Thirdly, do your best to keep your crops free of pests and disease. Pests are like the hyenas in the Serengeti, they prey on the weak and lame; so make your plants the strong ones! Insect netting will protect crops from the worst scourges such as carrot rust fly, cabbage moth, and other predators

2. Plant successively. As soon as one crop is finished, plant another in that space. Keep the ground productive, moving quickly from one crop to another. This can mean planting a later vegetable along with an early one. The later one starts off small, then by the time the early one is finished and pulled out, the later one can take over that spot.
Right now, you can sow radish, arugula, spinach and peas. (See: Peas In Particular!) The spinach will bolt by late May with lengthening daylight hours, but you will have enjoyed the baby leaves all spring. This space can be used later for your main season crops such as tomatoes, cucumbers, and squash.
Sowing successively is a little different, it’s just sowing as many seeds as you need for now, following up with more a couple of weeks later. By doing this you will ensure a continuous supply of young and fresh plants, rather than more than you can eat at one time.

3. Grow Vertically. Plants sprawling on the ground take a lot of space. Many plants are happy to grow up a trellis, netting, fence, or other support, saving much needed space on the land.  Yields are higher, due to less wastage (rotting on the ground), better pollination, increased air circulation so less disease, and the beneficial insects have easier access as they dine on aphids and other troublesome pests.
Vertical growing works for tomatoes, cucumbers, squash, peas and pole beans. I have found that growing Pole Beans rather than Bush Beans gives me more beans over a longer period, saving space as well.

4. Grow in Containers. This is a vast subject, and there are both positive and negative points with container growing. In a container you must be very careful to give adequate food and moisture to your plants. Soil must be excellent, with lots of organic matter.  Drainage must be perfect. Having said that, any vegetable that can be grown in the ground can be grown in a container, if it’s large enough.
I grow potatoes in huge tubs, and even raspberries are in a large wooden container; they surely have rooted right through to the ground by now.  Containers can be placed anywhere you have the best sun exposure, even atop a large rock! They are easy to weed, and entail less bending and reaching to access your crops.  Raised beds are actually a form of container, and are probably the very best place to grow veggies.

5. Interplant. Smaller crops can be planted in and amongst the larger ones. Plant a few radishes beside the tomatoes or in front of the peas. Plant lettuce between the rows, they will appreciate the shade cast by their taller neighbours. Later in the summer, small starts of winter crops can be inter-planted with the main crops. A cover crop of Corn Salad, sown for winter, is happy under the spreading leaves of the squash. Let no space go unplanted!

Broccoli6. Square Foot Gardening. This is a wonderful concept that works especially well in raised beds and large containers. Who really needs to waste the space on pathways between rows? Plant in blocks, and it’s surprising how much food can be grown in a 4’ square plot of land. Check this link for more information. There are many sources for information on this topic, and the library usually carries the original Square Foot Gardening book.
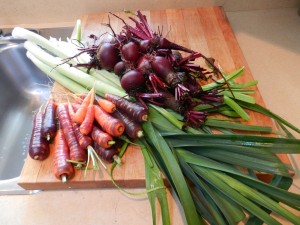
7. Grow all Year. This may be the best tip of all.  Winter veggie growing is so easy: no watering, no weeding, and few pests.  The joy of harvesting fresh carrots, leeks, beets, kale, spinach and broccoli all winter long cannot be over stated.

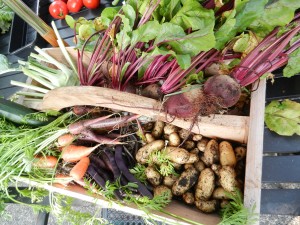
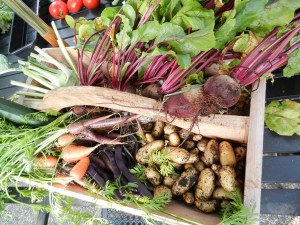
Veggie Harvest For February Dinner

Veggie Harvest For February Dinner

The main thing to know is this: winter crops must be planted when summer is at its peak, so garden planning now should include where to put them.  Remember too that if planting for winter, it’s a longer season of eating; plant lots! My carrots and beets planted in May are still being harvested now, although with the coming of spring they will soon start to form seed so I must get them out soon.

As always, I am grateful to Linda Gilkeson for her vast knowledge, and helpfulness. Her very informative books are available at the nursery, library, and book stores everywhere.

With the longer days, increased sunshine and warmer temperatures, we are all getting the bug to start growing. So let’s make it the best harvest ever!


Swiss Chard

Swiss Chard Stem Hummus

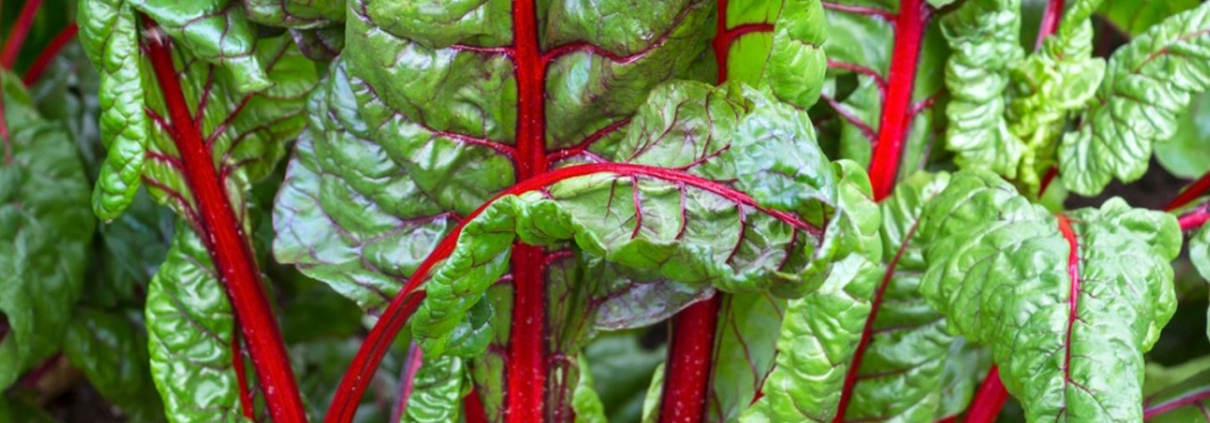
So much of the Swiss Chard is in the stem, so it makes sense to use it all.

1 pound chard stems, coarsely chopped (about 4 cups)

salt to taste

2-4 garlic cloves (to taste), peeled and green shoots removed

½ cup sesame tahini, stirred if the oil has separated

¼ – ½ cup freshly squeezed lemon juice (to taste)

1 TB extra-virgin olive oil


Steam the chard stalks about 15 minutes, or until tender when pierced with a fork. Drain well, and allow to cool. Place in a food processor fitted with the steel blade. Puree, stopping the machine from time to time to scrape down the sides.

Mince garlic and mash with ½ tsp. salt until you have a smooth paste. Add to the chard stalks. Process until smooth. Add the tahini, and again process until smooth. With the machine running, add the lemon juice and salt to taste. Stop the machine, taste and adjust seasonings. Transfer to bowl, drizzle on the olive oil and serve. It may seem runny at first, but it stiffens up. Keeps for about 3 days, but is best freshly made. Great with crudités or pita bread and good olives. Yumm.

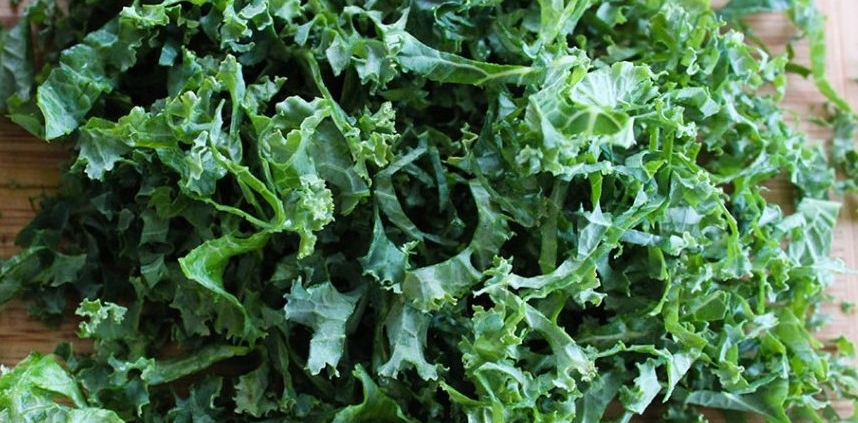
Shredded kale

Colcannon

2 pounds russet potatoes

5 cups (or more!) chopped kale

1 or 2 leeks (need to plant in February), cleaned and chopped

1 cup milk

3 TB unsalted butter

¼ tsp nutmeg

coarse salt

1 TB unsalted butter


Boil and mash potatoes.

Combine kale, leek, milk, 2 TB butter, and nutmeg; season with salt. Cover and cook over medium heat, stirring occasionally, until the vegetables are soft but not browned, about 15 minutes. Stir into potatoes.

Transfer mixture to an oven-proof casserole, making an indentation in the center. Keep warm in a low oven until serving. Top with a little more butter.

Sunomono

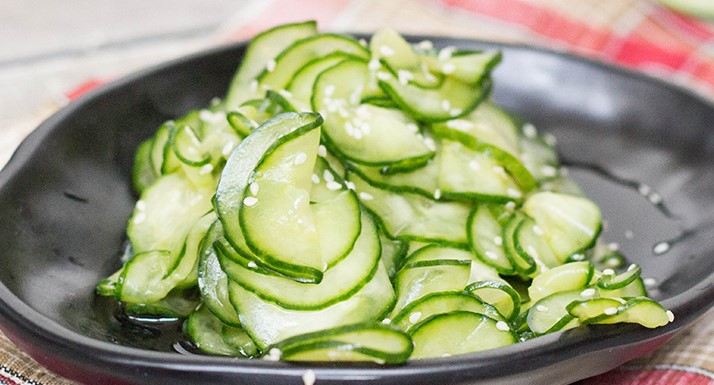
Sunomono Salad (Japanese Cucumber Salad)

1 long English cucumber, preferably just picked, and young and tender without large seeds. Alternatively, use 4 smaller Japanese cucumbers.

6 TB rice wine vinegar

2 TB mirin (sweet rice wine vinegar)

1 TB sugar

½ tsp Kosher salt

1/8 tsp dried chili flakes


Mix the rice wine vinegar, mirin, sugar, salt and chili flakes. Slice the (peeled if waxy or spiny) cucumber VERY thinly, preferably with a mandolin. I have found very inexpensive slicers at Fujiya, a Japanese food store/deli on Shelbourne) .

Add the cucumber slices to the dressing, toss and place in a covered container in the refrigerator for at least an hour, or overnight to best meld the flavours.

This recipe is originally from Rouxbe, an on-line cooking school based in Vancouver.

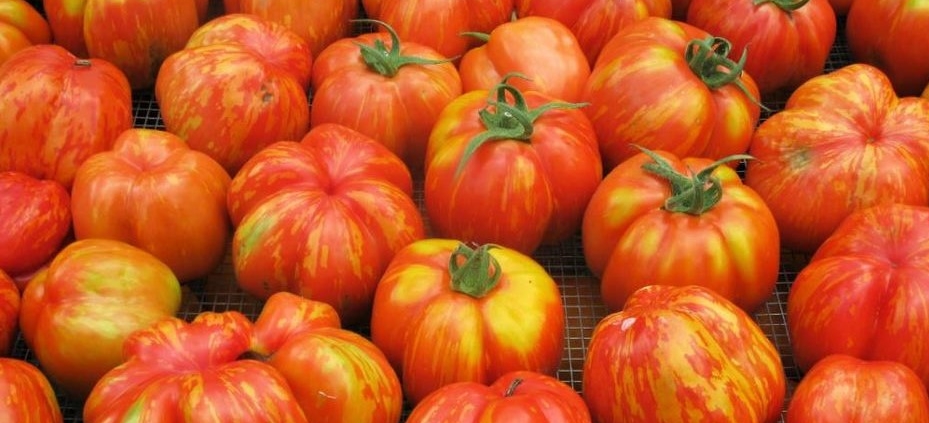
Striped Cavern tomato

Stuffed Tomatoes – Using Striped Cavern Heirlooms

These tomatoes are particularly suited to stuffing; they are large, hollow, and contain few seeds or pulp, with firm ‘walls’.

6 Italian sausages, meat taken out of the casings

1 cup cooked rice, or quinoa, bulgur, or any grain of choice

3 green onions, chopped

1 cup grated zucchini

lots of garlic and fresh basil, chopped

salt and pepper to taste

Cook and stir the above until sausage meat is no longer pink. Drain off any excess liquid.

Cut tops off the tomatoes. This is probably enough for about 8 tomatoes, but depends on the size, of course. Stuff them fully, then top with grated cheddar or any cheese you like. Consider this more of a guideline than a recipe, just add whatever suits your taste.

Bake at 400 degrees for 30 minutes.

After cooling, they freeze well, and are a welcome treat in the winter months.

Vegetarian? Check the internet for dozens of great recipes.

Enjoy!


Roasted Beets With Sauce

To roast beets, wash, then rub with olive oil, add just a small splash of water, then wrap tightly in foil. I usually wrap 2-3 together. Put on baking tray in oven at 375 for about an hour, depending on size and freshness of beets. When time is up I just leave sitting (out of oven) until I need to peel them. The skins slip off beautifully and flavor is better than steaming or boiling.

SAUCE

2 tsp Dijon mustard

2 tsp horseradish

1 clove garlic, minced

salt and pepper to taste

2 TB olive oil

2 TB lemon juice


Mix together and serve with beets. I usually serve in a little pitcher at the table.

Garnish with big swath of chives.

Enjoy