Tag Archive for: veggies

Banana Potato

Tomatoes, Potatoes and Blight

I know, you aren’t ready to hear about end-of-season gardening yet; the summer has only recently started, hasn’t it? However, the calendar says otherwise; September is here, and we actually had a little sprinkling of wet stuff the other day. ‘Tis the season to worry about late blight in the tomato garden, and if you grow potatoes now is the time to be concerned about next year’s crop as well.  Sigh.

 Yes, potatoes can be a source of late blight for tomatoes, and any innocent potato left in the ground after harvest can be the source of doom for next year.  Potatoes are closely related to tomatoes, and they actually can be carriers of the blight so feared by tomato growers here on the wet west coast, as they are even more susceptible than tomatoes.  The official name for this fatal disease is Phytophthera infestans, a fancy name to describe a rapid collapse and rot of the entire plant, so fast that the first blotches on the stems and leaves precede the demise of fruit so fast that no tomatoes can be saved. The risk is in leaving any potatoes not dug; the blight survives in living tissue, so if you find volunteer potatoes growing in the spring, remove and garbage just in case. I know, this is hard to do; any volunteer vegetable feels like a freebie.

Wrapped For Warmth

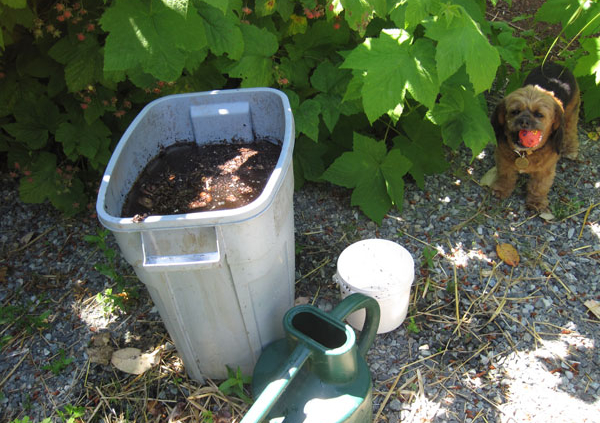
The very best way to prevent late blight from attacking your tomatoes is to keep the foliage dry at all times.  My tomatoes are grown in a raised bed, so it was easy to build a shelter around the tomato bed to keep warmth in, using a plastic ground sheet from the paint store.  For these dewy nights, I cover the top as well, removing the roof in the morning, unless rain is threatening.  Ventilation is critical; don’t create a steamy sauna in there! If the top is covered, open up some of the sides when you can.

All Covered Up For The Rain

This time of year it’s all about ripening the tomatoes that have already formed; by now you should have cut off any flowers and excess leaves, and topped the vining plants.  Withholding water helps the fruit ripen as well, as the plant gets a little stressed at the idea of not reproducing its seed, and ripens to ensure the continuity of its species.  Don’t tell the plants that their seed may not be used for this purpose!

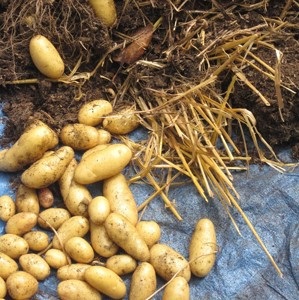
Enough about the worries, and more about what worked! This was my first year of growing potatoes, and I’ll never again be without them.  As sunny, well-drained sites are in short supply in my garden, I planted potatoes in huge pots or bins, whatever I had on hand.  Harvest time was simple; just dump out the pots and add the soil to any beds where there won’t be potatoes or tomatoes for 4 years. I’ll write more about growing these marvelous little nuggets next spring when the seed potatoes are at the nursery.

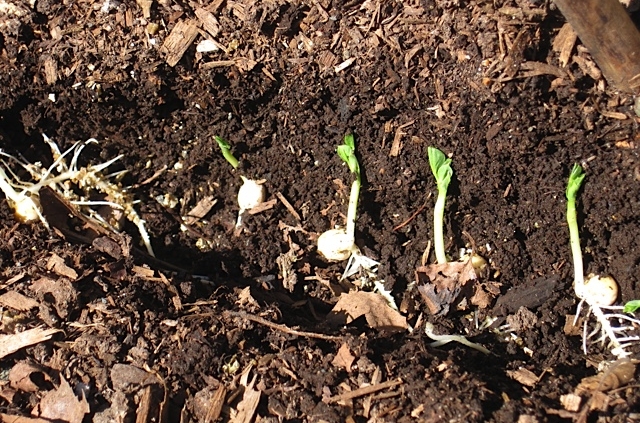
Here is Harvest Day in Faye’s Potato Patch:

Bucket Growing Potatoes Dumped Out

So what worked in your tomato garden this year? What ripened, and what didn’t?

My first blog was all about what to grow in case we had a cold and wet spring and summer. Well, was I prescient or what?  Following my own advice, I grew only tomatoes that ripen quickly, and have been relatively successful. My Siletz are ripening, although the very best for early ripening and excellent flavour have been Enchantment.  These seeds aren’t widely available here, but worthy of a search when you are poring over seed catalogues in the coming winter. Sun Gold is another one that has ripened well.  I’d love to hear about your successes, and failures too.

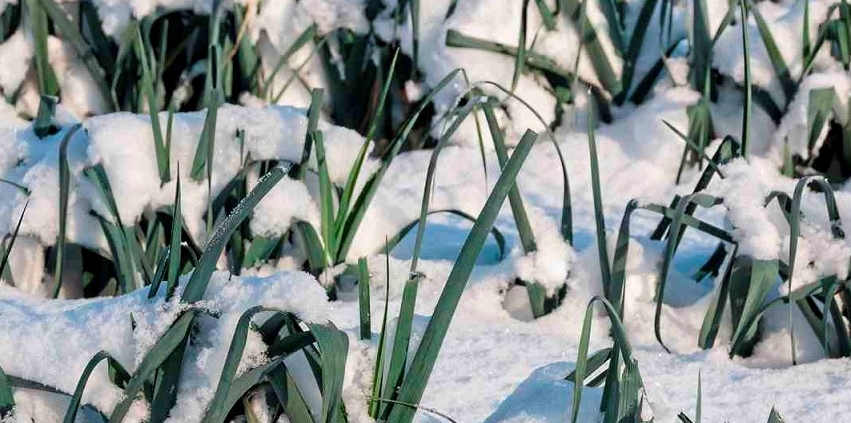
Harvest Of ‘Banana’ Potatoes

As you enjoy the bounty of autumn, make notes on what has worked for you; varieties, conditions, placement for crop rotation, and important dates of planting and harvest. If you don’t have a garden journal, there is no better time to start one than today.  OK, remembering to write in it is another matter, maybe I’ll do a blog on that subject!

swiss chard seedling

Planting The Winter Vegetables In August Or “Stocking The Great Canadian Refrigerator”

It’s a warm summer evening, August 3, and I just planted some vegetables that I won’t be eating until the cold days of winter and early spring 2012. 

What I’m planting now will overwinter, and although some of it can be eaten in the fall and all through the winter while young and tender, such as the spinach, kale and chard, the purple sprouting broccoli won’t be ready until early next spring. 

 I discussed the Great Canadian Refrigerator in my blog of May 16.  It feels like a drum roll has been beating, leading up to the final available planting time, which is now.

Purple Sprouting Broccoli With ‘Collar’

PURPLE SPROUTING BROCCOLI
I seeded this on June 10, grew them on in trays, and now they are ready for planting in the garden.   We have starts at the nursery, if you didn’t get yours going in June.

As soon as they are in the ground, it’s a good idea to put a physical barrier around them to protect against the Cabbage Maggot, a scourge which attacks the root of any member of the cabbage family.  Cut a square of barrier fabric such as heavy cloth, butcher paper, woven plastic fabric like that used in feed bags etc. Cut a slit to the center from one side, and place tightly up against and around the stem. Place a rock on it to hold in place, and leave on.

The sprouting broccoli will head up around February and you’ll be eating and enjoying this healthy vegetable until late spring, when you will have had so much you’ll be sick of it!

KALE  This is one tough plant, and can still be sown this week at the latest, although many prefer to buy starts.  It can actually remain in the soil for one year, if sown in the spring.

I’ve noticed the Imported Cabbage Worm lurking around my little kale babies in the pots I’ve started at the nursery. This evil pest is the innocent looking white butterfly that flutters and hovers in the garden, until it finds a member of the cabbage family, and lays tiny white/yellow eggs on the back of the leaves.  A smart mom, she lays her eggs where her larvae will find an immediate food source, ie your precious cabbage, kale, or broccoli. I just rub the eggs off as I find them. It really needs to be a daily task, as some have hatched already, producing tiny green worms which are perfectly camouflaged against the leaf. They are ravenous little critters and need to be squished immediately!   If your crop is too large or the infestation too great, spray with BTK when the caterpillars hatch, as BTK is harmless to any of the beneficial insects and kills ONLY caterpillars.

Kale becomes milder and sweeter in cold weather, so is the perfect winter crop here.

Swiss Chard Seedling

SWISS CHARD 
Chard is one of those leafy greens that make succession planting a joy. Plant it  densely with your kale and broccoli, and eat it when small and young, raw in salads. As the plants grow, cut some off at root level and make room for the others to get bigger. Before winter sets in you should have just enough full grown plants left to last you over the season.

SPINACH
Sowing spinach seeds is so easy, and up until the end of this week it can still be started from seed outside.  After that, starts from the nursery can be planted until the end of August, early September. 
By this time there is no danger of plants bolting to seed. They will continue to grow new leaves until the cold weather really sets in. Leave in the ground no matter how beat up they look after winter, as they’ll sprout new leaves as soon as the soil warms again, and have a long season of fresh growth.

MACHE (corn salad) can be seeded right under the sprawling vines of cucumber and squash, which will shade them from the summer sun until they are established, at which time the squash are ready to be cut down anyway. This is succession gardening at its best. Mache is a delicious and nutritious small-leafed green to add to salads; it will grow all winter. It is not bothered by slugs, and no matter how cold it gets it seems to just thrive in our climate. Winter grown mache is far more tasty than a spring crop, so if this is the one winter crop you try, at least get your feet wet (or muddy) with this tender little green.

(I’ll say more about succession planting in a further blog, on Winter Veggies in Containers)

 Remember, for plants to survive the winter, they should be almost full size by Halloween, as they don’t actually put on much growth during the cold season, but are kept alive in our gardens (The Great Canadian Refrigerator) to harvest and eat at their freshest and most delicious.

Crop rotation is very important in winter gardening, so please don’t plant your winter cabbage family in the same bed where you grew your summer cabbage or broccoli. Foil the varmints!

I have to repeat that so much of my information has come from the Year Round Harvest Class I’m taking at Glendale, and from the book written by my teacher Linda Gilkeson, Backyard Bounty.  Do have a look at this if you are serious about vegetable growing, or want information on the many other winter food crops.

We now have seedlings of all the most popular winter crops at the nursery, if you didn’t get around to seeding your own.

female zucchini flower

The Birds, The Bees And Summer Squash

Does your zucchini look like this?

Unpollinated Zucchini Flower

Well, the birds and the bees don’t always do…….what they are meant to, and sometimes we just need to get up close and personal with our vegetables.

This is what a male flower on a zucchini or squash plant looks like:

Male Zucchini Flower

Notice that it is just a flower at the end of a stem, no fruit.

This is what a female zucchini flower looks like:

Female Zucchini Flower

Notice that behind the flower are rudimentary fruits starting. If the flower isn’t pollinated, then these wither and die off as the first picture shows.

Now, for the sensitive part: What you have to do is make these flowers come together in a mating ritual that is normally assisted by the insects and small birds, but sometimes goes awry in wet or cool weather. The secret is to peel back the petals of the male flower, and dab some of the pollen onto the center parts of the female flower. The trick seems to be that sometimes there aren’t both sexes of flower on the plant at the same time, so it helps if you have more than one plant. I have successfully pollinated more than one female flower from one male. Enough said about that!!

The flowers are only open for one day, and morning seems to be the best time. You can pollinate any flower from the same species, but not between different species.

 Does this feel weird? Absolutely. But is it worth it? Absolutely yes! I have been enjoying fruitful success in the summer squash department.  My zucchini are delicious, and will continue to produce until later in the fall, helped perhaps by Mother Nature, and me.

compost tea operation

Some Compost Tea, A Bale Of Straw, And Thou

With profound apologies to Omar Khayyam; we’ve come a long way since the 11th Century.

Compost tea and straw are elixirs for the modern gardener.  Better than that “jug of wine, a loaf of bread and thou”?  Uh, maybe not, but much appreciated by your happy plants.

Compost tea is just about the easiest thing to make; it can be as simple or as complicated as you wish to make it.  Sure, if you Google ‘compost tea’ you’ll find places to buy it, sources for expensive bubblers and aerators, and these are all wonderful no doubt.

Compost tea operation.

However, my version is just like the bag-in-a-cup way of making real tea; a shovelful of good compost in a 5 gallon bucket, fill with water (ideally rainwater, but second best is to allow the water to sit for a day or two to dissipate the chlorine, but I’ve never had the patience for that), and allow to steep for 3-5 days, stirring daily to incorporate oxygen into the brew. Any longer than that, without an aerator, there can be too many anaerobic organisms and a never-ending supply of mosquito larvae!
When ready to use, stir vigorously, muttering incantations to the moon of course, allow the solids to settle, and scoop. I keep a yogurt container handy, scoop some into my watering can, and fill the can with water.

Depending on what I’m watering, i.e. seedlings or my established perennials, I’ll dilute or not. Full strength is a real treat for shrubs and all other plants, but it can be diluted up to 1:5 ratio with water, and still be an energizing fix for the hungry plants.

To make the tea even more deluxe, you can add a few cups of alfalfa pellets, or a good slosh of liquid seaweed. The alfalfa adds nitrogen, and the seaweed contains about 60 micronutrients, beneficial fungal foods, and plant growth hormones.

Used as a foliar feed or soil drench, the tea feeds a very nutritious tonic to the plants, inoculates the soil with beneficial bacteria and fungi, and helps control plant diseases. Add the remaining sludge back to your compost to return an active community of microorganisms to the pile.  Recycling at its best.

Needless to say, there are hundreds of sources for more information, but I like this one:

http://faq.gardenweb.com/faq/lists/organic/2002082739009975.html

He claims that there are enough aerobic bacteria and fungi in a good 5 gallon batch of compost tea to equal the benefit of 10 tons, or 40 cubic yards of good compost. Well, I can’t prove him right or wrong, but it sounds good to me.

***PLEASE DO NOT LEAVE YOUR BUCKET WHERE A SMALL, CURIOUS CHILD COULD TIP INTO IT***

Every Spring, I buy myself a bale of straw. The local supplier of animal feeds and farm supplies sells bales in two sizes, and I always get a good-sized bale as I find it has many uses in the garden.

In these days of water conservation, a mulch of straw in the vegetable beds keeps the soil nicely moist and warm, and as it breaks down it provides wonderful humus and porosity to the soil.  Mulches in general protect the soil from driving rain (or sprinklers), prevent a crusting-over in the sun, and keep it from blowing away in the wind. Straw is inexpensive, widely available, and will break down over the year. Some people prefer to buy it in the fall and open it to the rain, to start the breaking down process. Certainly when it’s nicely wet it is much easier to control when spreading. In fact, even if you buy it in the spring, wet it thoroughly to facilitate spreading; it’s not possible to control the dry stuff on a windy day!

Straw mulch for the ground and containers.

By the way, don’t buy hay instead of straw, it’s full of seeds.

Many avid vegetable growers use straw as a covering for pathways between rows, blocking the sun from the nasty weed seeds, and as part of a winter mulch program along with seaweed, organic fertilizers, and lime.

By putting a generous layer of straw around my strawberry plants, the slugs seem to be discouraged, and the berries remain clean, all the better to eat while standing in the garden.

Another wonderful use of straw is in the making of Lasagna Gardens; another topic for another day…

For now, I’m off to enjoy that jug of wine and loaf of bread………some good cheese……….strawberries and raspberries from my straw-mulched beds………..

spinach bolting to seed

Are We There Yet, Is It Summer? Tomatoes Lying Down, Beans Climbing Up, And Spinach Bolting.

Wow, this sounds like a lot of action in my little corner of the garden. The last time I wrote was three weeks ago; yes we have made progress in the slow creep into summer, and finally the tomatoes and cucumbers are actually, officially planted out into the garden.

Surprisingly, the tomato plant will right itself almost before your eyes, at least by the next day, standing straight and enjoying the chance to flex its little roots into diverse territory.  Of course, before planting you had soaked the root ball and the waiting soil, right?

It’s not too late to get more tomatoes into the ground, especially all those juicy little cherries that ripen quickly.  Run out of space in your garden? Growing veggies in containers is the new black, you know, so get out those big plastic pots and fill with soil, compost, and healthy amendments such as seaweed elixir, and watch those little nuggets of flavour grow.

Remember my magnificent bean roots straight out of vermiculite? Well, look at how happy they are once planted into the soil, reaching ever skyward, twining around the poles of the teepee. (well, not quite twining yet) I put 4-6 seeds at the base of each pole, and you can see how they are already putting on good growth, just two weeks later.

Ahh, spinach, that easy crop we all love to grow from seed.  Plant in early spring before it gets too hot, right? Well, not quite that easy. Spinach (just like we do) looks forward to the lengthening hours in the day, leading up to June 21, the year’s longest day.  As the hours lengthen however, the spinach panics—“yikes, I better make my seed now, so I can reproduce my kind”. So the spinach plant does the only thing it knows how, and that is to bolt— yes, to bolt to seed. Does your spinach look like mine does?

Picking off the flowers does nothing to halt the inexorable march to the preservation of its species, so just use the crop as quickly as you can, put a tomato plant in its place, and remember to plant a fall crop of Spinach in mid-August.  How many recipes for spinach do YOU have?

Hard to believe, but once you get these crops of summer well on their way, it will be time to start seedlings for winter harvest. Check the recent blog on The Great Canadian Refrigerator, and stay tuned.

kale1

THE GREAT CANADIAN REFRIGERATOR Or Planting Now for Next Winter’s Harvest.

Growing delicious vegetables at any time is satisfying, but planting now, with the knowledge that next winter you will have food in the garden, is nothing less than thrilling.  Yes, I realize the irony of talking about next winter’s harvest when we aren’t even out of this ‘winter’ yet.

These are a few seeds you can plant between now and late June:

Purple Sprouting Broccoli should be seeded from mid to late June for harvest next spring. There are several varieties, ensuring harvests from early February all the way to late May.

Brussels Sprouts should be seeded by the end of May, or first week in June at the latest. If planted later than that, the sprouts won’t be large enough by fall, and there will be little growth during the coldest months.

Swiss Chard can be direct seeded in May, with Cabbage and Kale following in mid-June. Here is my Lacinato (Black Tuscan) Kale, planted from nursery starts late last summer.  
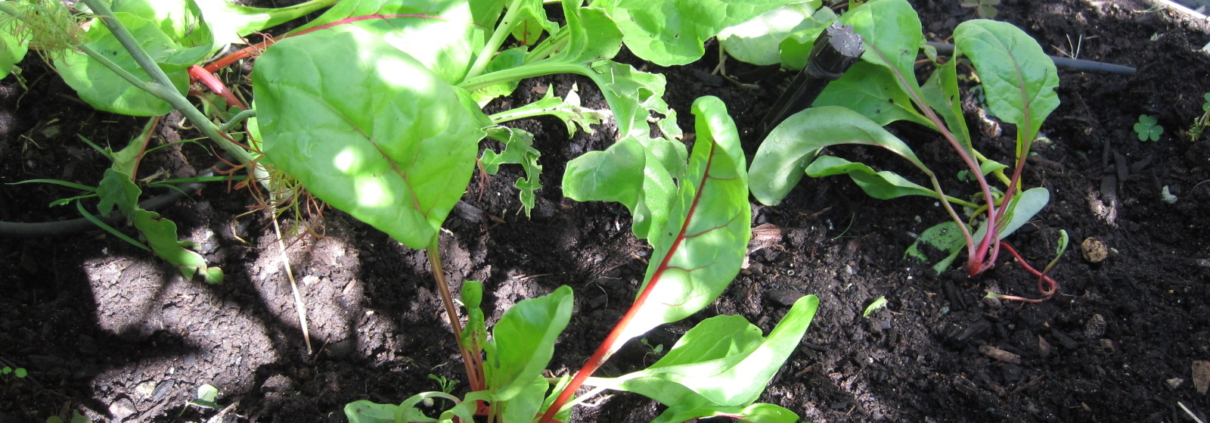
As I was a little late in planting, it didn’t do much until early this spring, but is now delicious and sweet, even raw.

Leeks for winter harvest should have been seeded in February or March (whoops, too late now), but we do sell the starts of winter-hardy leeks, which should be planted out in the garden now.

Be sure to check the variety when buying seeds, some are meant for winter harvest and some are just not hardy. Ideally, winter vegetables should be almost fully grown by Halloween if you expect to harvest in the coldest months. These winter veggies are always more delicious after being kissed by frost, so don’t worry about the cold.

The whole idea of growing vegetables to harvest in winter or early spring is a vast subject; we are fortunate to have not only West Coast Seeds, but Linda Gilkeson’s book Backyard Bounty for everything you need to know to be successful, and truly turn your garden into The Great Canadian Refrigerator.

basil starts in jiffy pelle

Potting On The Tomato And Basil Seedlings

First published May 8, 2011 – It’s early May, and the tomatoes are now well established in the seeding trays, ready to move into larger pots.

They have been ready to move for at least three weeks now, but it’s funny how bad weather outside makes one not believe the reality that spring is coming, and even some indoor garden chores get neglected.

Tomato seedlings on right were moved out to greenhouse earlier than the ones on the left.

Most of the tomatoes have remained in the laundry room under the lights until now. However, this does make them lanky and weak. The one variety that I did move out to the greenhouse earlier looks shorter and stronger than the ones in the house. As this was my first try at “tough love” with the seedlings, I was hesitant to move all of them out at once.

This is my main lesson learned this spring—pot the seedlings on earlier; get them into real soil as soon as possible, where they will grow sturdy and strong.

I started some of the tomatoes and all of the basil in the Jiffy Pellets, as mentioned in my blog on April 3.  The basil is better than previous crops; it has remained short and healthy, not leggy. I think the mix in the Jiffy Pellets may be well suited to its needs. They too are ready for larger pots and real soil.

Basil starts in Jiffy pellets.

The tomatoes grown in the Jiffy Pellets seem to have a smaller root mass than those started in starter mix, yet the tops are significantly bigger. This was a surprise. The clean and easy process of growing in these pellets may well make the slower root growth worth it, but the final product is all that matters, so I’ll let you know.

Remember, each time you pot your tomatoes up to a larger pot, strip off lower leaves and bury the plant a little deeper.  The soil mix for the 4” pot stage can be just sterilized potting soil, but Linda’s book Backyard Bounty gives a recipe you can make yourself; 1 part each finished compost (either home-grown or purchased), perlite or vermiculite, coir or peat, and the best garden soil you have; (home-grown or purchased). I must confess that the mix I used was simply the Growell bagged garden soil we sell at the nursery, amended liberally with the seed starting mix, which is primarily the other ingredients anyway.  I will fertilize weekly, alternating half strength solutions of liquid seaweed with liquid fish.

Don’t be too eager to move your newly potted seedlings outside, they must be hardened off slowly; bringing them in each night until the minimum temperature is reliably 12 degrees or above. This year, it may be July!!!  An unheated greenhouse or cold frame is the best place for them now,  but be careful to leave the door open when (or if!) there is any sun, it can very quickly get too hot. Plants need to get used to sunshine and wind just as much as they need to get used to the cold.

It’s still too cold outside for the basil, so while they will benefit from the better soil and more room in a 4” pot, keep them inside under the lights until it warms up and eventually pot them up into larger containers; I find basil just doesn’t do well in the ground.

Around the May long weekend, or early June this year, the tomatoes should be tough enough to be planted outside; I’ll write more about this later, but you want to get them as big and strong as possible before this move.

For those looking for seedlings to purchase, now is a good time to buy them in 4” pots or the 6 pack, and follow the potting up routine above.  Summer will come, even if late, and you don’t want to miss those juicy red fruits along with basil, good bread, balsamic……….

Yummmmm.

pea seedlings in trench

Peas In Particular


I really put a lot into the carton, too many it seems, however, they all rooted just fine.

It’s a beautiful sunny day, April 8. The peas started in vermiculite are now in the ground, germinated and well-rooted.

I will never again plant peas into cold soil and wait, and wait and wait for them to emerge. Usually one third rot in the cold wet ground, another third get eaten by slugs, and we wax eloquent over the few remaining peas that we thoroughly enjoy in summer.

My pea shoots in just 10 days. I had no idea they put down such a deep tap root.

Following the suggestion by Linda Gilkeson, mentioned in my last blog about planting seeds, I germinated the peas in vermiculite, starting on March 28. I moved the milk cartons outside a few days ago just to harden them off a little bit, and today simply pulled each little stem out; the vermiculite doesn’t grab onto the delicate root hairs so there was no resistance and no damage to the roots.

The picture below shows the amazing root system formed in only 10 days, in my warm laundry room.

I then simply dug a shallow trench at the base of my bamboo trellis in one of the raised beds, lay the seedlings in the trench, covered them with soil and watered them in, leaving only about half an inch of green shoot showing above ground.

I planted them so the green shoots were just above the soil surface.

Since we actually had frost last night, I did put a little plastic shelter over them, as well as I could, given that they are planted at the base of the trellis. I also put some netting on the other side to keep the birds and squirrels away. Not a lot of effort, and a whole lot better germination than ever before; they are off to a very good start in life.

Peas have been in my garden for years, they are a mainstay, except for last year when the first crop rotted and the second crop was eaten by critters (birds? squirrels?).  But there have never ever been enough; maybe this is the year.

Is there any crop more delectable than fresh peas eaten outside while standing in the garden? If so, I’m not sure I’ve tried it.  Looks like it will be a good year for my peas, and perhaps for the first time, I’ll even have enough to cook a few.

seeds in trays

Seeding Vegetables For Summer Harvest

Why is there so much fuss about seeding? Is it rocket science? Seeds have been grown since the beginning of time, yet we all dither and wring our hands about “is it time?” I have come to the conclusion that all one really needs is the West Coast Seed Catalogue, and Linda Gilkeson’s book Backyard Bounty .

Of course there are many other seed companies, and many delectable varieties only available from obscure sources, but you get my gist.

My honourable co-worker Lynne has stated the obvious, it’s still too cold and wet outside to direct seed, but in our short growing season most things seem to do better if started indoors anyway.

It’s April 2, and pouring rain. Music playing, and a cup of tea in hand, I seeded part of my summer crop today, in my dining room.

I’m learning so much in Linda’s class at Glendale, and one of the most surprising things is that while seeds need the heat to germinate, the seedlings actually grow more dense and bushy if grown on at cooler temperatures.   So once a crop is up and off to a good start, it’s time to start hardening off, weather permitting. An unheated greenhouse or cold frame is the best place to start.  At first, I was hauling all the trays in every night, but that was too much effort; I now give “tough love” to all my seed babies; they are now sleeping in the greenhouse at night.

For the potting medium I use a starter mix such as ‘Islands Finest Starter Mix’. (Confession: I do not sterilize my seeding trays. I do blast them clean outside with the hose, however.)

So far I’ve got beets, leeks, spinach and lettuce seedlings in the greenhouse, and today planted the warmer weather plants.

Seeds in trays.

Tomatoes and basil are in the Jiffy Starter Trays from the nursery, this is a clean and complete way to start. Since the actual planting holes are quite small, it works well for my system of potting on into 4”, then larger pots. By late May my basil and tomato plants are in the greenhouse with large root masses, ready for their final transplant.

The Lemon Cucumber seeds go into larger pots or trays with huge planting holes, as cucumbers resent root disturbance, yet need to wait for the warmer weather.

Linda sent along her great idea for pea germination in her “Linda’s List” email, (which anyone can register for on her website) that is to start them in milk cartons with vermiculite for the planting medium.

Peas (germinating) in vermiculite.

It’s easy to remove the seedlings from the vermiculite without root damage, and they will be off to a good start when I plant them outside, probably within a week or two. It’s just for germination, remember. I’ll recycle the vermiculite in my container plantings, as it lightens the soil and retains moisture.

I love to grow seeds for friends, nurturing them (the seeds, not the friends) until ready to plant outside. I plant way too many seeds and love every tiny one of them.

Let me know how yours are doing— any tips?

Leeks in snow

Long Standing Leeks

During the big snowfall in February, I harvested my leeks.  I can’t believe I’m saying this! I harvested my own leeks, with a foot of snow on the ground. What a marvelous crop this is, growing steadfastly through last year’s cool spring, brief summer heat, autumn rains and two snow storms.  So when I say ‘long standing’ leek, I mean that literally.  I planted leek starters from the nursery last spring. I put them in front of my climbing roses, since I have limited areas of sun and must use all available real estate in the pursuit of more food in the garden.

Leeks are also heavy feeders and need good drainage, so the rose bed seemed a perfect spot with its frequent amendments of manure, compost, and organic fertilizer blends.  I was lucky that the deer didn’t bother them on their way to the rose course, but I’m advised that leeks are often on their menu, so protection may be needed if deer graze your garden.

Visually the combination was very pretty, since I have a row of Stipa tenuissima along the driveway edge, falling in blowsy soft billows, then the erect 2’ stems of strappy green leek, and then the roses climbing on the fence.  Growing veggies amongst ornamentals is a feast for the eyes as well as a delicious way to enjoy fresh, home-grown food.

Don’t believe what they say about leeks needing a trench to form the white stems, I just planted at ground level, and they had lovely firm and clean necks, tall and sturdy. This year I’ll plant seeds rather than nursery starts, for more variety and lots more plants; there are so many recipes I want to try.

In Linda’s book she mentions some varieties that are hardy for winter; one is Bandit. For summer harvest Varna is the variety to start now; it is not winter hardy.  Both are from West Coast Seeds, available at the nursery.  I’ll plant them this week, indoors. I have a simple grow light suspended in my laundry room, and now is the time to start my crops for summer and next winter.

I can almost smell that Leek and Potato soup simmering on the stove…