Tag Archive for: Winter Veggies

Winter veg bed

What to Do Now with Winter Veggie Beds?

By Faye

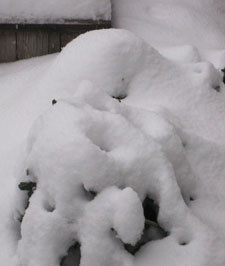
If you, like me, are admiring your nicely established winter crops in the garden, then it’s worth the little bit of time it takes now to make sure everything stays healthy throughout the cold season. Mulching and some staking are needed to protect winter crops from the elements.   It’s been a while since we’ve seen snow, but who knows what this winter will bring. Read on for details…

Winter rains are a welcome sight as our parched ground absorbs the needed moisture, but pounding rains are hard on the soil. Protecting the soil from erosion and leeching is very simple; just add a 6” top dressing of fluffy autumn leaves. This also prevents the splash-up of soil onto your plants, helping to keep them disease-free, in addition to giving some protection from slugs.

purple-sprouting-broccoli-snow

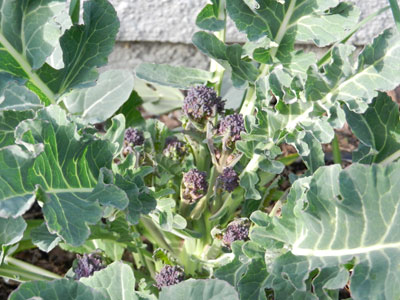
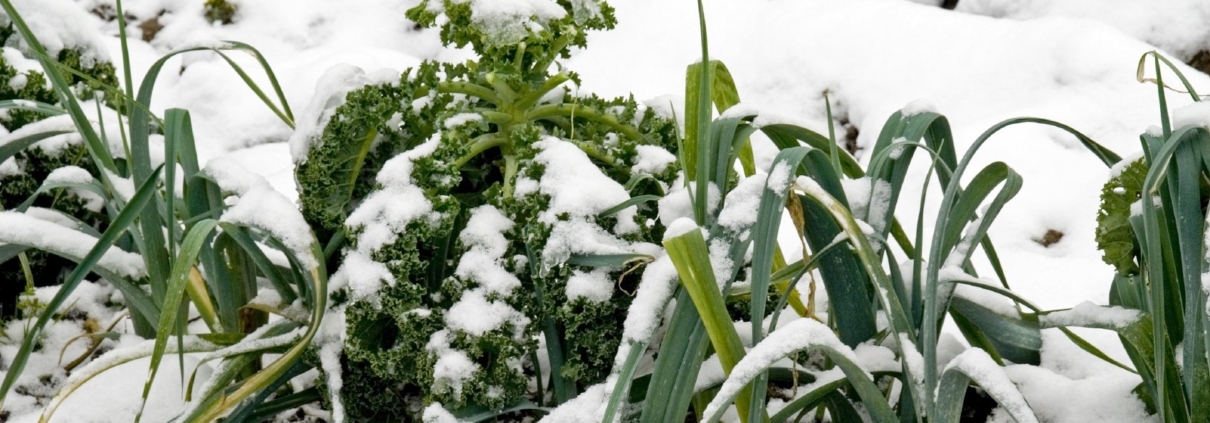
Purple sprouting broccoli is tough but it would be flattened if not staked

Don’t waste your compost; leave it in the bin, covered and relatively dry, to await spring warmth which is the wake-up call to the micro-organisms to start their work of digesting the organic waste, converting it to usable plant food. Spreading it on the garden in fall results in its goodness being leeched out and washed away in the rain.

Stake your brassicas. While kale and other brassicas are very hardy, they do tend to be brittle, while purple sprouting broccoli and Brussels sprouts are top heavy. A very sad sight is a tall vegetable toppled over in the wind, when it’s so easy to protect with a sturdy stake or two.

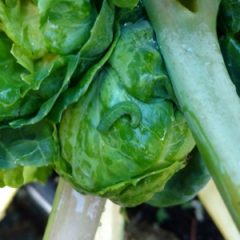
Watch out for caterpillars (still!) I neglected to net my Brussels sprouts with ProTekNet, and you can see the results here, the fat cabbage worm has been feasting. If you haven’t done so already (ideally in September), be sure to pinch out the top cluster of leaves, stimulating formation of the sprouts all along the stem. Leave the plants in the ground, and harvest sprouts as needed after frost, when they will be at their sweetest.

cabbage-worm-on-b-sprouts

Cabbage worm feasting!

Protect your shoulders. There is nothing better than pulling fresh carrots and beets during the winter, but if the shoulders get frozen they can turn to mush. When cold weather arrives, having a few inches of leaves in the bed will insulate the roots, and when it does get below freezing it’s easy enough to pull the leaves up and over the shoulders of the vegetables, especially the cylindrical beets which tend to push themselves up and out of the ground.

Stockpile mulches. Gather as many leaves as you possibly can; rake your own, take bags from the road side, do what you can to have a vast supply. Keep some for next summer in a plastic bag to keep them dry, adding to the compost alternately with layers of green. Put some in bins to decompose into leaf mold, truly black gold.

Lime the empty beds so they will be ready to plant by spring. While this can wait until spring, why not get it started now? Keep track of what beds you lime, and when; this needs doing only once a year, and never in beds that will be used for strawberries or potatoes.

Spinach and Chard have softer leaves, and can do with some winter protection during heavy rains and colder weather. I grow both in the greenhouse, but a tunnel or cold frame give protection from harsh conditions.

Plant garlic. Fall is the best time to plant garlic so the roots are well established for bulb growth in the spring.

Sit back and let Mother Nature do your watering, but keep an eye out for critter predation, slug damage, and extremes of temperature. Eat your veggies!
purple sprouting broccoli

Heads Up, It’s Time To Think About Winter Veggies

By Faye

How strange to be writing an article about growing vegetables in winter in the same newsletter as one on pruning tomatoes, but the reality is that now is definitely the time to start planning what, where and when to grow. Read on…

Definition of Winter Vegetable Gardening:
When we talk about growing vegetables in winter, we don’t mean planting in winter, we mean planting in the summer, and eating in the fall, winter or early spring. There are two types of winter gardening:

Summer planting, fall and winter harvest.
Such crops as kale, chard, carrots, beets, parsnips, lettuce, arugula, leeks and salad greens can be enjoyed all summer with harvests continuing during the winter. Root veggies are perfectly happy to stay in the ground until early next spring, and such things as kale, corn salad (Mache) and Brussels sprouts are even sweeter after having been kissed by frost. Brussels sprouts seeded now will be ready by fall, but only if you get the seeds in very soon.

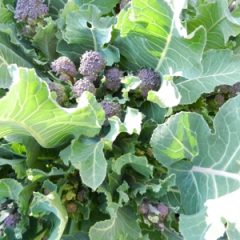
Purple Sprouting Broccoli Ready to Harvest

Purple Sprouting Broccoli Ready to Harvest

Summer planting, spring harvest.
The most important overwintered crop is Purple Sprouting Broccoli, a true biennial, which needs winter cold to finish its life cycle in the spring. Its delicious side shoots are actually its attempt to make flowers and set seed, but as long as we keep harvesting, we can prolong the life of the plant until March or April, after which it is time to let it properly go to flower and finish.

Technically all of the brassicas, leeks, carrots and beets are biennials too, but we normally harvest them before this final stage of their life.

Spinach is really in a class of its own, but the main harvest is in the spring so I will include it here. Spinach bolts to seed with long daylight hours or with extreme heat. That is why it’s so hard to grow a long crop of spinach in the spring, as it will always bolt by May or June, no matter how healthy it is. Having tried many times, my best success was to plant in September, keep it in the greenhouse (or coldframe) all winter, and wait for the explosion of gorgeous green growth in the spring. I’ll never grow spinach any other way now.

Are there pests to look out for?
Unfortunately, there are serious pests that can frustrate even the most dedicated gardener. Mainly there is the Carrot Rust Fly and the Imported Cabbageworm; both of which can be kept at bay with ProtekNet, a very fine mesh netting that excludes these critters from laying their eggs on our crops. Slugs can be a problem in wet winters, but they are easily controlled.

Starting your winter crops in summer gives them time to become full sized plants by Halloween, which gives them the strength to withstand the challenges of winter and reward you with the most delicious food you have ever tasted. Winter vegs starts are available in early August, but if you prefer to grow from seed, it’s time to start some of them. Check out Linda Gilkeson’s Planting Guide

Harvesting all year is a luxury that we on the west coast are fortunate to have, so we need to get growing!

If you are serious about growing your own vegetables, then Linda Gilkesen’s web site and books are great resources. Even if you are more experienced, have a look at her latest publication, a magazine style update on newly discovered pests with practical advice on dealing with our new climate realities. All of Linda’s books are available at the nursery.


comparison of tomatos

How Not to Kill your Seedlings

By Faye

Killing your seedlings is easy, but so is growing them to become strong and vibrant young plants!

Whether you sow your own seeds or buy starts from the nursery, your seedlings will go through a vulnerable stage of babyhood, when you must meet their every need. Some simple guidelines and lessons learned along the way:

*Use a sterilized soilless seed starting mix when sowing seeds.

* Seeds need heat, seedlings need light. A heat mat and grow lights will be the single most effective investment you can make if you really want to get into seeding. Once the seeds germinate, keep light about an inch above the seedlings, and only turned on for 12-16 hours a day.

* Don’t over crowd. Use scissors to snip off excess seedlings if they are too close to separate.

* Once they have 2 sets of true leaves, start to fertilize. Use a weak solution of liquid fish or seaweed.

* Always water from the bottom. Your seeds will have been sown into a tray or cell-packs with drainage. Put these into a non-draining tray, add water to bottom tray, removing excess water after half an hour or so. Watering the top of the soil encourages damping off, a fatal fungal disease of seedlings. Watering from below also encourages roots to grow downward seeking moisture.
If you want to be extra kind, water with room-temperature saved rainwater or de-chlorinate your tap water by leaving it sitting out for a day or so before using.

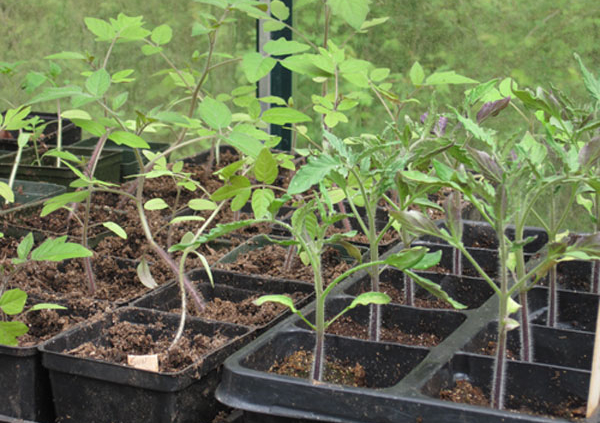
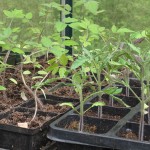
Tomato seedlings on right were moved out to greenhouse earlier than the ones on the left.

* Pot on! Don’t allow roots to become over crowded and tangled, move plants up to 4” pots. Hot-weather crops like tomatoes, eggplant and peppers will need to be started early yet moved to successively larger pots before planting out.

* Grasp by leaves only. Seedling stems are very fragile and easily damaged. If you need to separate seedlings that have been grown together in trays, tease roots apart gently with fork or fingers.

* Label everything! You think you will remember which flat is which, but you won’t. Trust me.

* Pinch back. When plants are 3-4” tall, with 2 or 3 sets of true leaves, nip out the top leaves to encourage branching, more flowers and fruit. Technical bit: plant hormone AUXIN is in terminal (end) bud, and causes vertical growth but suppresses side growth, so you want to interrupt this cycle. Don’t pinch back tomatoes!

* Rough ‘em up. Brush your hands gently over the tops of the little plants; this toughens up the cells and prepares them for the great outdoors.

* Harden off. Very important, the little plants need to be gradually acclimated to cold, wind, rain, sun. Direct sun can burn leaves if not properly hardened off.
Give them partial days in dappled shade, bring in for the night, gradually expose to more weather and more sun. A coldframe or cool greenhouse makes this transition easier, but be careful on sunny days.

* Leaving the nest. When it’s time to move the seedlings to the garden, be wary of critters; slugs love the tender young shoots. Safer’s Slug Bait is my best defense, along with rabbit fencing of course. Checking after dark sometimes uncovers cutworms too, be vigilant.

* Label everything! Did I mention this already? Knowing the variety and date you planted is helpful when planning next year’s crops. Many good growers maintain a notebook listing plants, date seeded, when planted out, and result.

* Enjoy the harvest!! You’ll be glad you got your babies off to a good start, and they will thank you with delicious produce.