Tag Archive for: seeds

comparison of tomatos

How Not to Kill your Seedlings

By Faye

Killing your seedlings is easy, but so is growing them to become strong and vibrant young plants!

Whether you sow your own seeds or buy starts from the nursery, your seedlings will go through a vulnerable stage of babyhood, when you must meet their every need. Some simple guidelines and lessons learned along the way:

*Use a sterilized soilless seed starting mix when sowing seeds.

* Seeds need heat, seedlings need light. A heat mat and grow lights will be the single most effective investment you can make if you really want to get into seeding. Once the seeds germinate, keep light about an inch above the seedlings, and only turned on for 12-16 hours a day.

* Don’t over crowd. Use scissors to snip off excess seedlings if they are too close to separate.

* Once they have 2 sets of true leaves, start to fertilize. Use a weak solution of liquid fish or seaweed.

* Always water from the bottom. Your seeds will have been sown into a tray or cell-packs with drainage. Put these into a non-draining tray, add water to bottom tray, removing excess water after half an hour or so. Watering the top of the soil encourages damping off, a fatal fungal disease of seedlings. Watering from below also encourages roots to grow downward seeking moisture.
If you want to be extra kind, water with room-temperature saved rainwater or de-chlorinate your tap water by leaving it sitting out for a day or so before using.

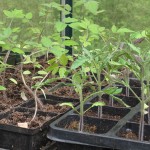
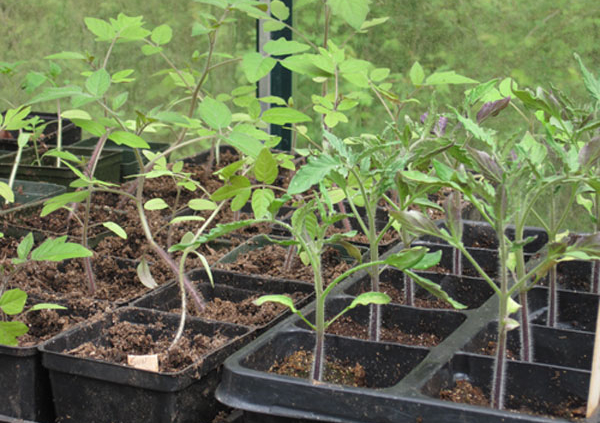
Tomato seedlings on right were moved out to greenhouse earlier than the ones on the left.

* Pot on! Don’t allow roots to become over crowded and tangled, move plants up to 4” pots. Hot-weather crops like tomatoes, eggplant and peppers will need to be started early yet moved to successively larger pots before planting out.

* Grasp by leaves only. Seedling stems are very fragile and easily damaged. If you need to separate seedlings that have been grown together in trays, tease roots apart gently with fork or fingers.

* Label everything! You think you will remember which flat is which, but you won’t. Trust me.

* Pinch back. When plants are 3-4” tall, with 2 or 3 sets of true leaves, nip out the top leaves to encourage branching, more flowers and fruit. Technical bit: plant hormone AUXIN is in terminal (end) bud, and causes vertical growth but suppresses side growth, so you want to interrupt this cycle. Don’t pinch back tomatoes!

* Rough ‘em up. Brush your hands gently over the tops of the little plants; this toughens up the cells and prepares them for the great outdoors.

* Harden off. Very important, the little plants need to be gradually acclimated to cold, wind, rain, sun. Direct sun can burn leaves if not properly hardened off.
Give them partial days in dappled shade, bring in for the night, gradually expose to more weather and more sun. A coldframe or cool greenhouse makes this transition easier, but be careful on sunny days.
* Leaving the nest. When it’s time to move the seedlings to the garden, be wary of critters; slugs love the tender young shoots. Safer’s Slug Bait is my best defense, along with rabbit fencing of course. Checking after dark sometimes uncovers cutworms too, be vigilant.

* Label everything! Did I mention this already? Knowing the variety and date you planted is helpful when planning next year’s crops. Many good growers maintain a notebook listing plants, date seeded, when planted out, and result.

* Enjoy the harvest!! You’ll be glad you got your babies off to a good start, and they will thank you with delicious produce.
Peas

PEAS TO PERFECTION

By Faye

Few garden crops rival the perfection of crisp peas in late spring. Getting them started early is the secret, as they prefer to grow in cooler temperatures.

Read in “Peas in Particular” to see a foolproof way to beat cold weather, critters, and rot.
Since writing that article a few years ago, I have become more sophisticated and now use well-draining trays for my damp vermiculite instead of milk cartons, on a heat mat with grow lights suspended from the ceiling; faster and easier, in limited space. I currently let them get to about 4” tall before planting outside, as the starch is used up from the seed, and the varmints aren’t so interested in this ‘food source’. I am careful to harden them off before moving them out to the cold.

Don’t have a heat mat and grow light? Peas aren’t fussy, they are fine at room temperature, but will be slower. Once germinated, they don’t need heat, so a cool greenhouse, sunroom or even outside in a spot protected from weather and predation is fine. At this stage bright light is paramount.

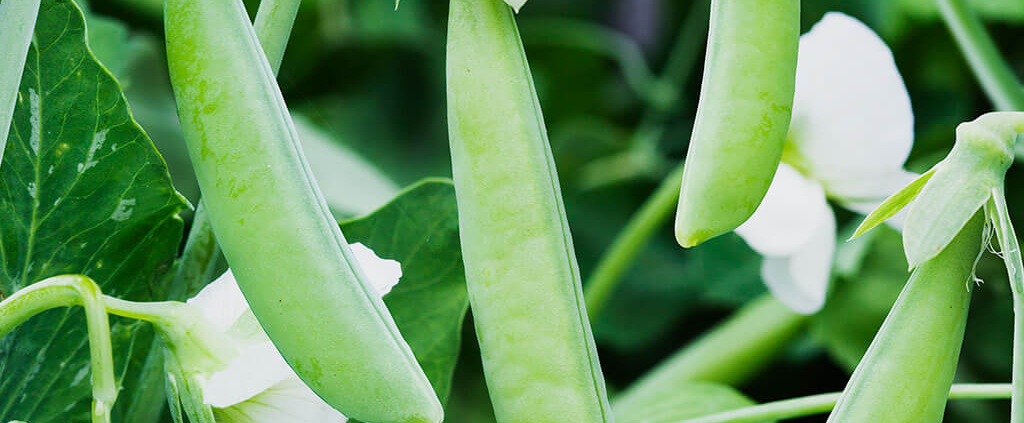
We are often asked “What is the difference between Snap peas and Snow peas?” It’s hard to remember which is the flat one and which is the one with peas in it? The way I remember is that snow lies flat on the ground, and Snow peas are the flat edible pods. Snap peas, aka Sugar Snap, have fully formed peas inside. Both kinds have edible pods, ‘mangetout’ or ‘eat it all’.

Dwarf Peas

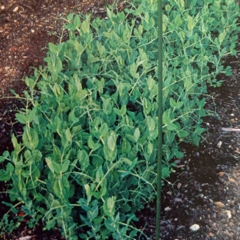
While I’ve always grown both Tall Telephone and Sugar Snap Pole (in the ground at home, and in large pots with bamboo poles at the nursery), another option is to grow dwarf peas, not needing a trellis. Allegedly they produce more peas per square foot, and would be ideal for smaller gardens, patios and balconies.
Plant them in a block, not in rows, so you can just reach down into the branches and harvest.

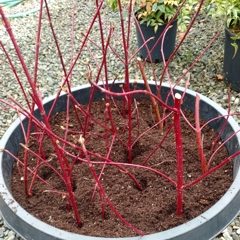
Cornus twigs for pea support

I’m trying Little Marvel at the nursery in a large pot, planted densely all over the soil, with pretty red Cornus twigs to give them something to climb on. Come and check out their progress!

Some of the many good varieties of dwarf peas are: Sugar Ann, Little Marvel, Sugar Lace II, Lincoln Homesteader, Dwarf Grey Sugar.

Whichever pea variety you love best, no one will ever have to remind you to “Eat your peas!”

fresh new beans in August 6 scaled

The Magical Bean

By Faye

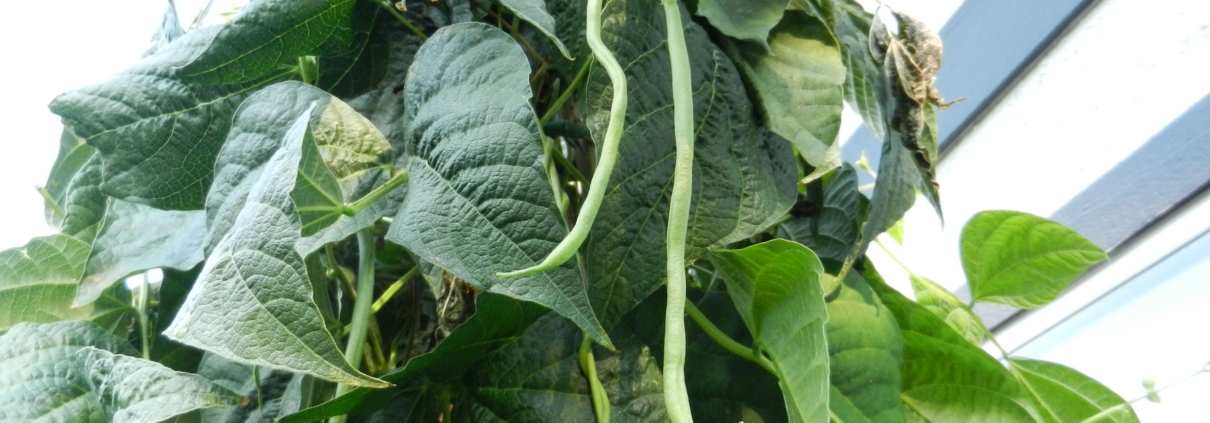
Fortex beans in August

Fortex beans in August

For the snap and crunch of a perfect green bean, nothing comes close to the bean you grow yourself. Those hollow, stringy supermarket beans should be banned!

Beans are one of the easiest vegetables to grow; the perfect crop for a beginner. They even make their own fertilizer! Beans are legumes, and all legumes convert nitrogen found in the air to a usable form, evident by small white nodules on their roots.  Legumes have a relationship with Rhizobia bacteria in the soil, which enables the nitrogen-fixing process. All they ask is regular moisture, warm sunshine, and a moderate amount of organic material in the soil. Don’t add manure, and don’t over fertilize. Excessive nitrogen in the soil will produce a large plant with poor pod set and delayed maturity. A bean crop that has lots of flowers but few pods may have a zinc deficiency, which can be remedied by foliar feeding with liquid seaweed. Because beans have a relatively light nutrient demand on the soil, crop rotation for fertility needs is less important than for some other crops. They grow happily with other veggies except for onions, which they dislike.

Scarlet Runner Bean root after 1 week

Scarlet Runner Bean root after 1 week

PLANTING:  Warmth is essential for germination; cold soil will result in rot and sporadic germination, so wait until at least mid-May if direct-sowing.  For this reason, pre-sprouting in a warm room in damp vermiculite has been my habit for both peas and beans, using a well-draining tray and dense sowing of seeds. They root in less than a week, with 100% germination and no critter predation. Harden off, and plant outside when weather permits.

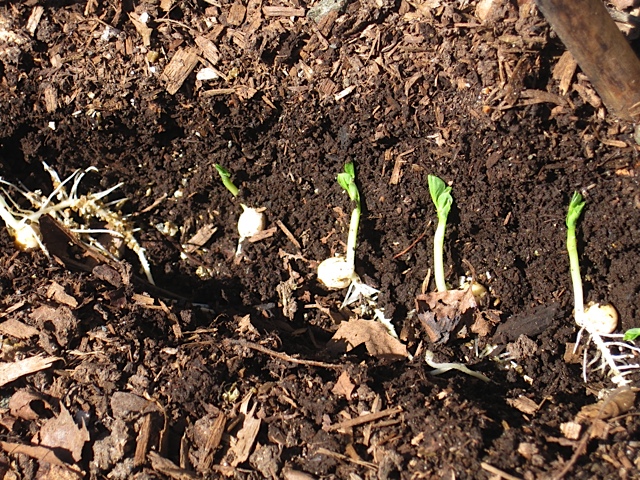
Talk about the magic of the bean; look at those roots!

The vision of a bean seed’s emerging root at one end, and a leaf at the other end, is surely one of gardening’s wonders, and reason enough to try the vermiculite.

BEANS FOR EVERY GARDEN

POLE BEANS:

*Indeterminate: Will need tall poles to climb around.
*Produce over a longer period, yielding more beans in a smaller area.
*Can be grown in a large container, but keeping soil adequately moist can be difficult. Smaller yield.
*If using a ‘teepee’ of poles, plant 5-6 beans at each pole base.
*Limited sun? ‘Purple Peacock’ is a variety suitable for cooler areas with less than full sun.
*Pick often, don’t let the pods get old, tough and lumpy. Eat while young and tender. Once pods get full and start to ripen off, the plant shuts down production to make seed.

BUSH BEANS:

*Determinate, usually about 2 ½ feet tall.
*Produce a large crop quickly, within a couple of weeks or so.
*Successive sowing from mid-May to late June, every 2-3 weeks, will provide a longer yield.

Runner Beans germinating in vermiculite

Runner Beans germinating in vermiculite

SCARLET RUNNER BEANS:

*Botanically distinct from Bush and Pole beans. While all beans are legumes, these belong to a different species.
*Pollinated by bees and hummingbirds, a bonus! Other beans are self-fertile.
*Prefer cool summer weather, needing more moisture and cool roots.

BROAD BEANS:

*Shelling bean.
*Plant in October for early spring eating, or in February/March for summer eating.
*Allow bean to fill out and harden in the pod, then shell when dry.

SOYA BEAN:

*Edamame, the best known soya bean, has been cultivated in China and Korea since 5000 BC, and is now a staple in Japanese cuisine.
*Not suitable for containers.
*Never soak the seed before planting.
*Must be cooked, and pod not edible.

Whether eaten raw or cooked, the green bean has earned a place of honour at our summer table. For its high nutritional kick, beauty in the garden and ease of growing, this magical bean deserves a star.


purple sprouting broccoli

Harvesting In Early Spring

Growing our own vegetables has become a passion. Who knew that the third millennium AD would find city people going back to the earth in droves, growing food in back yards? Way back in the olden days we thought it would bring only high tech, and cars that flew.  Well, it did bring much of this, but for a variety of reasons people are searching for safer, more nutritious food and the best place to start is in our own gardens.

One of the best ways to do this is to make your garden work all year long, not just in the summer. This past winter has seen more nutrition grown in my back yard than ever before. Winter? Yes, winter.

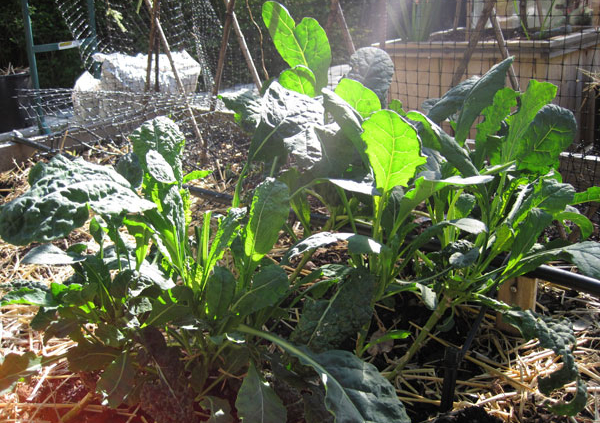
I’ve had chard, spinach, kale and purple sprouting broccoli to pick for months now. We finished the leeks in January. I showed you pictures of my winter crops during the snowfall in January, and harvest time is now at its peak. This is what my chard plants looked like just before the warmer days arrived.

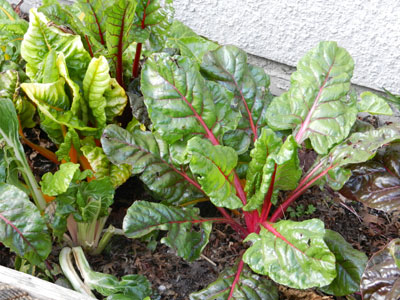
Chard before spring burst of growth

Chard is almost a full year delicacy, as it can be planted now, eaten all summer, then go through the winter and give one final burst of growth before starting all over again next year with fresh plants. It’s now bigger and lush; I just keep cutting leaves off the outside, allowing the central new growth to put on size.

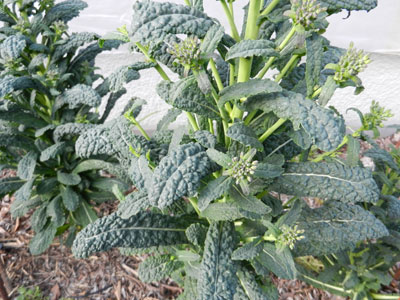
Kale was enjoyed all winter, and with the coming of spring it started forming flowers, leading of course to seed. The flowers are incredibly attractive to beneficial insects, so I’ll let some of them open up, but most are being harvested and given a light steaming……delicious!

Kale starting to flower

I usually grow Lacinato Kale, the black crinkly leaves being very nutritious and yummy as well. Did you know that Lacinato Kale is the original precursor to all of the cabbages? I have found many excellent recipes using kale, and this year I’ll grow other varieties as well.

I sowed spinach seed in September in a large plastic pot, and put the pot in my greenhouse just to see how they did there. I do keep the greenhouse just above freezing, since I store my Aeoniums in there for the winter, and they cannot tolerate frost. The spinach seeds kind of languished, as they were planted too late to show any growth before winter set in. However, as soon as the days started lengthening in February I noticed that the spinach was putting forth luscious growth of tender succulent leaves, and now I pick it weekly. This year I’ll start earlier and have a proper crop. One thing to know about spinach is that it sets seed according to day length, so no matter what you do it will bolt to seed in June.  This is another reason to grow it in the fall and winter.

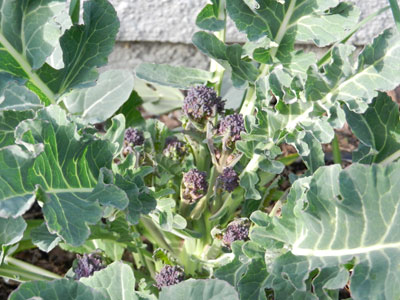
Purple sprouting broccoli is an amazing plant. It’s a biennial, meaning that it starts growing one year, overwinters, then produces and goes to seed in the second year. We plant this in August, ensuring that it’s pretty much full size by Halloween; then it quietly overwinters. Some time in March it starts producing small purple broccoli heads along the sides of its main stem and all along side branches, and continues abundantly until about June, by which time you have had more than your fill of this health-giving vegetable. Like peas, it’s really good eaten raw, standing in the garden with a bit of mud on your boots!

Purple sprouting broccoli

But try steaming it like you do with regular broccoli; a little butter, salt and pepper, or lemon…..personally, I love it with a bit of Japanese seaweed paste…….divine. Yes, you do pick the sprouts when small; as with most garden veggies, small is good. Size matters.

While my picture, taken in March, is rather puny, apparently this wonderful crop will be waist-high by the time it’s finished. Wow!

Now that I have enjoyed the delightful and delicious crops grown during the winter months, I will never ever be without them.  I don’t have a lot of sunny real estate in my garden for veggie growing, so I have to make the most of what I have. One of the best ways is to make the garden produce crops all year, not just in the summer. Try it, and I promise you that you’ll never regret it, and never go back to summer-only harvests.

Note: for more complete information on growing winter vegetables, or any vegetables any time, check out Linda Gilkeson’s book Back Yard Bounty.

kale1

THE GREAT CANADIAN REFRIGERATOR Or Planting Now for Next Winter’s Harvest.

Growing delicious vegetables at any time is satisfying, but planting now, with the knowledge that next winter you will have food in the garden, is nothing less than thrilling.  Yes, I realize the irony of talking about next winter’s harvest when we aren’t even out of this ‘winter’ yet.

These are a few seeds you can plant between now and late June:

Purple Sprouting Broccoli should be seeded from mid to late June for harvest next spring. There are several varieties, ensuring harvests from early February all the way to late May.

Brussels Sprouts should be seeded by the end of May, or first week in June at the latest. If planted later than that, the sprouts won’t be large enough by fall, and there will be little growth during the coldest months.

Swiss Chard can be direct seeded in May, with Cabbage and Kale following in mid-June. Here is my Lacinato (Black Tuscan) Kale, planted from nursery starts late last summer.  As I was a little late in planting, it didn’t do much until early this spring, but is now delicious and sweet, even raw.
Leeks for winter harvest should have been seeded in February or March (whoops, too late now), but we do sell the starts of winter-hardy leeks, which should be planted out in the garden now.

Be sure to check the variety when buying seeds, some are meant for winter harvest and some are just not hardy. Ideally, winter vegetables should be almost fully grown by Halloween if you expect to harvest in the coldest months. These winter veggies are always more delicious after being kissed by frost, so don’t worry about the cold.

The whole idea of growing vegetables to harvest in winter or early spring is a vast subject; we are fortunate to have not only West Coast Seeds, but Linda Gilkeson’s book Backyard Bounty for everything you need to know to be successful, and truly turn your garden into The Great Canadian Refrigerator.

pea seedlings in trench

Peas In Particular


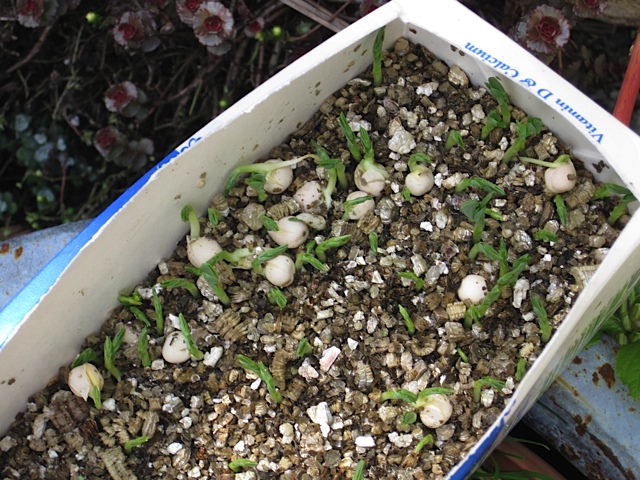
I really put a lot into the carton, too many it seems, however, they all rooted just fine.

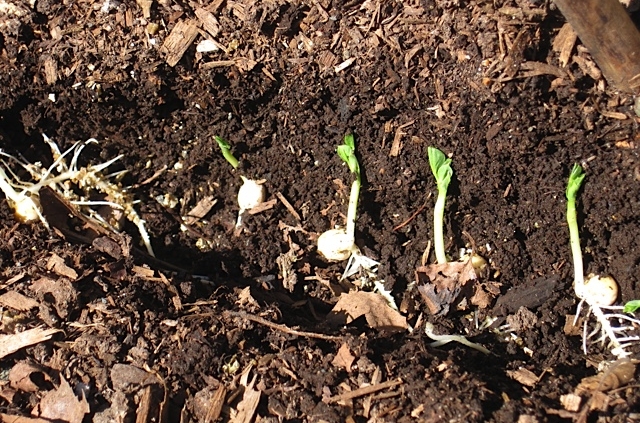
It’s a beautiful sunny day, April 8. The peas started in vermiculite are now in the ground, germinated and well-rooted.

I will never again plant peas into cold soil and wait, and wait and wait for them to emerge. Usually one third rot in the cold wet ground, another third get eaten by slugs, and we wax eloquent over the few remaining peas that we thoroughly enjoy in summer.

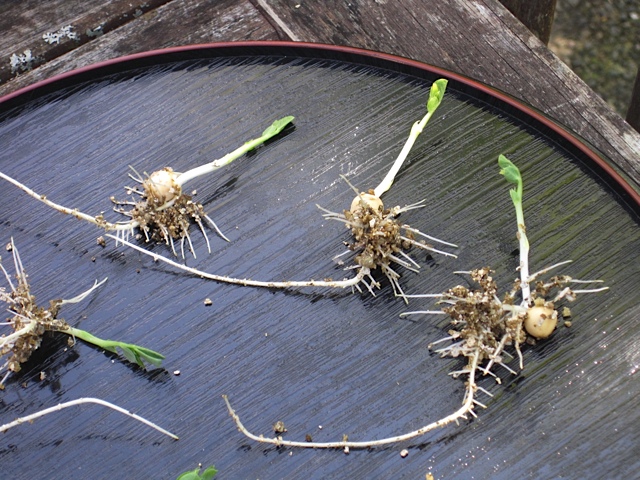
My pea shoots in just 10 days. I had no idea they put down such a deep tap root.

Following the suggestion by Linda Gilkeson, mentioned in my last blog about planting seeds, I germinated the peas in vermiculite, starting on March 28. I moved the milk cartons outside a few days ago just to harden them off a little bit, and today simply pulled each little stem out; the vermiculite doesn’t grab onto the delicate root hairs so there was no resistance and no damage to the roots.

The picture below shows the amazing root system formed in only 10 days, in my warm laundry room.

I then simply dug a shallow trench at the base of my bamboo trellis in one of the raised beds, lay the seedlings in the trench, covered them with soil and watered them in, leaving only about half an inch of green shoot showing above ground.

I planted them so the green shoots were just above the soil surface.

Since we actually had frost last night, I did put a little plastic shelter over them, as well as I could, given that they are planted at the base of the trellis. I also put some netting on the other side to keep the birds and squirrels away. Not a lot of effort, and a whole lot better germination than ever before; they are off to a very good start in life.

Peas have been in my garden for years, they are a mainstay, except for last year when the first crop rotted and the second crop was eaten by critters (birds? squirrels?).  But there have never ever been enough; maybe this is the year.

Is there any crop more delectable than fresh peas eaten outside while standing in the garden? If so, I’m not sure I’ve tried it.  Looks like it will be a good year for my peas, and perhaps for the first time, I’ll even have enough to cook a few.

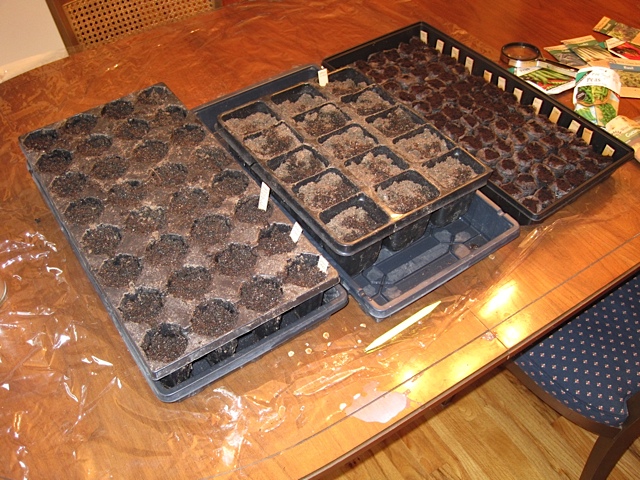
seeds in trays

Seeding Vegetables For Summer Harvest

Why is there so much fuss about seeding? Is it rocket science? Seeds have been grown since the beginning of time, yet we all dither and wring our hands about “is it time?” I have come to the conclusion that all one really needs is the West Coast Seed Catalogue, and Linda Gilkeson’s book Backyard Bounty .

Of course there are many other seed companies, and many delectable varieties only available from obscure sources, but you get my gist.

My honourable co-worker Lynne has stated the obvious, it’s still too cold and wet outside to direct seed, but in our short growing season most things seem to do better if started indoors anyway.

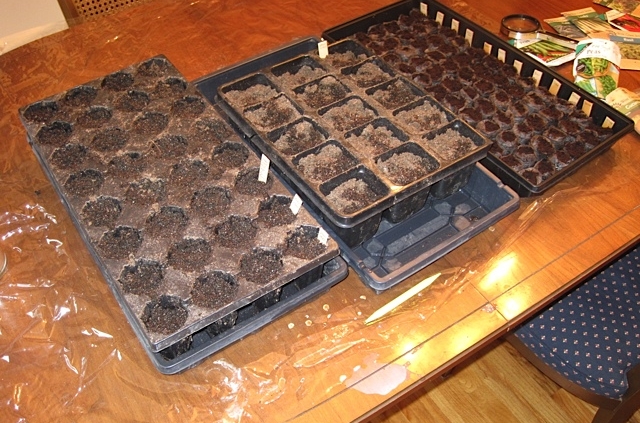
It’s April 2, and pouring rain. Music playing, and a cup of tea in hand, I seeded part of my summer crop today, in my dining room.

I’m learning so much in Linda’s class at Glendale, and one of the most surprising things is that while seeds need the heat to germinate, the seedlings actually grow more dense and bushy if grown on at cooler temperatures.   So once a crop is up and off to a good start, it’s time to start hardening off, weather permitting. An unheated greenhouse or cold frame is the best place to start.  At first, I was hauling all the trays in every night, but that was too much effort; I now give “tough love” to all my seed babies; they are now sleeping in the greenhouse at night.

For the potting medium I use a starter mix such as ‘Islands Finest Starter Mix’. (Confession: I do not sterilize my seeding trays. I do blast them clean outside with the hose, however.)

So far I’ve got beets, leeks, spinach and lettuce seedlings in the greenhouse, and today planted the warmer weather plants.

Seeds in trays.

Tomatoes and basil are in the Jiffy Starter Trays from the nursery, this is a clean and complete way to start. Since the actual planting holes are quite small, it works well for my system of potting on into 4”, then larger pots. By late May my basil and tomato plants are in the greenhouse with large root masses, ready for their final transplant.

The Lemon Cucumber seeds go into larger pots or trays with huge planting holes, as cucumbers resent root disturbance, yet need to wait for the warmer weather.

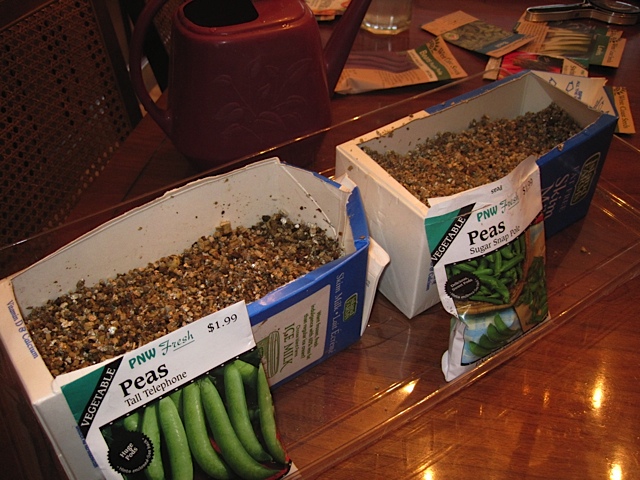
Linda sent along her great idea for pea germination in her “Linda’s List” email, (which anyone can register for on her website) that is to start them in milk cartons with vermiculite for the planting medium.

Peas (germinating) in vermiculite.

It’s easy to remove the seedlings from the vermiculite without root damage, and they will be off to a good start when I plant them outside, probably within a week or two. It’s just for germination, remember. I’ll recycle the vermiculite in my container plantings, as it lightens the soil and retains moisture.

I love to grow seeds for friends, nurturing them (the seeds, not the friends) until ready to plant outside. I plant way too many seeds and love every tiny one of them.

Let me know how yours are doing— any tips?

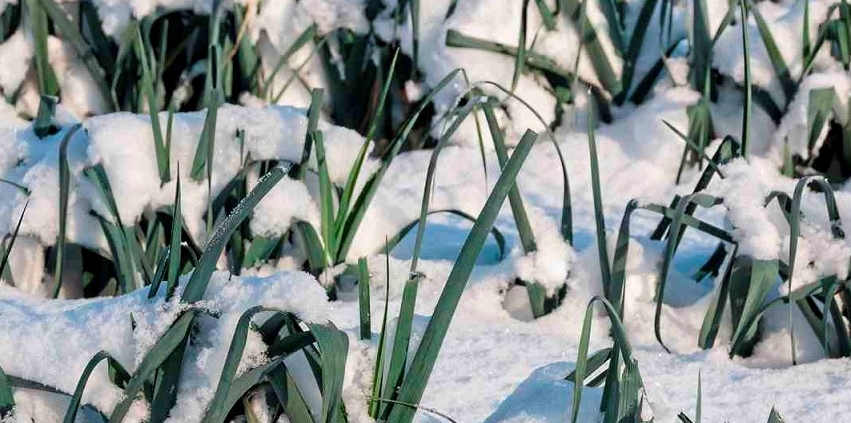
Leeks in snow

Long Standing Leeks

During the big snowfall in February, I harvested my leeks.  I can’t believe I’m saying this! I harvested my own leeks, with a foot of snow on the ground. What a marvelous crop this is, growing steadfastly through last year’s cool spring, brief summer heat, autumn rains and two snow storms.  So when I say ‘long standing’ leek, I mean that literally.  I planted leek starters from the nursery last spring. I put them in front of my climbing roses, since I have limited areas of sun and must use all available real estate in the pursuit of more food in the garden.

Leeks are also heavy feeders and need good drainage, so the rose bed seemed a perfect spot with its frequent amendments of manure, compost, and organic fertilizer blends.  I was lucky that the deer didn’t bother them on their way to the rose course, but I’m advised that leeks are often on their menu, so protection may be needed if deer graze your garden.

Visually the combination was very pretty, since I have a row of Stipa tenuissima along the driveway edge, falling in blowsy soft billows, then the erect 2’ stems of strappy green leek, and then the roses climbing on the fence.  Growing veggies amongst ornamentals is a feast for the eyes as well as a delicious way to enjoy fresh, home-grown food.

Don’t believe what they say about leeks needing a trench to form the white stems, I just planted at ground level, and they had lovely firm and clean necks, tall and sturdy. This year I’ll plant seeds rather than nursery starts, for more variety and lots more plants; there are so many recipes I want to try.

In Linda’s book she mentions some varieties that are hardy for winter; one is Bandit. For summer harvest Varna is the variety to start now; it is not winter hardy.  Both are from West Coast Seeds, available at the nursery.  I’ll plant them this week, indoors. I have a simple grow light suspended in my laundry room, and now is the time to start my crops for summer and next winter.

I can almost smell that Leek and Potato soup simmering on the stove…

seedysat2011briannicole

Seedy Saturday in Victoria

Nicole

This year was Victoria’s 18th annual Seedy Saturday and my 2nd. Upon entering the Conference Centre there was an unmistakable buzz in the air, and it wasn’t the mason bees getting ready to burst forth from their cocoons. It was the people: the volunteers, the vendors and the public. Everyone was excited to be there, and people were lined up out the door. There were so many vendors with a plethora of amazing products from seeds and bees to asparagus and Jujube trees, something for everyone.

One thing I noticed more than anything else was the sharing of information.

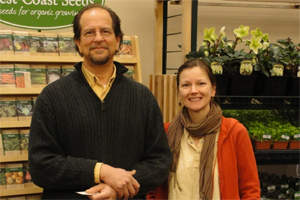
Nicole and Brian at Seedy Saturday

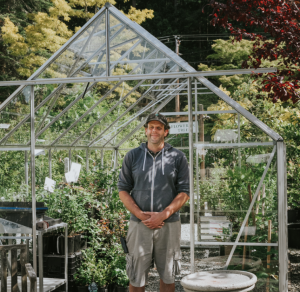
This open friendly sharing of knowledge is one of the major reasons I decided to stay in Victoria. I’ve never seen or felt a sense of competition, only witnessed everyone wanting success for everyone else.  And that’s what I saw at Seedy Saturday, a group of like-minded people striving to connect to the earth in whatever way they could and wanting to pass that connection on to others.

Seedy Saturday is a fun and important gathering that gets everyone excited and supports a growing movement to a better more sustainable way of living.