Tag Archive for: tomatoes

comparison of tomatos

How Not to Kill your Seedlings

By Faye

Killing your seedlings is easy, but so is growing them to become strong and vibrant young plants!

Whether you sow your own seeds or buy starts from the nursery, your seedlings will go through a vulnerable stage of babyhood, when you must meet their every need. Some simple guidelines and lessons learned along the way:

*Use a sterilized soilless seed starting mix when sowing seeds.

* Seeds need heat, seedlings need light. A heat mat and grow lights will be the single most effective investment you can make if you really want to get into seeding. Once the seeds germinate, keep light about an inch above the seedlings, and only turned on for 12-16 hours a day.

* Don’t over crowd. Use scissors to snip off excess seedlings if they are too close to separate.

* Once they have 2 sets of true leaves, start to fertilize. Use a weak solution of liquid fish or seaweed.

* Always water from the bottom. Your seeds will have been sown into a tray or cell-packs with drainage. Put these into a non-draining tray, add water to bottom tray, removing excess water after half an hour or so. Watering the top of the soil encourages damping off, a fatal fungal disease of seedlings. Watering from below also encourages roots to grow downward seeking moisture.
If you want to be extra kind, water with room-temperature saved rainwater or de-chlorinate your tap water by leaving it sitting out for a day or so before using.

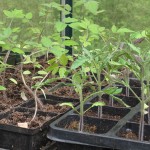
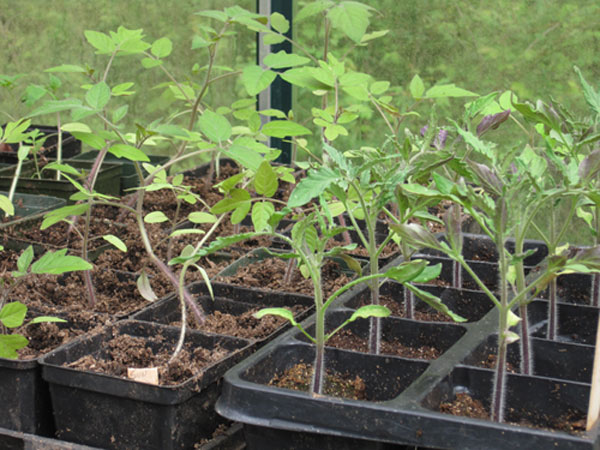
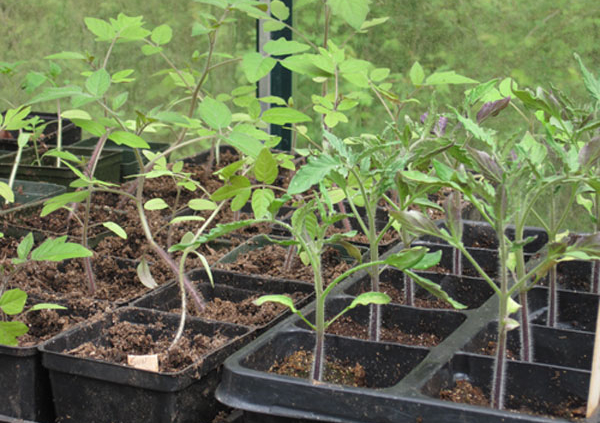
Tomato seedlings on right were moved out to greenhouse earlier than the ones on the left.

* Pot on! Don’t allow roots to become over crowded and tangled, move plants up to 4” pots. Hot-weather crops like tomatoes, eggplant and peppers will need to be started early yet moved to successively larger pots before planting out.

* Grasp by leaves only. Seedling stems are very fragile and easily damaged. If you need to separate seedlings that have been grown together in trays, tease roots apart gently with fork or fingers.

* Label everything! You think you will remember which flat is which, but you won’t. Trust me.

* Pinch back. When plants are 3-4” tall, with 2 or 3 sets of true leaves, nip out the top leaves to encourage branching, more flowers and fruit. Technical bit: plant hormone AUXIN is in terminal (end) bud, and causes vertical growth but suppresses side growth, so you want to interrupt this cycle. Don’t pinch back tomatoes!

* Rough ‘em up. Brush your hands gently over the tops of the little plants; this toughens up the cells and prepares them for the great outdoors.

* Harden off. Very important, the little plants need to be gradually acclimated to cold, wind, rain, sun. Direct sun can burn leaves if not properly hardened off.
Give them partial days in dappled shade, bring in for the night, gradually expose to more weather and more sun. A coldframe or cool greenhouse makes this transition easier, but be careful on sunny days.
* Leaving the nest. When it’s time to move the seedlings to the garden, be wary of critters; slugs love the tender young shoots. Safer’s Slug Bait is my best defense, along with rabbit fencing of course. Checking after dark sometimes uncovers cutworms too, be vigilant.

* Label everything! Did I mention this already? Knowing the variety and date you planted is helpful when planning next year’s crops. Many good growers maintain a notebook listing plants, date seeded, when planted out, and result.

* Enjoy the harvest!! You’ll be glad you got your babies off to a good start, and they will thank you with delicious produce.
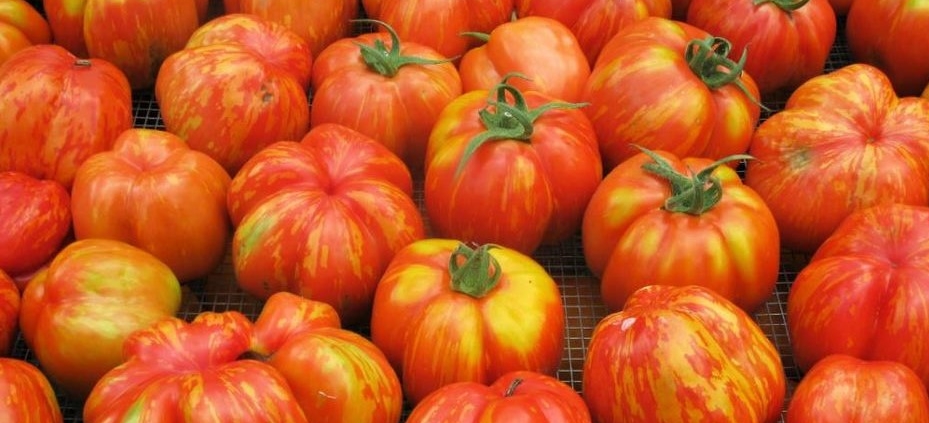
Striped Cavern tomato

Stuffed Tomatoes – Using Striped Cavern Heirlooms

These tomatoes are particularly suited to stuffing; they are large, hollow, and contain few seeds or pulp, with firm ‘walls’.

6 Italian sausages, meat taken out of the casings

1 cup cooked rice, or quinoa, bulgur, or any grain of choice

3 green onions, chopped

1 cup grated zucchini

lots of garlic and fresh basil, chopped

salt and pepper to taste

Cook and stir the above until sausage meat is no longer pink. Drain off any excess liquid.

Cut tops off the tomatoes. This is probably enough for about 8 tomatoes, but depends on the size, of course. Stuff them fully, then top with grated cheddar or any cheese you like. Consider this more of a guideline than a recipe, just add whatever suits your taste.

Bake at 400 degrees for 30 minutes.

After cooling, they freeze well, and are a welcome treat in the winter months.

Vegetarian? Check the internet for dozens of great recipes.

Enjoy!


Cherry Tomatoes With Pasta and Fresh Basil


1 ½ – 2 pounds fresh, ripe cherry tomatoes, halved (can squeeze out some of the juice if they are watery)

4 garlic cloves, minced

½ cup fresh French bread crumbs

½ cup freshly grated Parmigiano Reggiano

salt and pepper to taste

¼ cup olive oil

penne pasta, or fusilli, or farfallini etc

½ cup finely chopped fresh basil


Preheat oven to 400 degrees. Put the tomato halves in a large baking dish that can be brought to the table.

In a small bowl, combine garlic, bread crumbs, cheese, and s&p.

Spoon evenly over the tomatoes. Spoon the olive oil evenly over the mixture.

Roast the tomatoes for 30-35 minutes, or until the mixture is bubbly, browned, and slightly thickened.

In a large pot of boiling, salted water, cook pasta til al dente. Drain well.

Add the pasta to the tomato mixture in the baking dish.

Add the basil and toss to combine. Serve immediately, with more parmesan if desired.


Banana Potato

Tomatoes, Potatoes and Blight

I know, you aren’t ready to hear about end-of-season gardening yet; the summer has only recently started, hasn’t it? However, the calendar says otherwise; September is here, and we actually had a little sprinkling of wet stuff the other day. ‘Tis the season to worry about late blight in the tomato garden, and if you grow potatoes now is the time to be concerned about next year’s crop as well.  Sigh.

 Yes, potatoes can be a source of late blight for tomatoes, and any innocent potato left in the ground after harvest can be the source of doom for next year.  Potatoes are closely related to tomatoes, and they actually can be carriers of the blight so feared by tomato growers here on the wet west coast, as they are even more susceptible than tomatoes.  The official name for this fatal disease is Phytophthera infestans, a fancy name to describe a rapid collapse and rot of the entire plant, so fast that the first blotches on the stems and leaves precede the demise of fruit so fast that no tomatoes can be saved. The risk is in leaving any potatoes not dug; the blight survives in living tissue, so if you find volunteer potatoes growing in the spring, remove and garbage just in case. I know, this is hard to do; any volunteer vegetable feels like a freebie.

Wrapped For Warmth

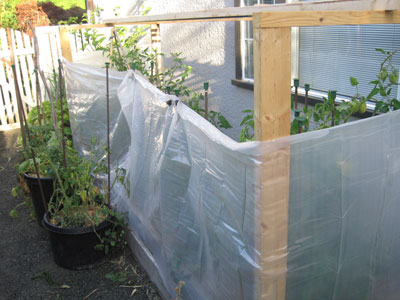
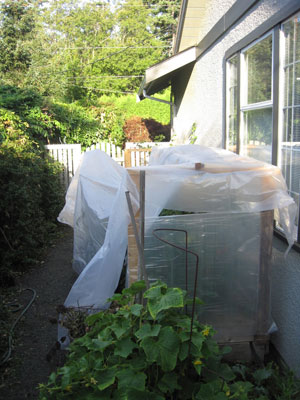
The very best way to prevent late blight from attacking your tomatoes is to keep the foliage dry at all times.  My tomatoes are grown in a raised bed, so it was easy to build a shelter around the tomato bed to keep warmth in, using a plastic ground sheet from the paint store.  For these dewy nights, I cover the top as well, removing the roof in the morning, unless rain is threatening.  Ventilation is critical; don’t create a steamy sauna in there! If the top is covered, open up some of the sides when you can.

All Covered Up For The Rain

This time of year it’s all about ripening the tomatoes that have already formed; by now you should have cut off any flowers and excess leaves, and topped the vining plants.  Withholding water helps the fruit ripen as well, as the plant gets a little stressed at the idea of not reproducing its seed, and ripens to ensure the continuity of its species.  Don’t tell the plants that their seed may not be used for this purpose!

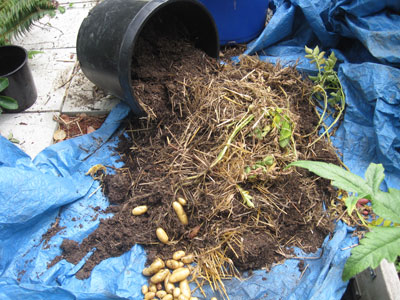
Enough about the worries, and more about what worked! This was my first year of growing potatoes, and I’ll never again be without them.  As sunny, well-drained sites are in short supply in my garden, I planted potatoes in huge pots or bins, whatever I had on hand.  Harvest time was simple; just dump out the pots and add the soil to any beds where there won’t be potatoes or tomatoes for 4 years. I’ll write more about growing these marvelous little nuggets next spring when the seed potatoes are at the nursery.

Here is Harvest Day in Faye’s Potato Patch:

Bucket Growing Potatoes Dumped Out

So what worked in your tomato garden this year? What ripened, and what didn’t?

My first blog was all about what to grow in case we had a cold and wet spring and summer. Well, was I prescient or what?  Following my own advice, I grew only tomatoes that ripen quickly, and have been relatively successful. My Siletz are ripening, although the very best for early ripening and excellent flavour have been Enchantment.  These seeds aren’t widely available here, but worthy of a search when you are poring over seed catalogues in the coming winter. Sun Gold is another one that has ripened well.  I’d love to hear about your successes, and failures too.

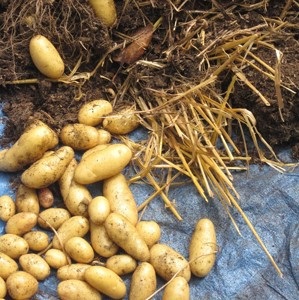
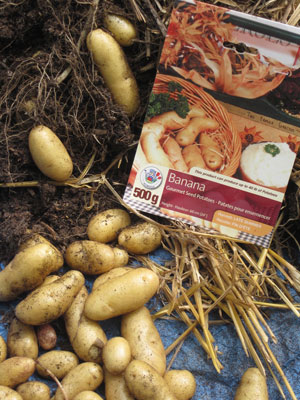
Harvest Of ‘Banana’ Potatoes

As you enjoy the bounty of autumn, make notes on what has worked for you; varieties, conditions, placement for crop rotation, and important dates of planting and harvest. If you don’t have a garden journal, there is no better time to start one than today.  OK, remembering to write in it is another matter, maybe I’ll do a blog on that subject!

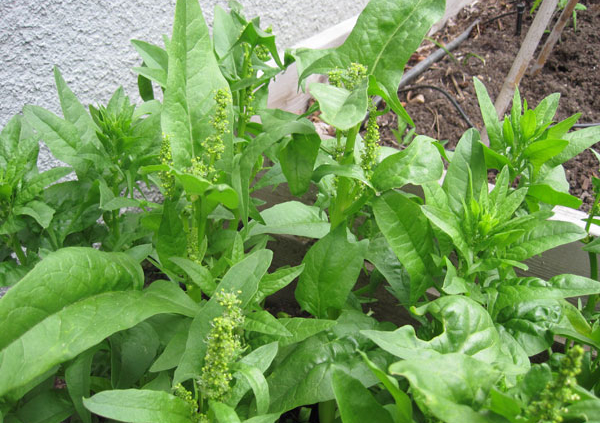
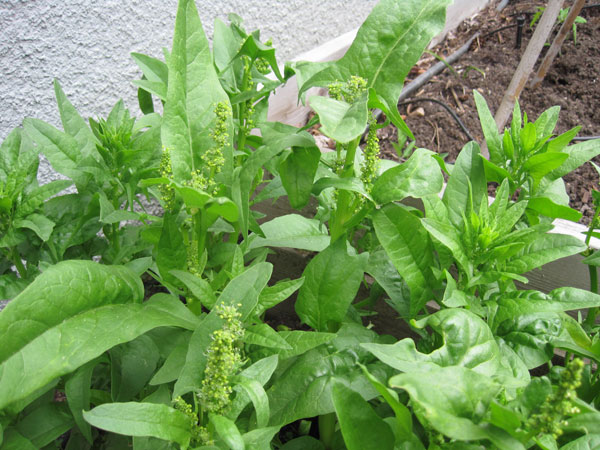
spinach bolting to seed

Are We There Yet, Is It Summer? Tomatoes Lying Down, Beans Climbing Up, And Spinach Bolting.

Wow, this sounds like a lot of action in my little corner of the garden. The last time I wrote was three weeks ago; yes we have made progress in the slow creep into summer, and finally the tomatoes and cucumbers are actually, officially planted out into the garden.

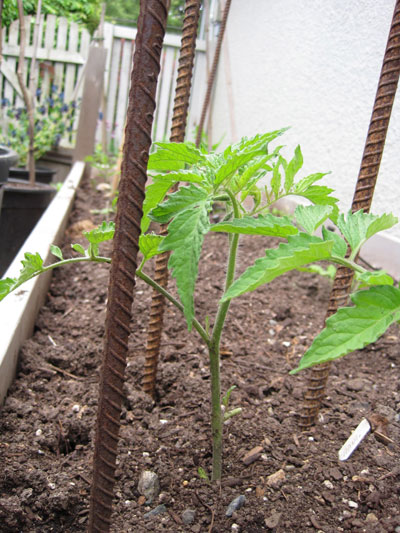
Surprisingly, the tomato plant will right itself almost before your eyes, at least by the next day, standing straight and enjoying the chance to flex its little roots into diverse territory.  Of course, before planting you had soaked the root ball and the waiting soil, right?

It’s not too late to get more tomatoes into the ground, especially all those juicy little cherries that ripen quickly.  Run out of space in your garden? Growing veggies in containers is the new black, you know, so get out those big plastic pots and fill with soil, compost, and healthy amendments such as seaweed elixir, and watch those little nuggets of flavour grow.

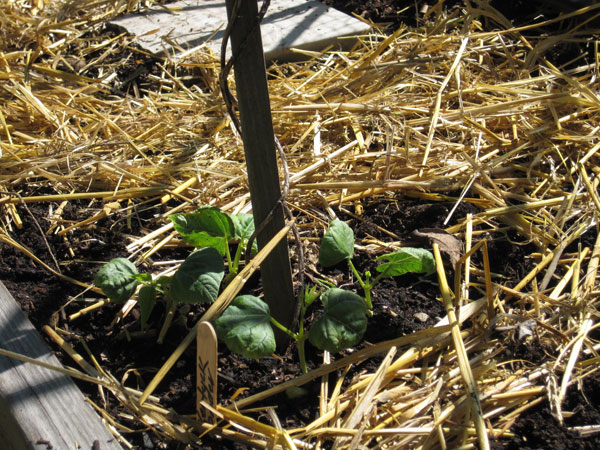
Remember my magnificent bean roots straight out of vermiculite? Well, look at how happy they are once planted into the soil, reaching ever skyward, twining around the poles of the teepee. (well, not quite twining yet) I put 4-6 seeds at the base of each pole, and you can see how they are already putting on good growth, just two weeks later.

Ahh, spinach, that easy crop we all love to grow from seed.  Plant in early spring before it gets too hot, right? Well, not quite that easy. Spinach (just like we do) looks forward to the lengthening hours in the day, leading up to June 21, the year’s longest day.  As the hours lengthen however, the spinach panics—“yikes, I better make my seed now, so I can reproduce my kind”. So the spinach plant does the only thing it knows how, and that is to bolt— yes, to bolt to seed. Does your spinach look like mine does?

Picking off the flowers does nothing to halt the inexorable march to the preservation of its species, so just use the crop as quickly as you can, put a tomato plant in its place, and remember to plant a fall crop of Spinach in mid-August.  How many recipes for spinach do YOU have?

Hard to believe, but once you get these crops of summer well on their way, it will be time to start seedlings for winter harvest. Check the recent blog on The Great Canadian Refrigerator, and stay tuned.

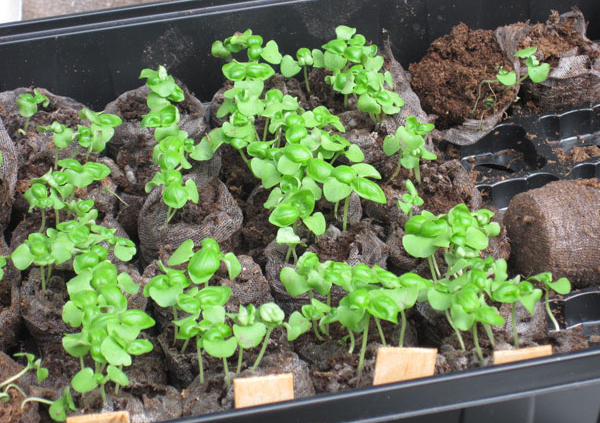
basil starts in jiffy pelle

Potting On The Tomato And Basil Seedlings

First published May 8, 2011 – It’s early May, and the tomatoes are now well established in the seeding trays, ready to move into larger pots.

They have been ready to move for at least three weeks now, but it’s funny how bad weather outside makes one not believe the reality that spring is coming, and even some indoor garden chores get neglected.

Tomato seedlings on right were moved out to greenhouse earlier than the ones on the left.

Most of the tomatoes have remained in the laundry room under the lights until now. However, this does make them lanky and weak. The one variety that I did move out to the greenhouse earlier looks shorter and stronger than the ones in the house. As this was my first try at “tough love” with the seedlings, I was hesitant to move all of them out at once.

This is my main lesson learned this spring—pot the seedlings on earlier; get them into real soil as soon as possible, where they will grow sturdy and strong.

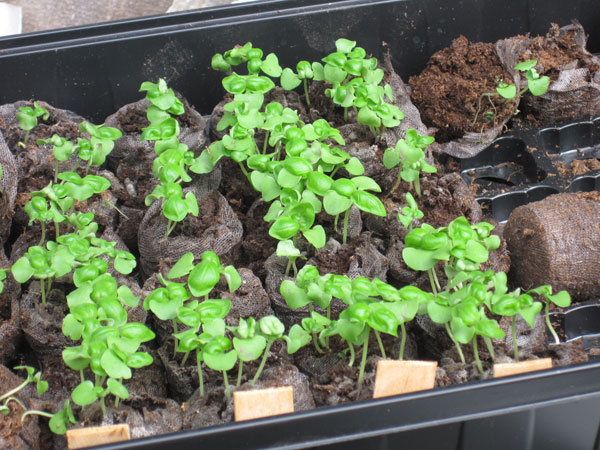
I started some of the tomatoes and all of the basil in the Jiffy Pellets, as mentioned in my blog on April 3.  The basil is better than previous crops; it has remained short and healthy, not leggy. I think the mix in the Jiffy Pellets may be well suited to its needs. They too are ready for larger pots and real soil.

Basil starts in Jiffy pellets.

The tomatoes grown in the Jiffy Pellets seem to have a smaller root mass than those started in starter mix, yet the tops are significantly bigger. This was a surprise. The clean and easy process of growing in these pellets may well make the slower root growth worth it, but the final product is all that matters, so I’ll let you know.

Remember, each time you pot your tomatoes up to a larger pot, strip off lower leaves and bury the plant a little deeper.  The soil mix for the 4” pot stage can be just sterilized potting soil, but Linda’s book Backyard Bounty gives a recipe you can make yourself; 1 part each finished compost (either home-grown or purchased), perlite or vermiculite, coir or peat, and the best garden soil you have; (home-grown or purchased). I must confess that the mix I used was simply the Growell bagged garden soil we sell at the nursery, amended liberally with the seed starting mix, which is primarily the other ingredients anyway.  I will fertilize weekly, alternating half strength solutions of liquid seaweed with liquid fish.

Don’t be too eager to move your newly potted seedlings outside, they must be hardened off slowly; bringing them in each night until the minimum temperature is reliably 12 degrees or above. This year, it may be July!!!  An unheated greenhouse or cold frame is the best place for them now,  but be careful to leave the door open when (or if!) there is any sun, it can very quickly get too hot. Plants need to get used to sunshine and wind just as much as they need to get used to the cold.

It’s still too cold outside for the basil, so while they will benefit from the better soil and more room in a 4” pot, keep them inside under the lights until it warms up and eventually pot them up into larger containers; I find basil just doesn’t do well in the ground.

Around the May long weekend, or early June this year, the tomatoes should be tough enough to be planted outside; I’ll write more about this later, but you want to get them as big and strong as possible before this move.

For those looking for seedlings to purchase, now is a good time to buy them in 4” pots or the 6 pack, and follow the potting up routine above.  Summer will come, even if late, and you don’t want to miss those juicy red fruits along with basil, good bread, balsamic……….

Yummmmm.

Principe Borghese tomato

Veggies For A Cool Summer aka Hedging Your Bets In The Vegetable Garden

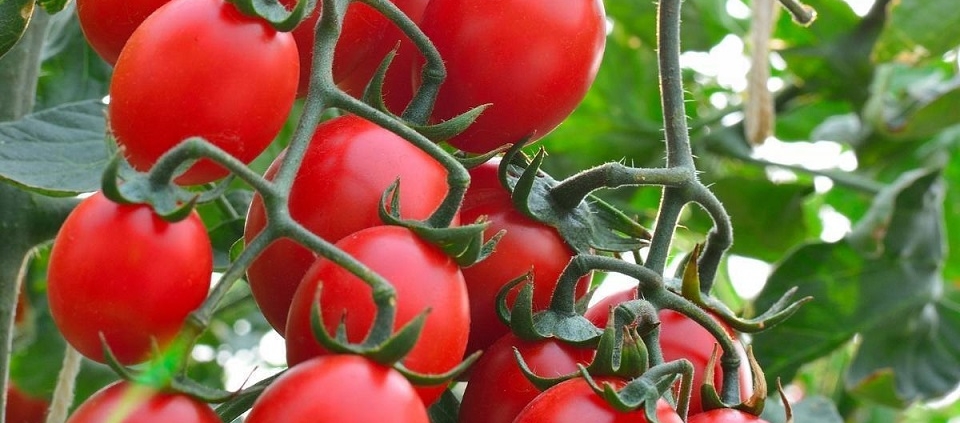
Tomatoes for bad weather: For many years I called myself a vegetable gardener, when in reality I was just a tomato grower. Oh, I’d put in a few peas and maybe a few lettuce starts, but mostly I grew tomatoes. Summers came and went, and it was just by luck that the tomato varieties I chose were the ones that didn’t mind cooler temperatures. Siletz was my default ‘regular’ tomato for slicing, and Principe Borghese was my favourite cherry tomato. Both early varieties, as it happens. I was happy.  Tomatoes ripened, and friends and family enjoyed the fruits of my labour.

‘Principe Borghese’ tomatoes

Over the years I became more sophisticated and chose some pretty fancy tomatoes, including San Marzano, Black Krim, Brandywine, which turn out to be all heat lovers. Some years they flourished and other years they barely ripened.

You may remember last year with its long, cold and wet spring, followed by a pretty dismal summer. Then came September, normally a fine ripening month for tomatoes; it shuddered by in a blur of rain and cold. Green tomatoes languished on the vines. The gardening season ended, not happily.

Without a crystal ball to show the weather for the coming spring and summer I’ll still plant some exotic varieties, but I’ll also be sure to have a good supply of Siletz, Early Girl, and Oregon Spring. For cherries I won’t be without Principe Borghese, Sweet One Hundred, or Sweet Million. The mixed tomato platter isn’t complete without some yellows, and my favourite is Yellow Pear; while not the earliest one it did ripen, even in last year’s dismal season.

CHOOSE VARIETIES THAT TOLERATE COOLER TEMPERATURES

Cool weather beans: It’s worth noting that even among heat lovers like beans there are varieties that are more tolerant of cooler weather.  Some like Venture Blue Lake bush beans have a good ability to germinate in cool, moist soils.  Both Kentucky Blue and Purple Peacock pole beans are tolerant of cooler temperatures, the latter even producing well in less than full sun. Scarlet Runner beans, botanically different from either pole or bush beans, actually prefer cooler weather and drop their blossoms if it gets too hot.

SNUG AND HAPPY UNDERGROUND

Root crops are far less picky about weather, as long as the drainage is excellent. Within the beet family, Red Cloud and Early Wonder Tall Top are both particularly cold tolerant, although beets in general are safe to plant and easy to grow in our climate.

Carrots never fail to please if planted in deep friable loam, and seem to love the cool soil, as do radishes and parsnips.  (To avoid carrot rust fly, cover carrot crops with row cover before they germinate.)

Potatoes are a cold tolerant vegetable that more of us should grow, providing we have good drainage.  With so many varieties, colours, and sizes plus solid nutritional value it’s too bad they are often overlooked.  For those with limited space, there are lots of options for growing potatoes in containers.

EAT YOUR LEAFY GREENS

Most people know that leaf crops thrive in damp, cool conditions, but many haven’t yet tried some of the hearty, nutritious chards, kales, and Asian greens.  Two springs ago I planted Bright Lights chard as starts from the nursery; they produced well all summer and winter, right up until they were replaced by new seedlings at the end of the following June.

Kale is so cold tolerant that it’s best planted in the spring for the following winter harvest.

Cabbage grows best in cooler weather, with the West Coast Seeds catalogue singling out Early Jersey Wakefield and Derby Day as growing “rapidly in the chill of spring.” Yes, some years the chill of spring can be followed by the chill of summer, so plan accordingly, and diversify.

Broccoli, like other brassicas, is known to prefer cool weather. Broccoli raab, also called rapini, is a headless broccoli that is delicious steamed or stir fried. In particular, Zamboni raab tends to bolt in summer heat. That’s not surprising, is it? Hockey fans unite and grow Zamboni raab!

TAKE A CHANCE ON CUKES

While cucumbers are thought of as a hot weather crop, and require very warm soil to germinate, once growing they seem to produce adequately in less than perfect conditions. I have grown Lemon Cucumber for years, started inside in individual pots as their roots resent disturbance. WCS catalogue mentions Marketmore and Fanfare as having early and extended harvest, respectively.

GET AN EARLY START – BUT NOT TOO EARLY!

In many cases I will give spring a helping hand by starting my seeds indoors. I now have a simple grow light suspended in my laundry room, and by using row covers I can warm the soil in my garden and give the seedlings a little protection after transplanting.  By being careful with the crop choice and variety selection, and knowing the microclimates within my own garden, I can expand my harvest.

It’s probably better in our currently unsettled climate to plant according to temperature, not calendar date. Planting too early is a major cause of crop failure; hardy plants go to flower prematurely, and heat-loving plants become stunted or perish.

INTO THE FUTURE

Will I still grow eggplant, squash, and those wonderful San Marzanos? Yes of course, I’m an optimist; and what is gardening if not a thrill and a challenge, with delicious vegetables as the main prize. But by planting both cool weather plants and heat loving crops, I will enjoy the harvest no matter what the weather lottery brings us this summer.