Bare root roses 2

Planting Guide for Bare Root Roses

Bare root roses are an excellent way to establish a new rose in your garden. Follow these 5 easy steps to ensure your rose gets off to a great start.

Before Planting – If you cannot plant right away, keep the roots covered in soil or mulch and keep watered to ensure they don’t dry out.

Step 1 – Remove the elastic bands

The roots are wrapped in elastic bands for transport, these need to be removed before planting!

Step 2 – Rehydrate the rose

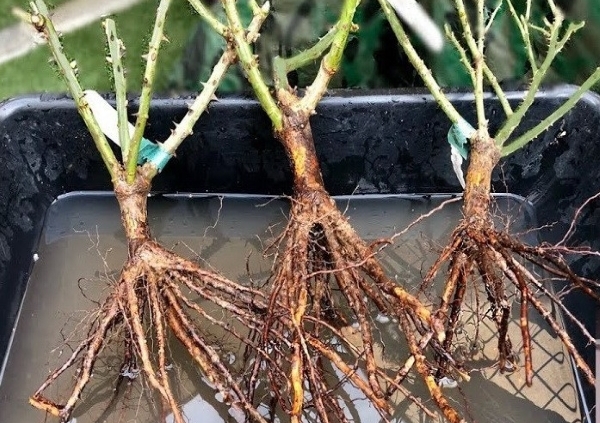
Submerge the rose roots in a bucket of water for at least 30 minutes to allow the rose to rehydrate before planting.

Step 3 – Prepare the hole

Dig a large hole, approximately 2’ wide by 2’ deep. Make sure to loosen soil up at the bottom of the hole. If existing soil is poor quality, make sure to add a good quality garden soil when planting. This is also the time to add bone meal and rose fertilizer to ensure strong growth in the first season. If adding rose fertilizer sprinkle in the bottom of the hole and add soil on top to prevent the roots from coming in direct contact with the fertilizer.

 Step 4 – Planting the rose
Planting depth bare root rose

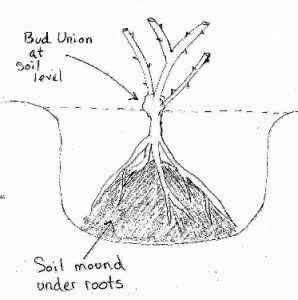
Fig 1. Planting depth for bare root roses in the Pacific Northwest.

Mound soil in the centre of the hole so that the roots lay on top of the mound of soil. This will help to prevent any air pockets from forming.

If adding new soil, make sure to mix it in with the existing soil so that the change in soil type is gradual for the plant as it grows.

Plant the rose so that the bud union is at, or just slightly below, ground level. The bud union is the swollen area where the stems arise from the root stock.

Fill in hole with soil about half way making sure there are no air pockets and water thoroughly. Once water has drained fill in the rest of the hole with soil and water generously.

 Step 5 – After Care

Make sure to keep the rose well watered, especially in the first year. Roses are heavy feeders and will benefit from regular fertilizing.
Rose Pruning 3

Winter Pruning of Climbing Roses

Winter is the best time to prune modern repeat climbers as all the old leaves need to be picked off anyway, so may as well prune at the same time. (Once blooming old roses and ramblers are best when pruned in the summer after flowering)

The key to climbers is to train the canes as near to horizontal as possible. A good structure of horizontal branches dramatically increases the number of flowers. Climbers that are allowed to grow straight up will have flowers only on the tips of the canes. Newly planted climbers won’t need much pruning the first year or two. Just tie in any canes that have developed over the summer and cut side shoots back to about 6 inches.

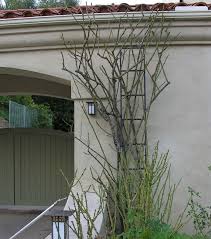
The rose in this picture would have most of its flowers at the top.

The rose in this picture would have most of its flowers at the top.

To prune an established wall trained climber, start by taking a critical look at the plant’s structure.   Identify two or three of the oldest, less productive canes for removal or cutting back. Decide which of the newly developed canes you want to keep and where they would be best tied in. Look for dead wood, weak thin growth and awkward branches.   Try to make a plan before you start cutting.

Once you have your game plan, start by cutting away what you don’t want. The oldest branches can be cut at ground level, or at a low point where you want a new branch to form. Keep an eye on where the buds are and make the cuts just above buds that are pointing in the direction you want new growth to go in.

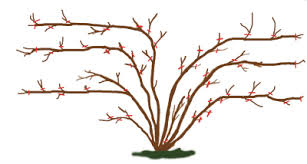
Cut out thin weak growth, dead wood and awkward crossing branches. Leave the side branches on the remaining canes for the time being.   Tie remaining canes onto the supports, spacing them evenly to get good coverage. Now prune the side branches, or laterals, growing out of these canes down to 3 or 4 buds. Cut just above an outward facing one.

Rose Pruning 3Remove any remaining leaves, an important step in disease control.   Lastly, rake up any fallen leaves off the ground, lightly fork over the soil around the base of the plant, apply a couple of inches of compost and you’re done.

The steps for pruning a rose trained over an arbour or similar structure are pretty much the same. Try to train some of the branches in “S” curves up trellised sides or wrap them around the support posts. Be sure that the branches over the top of the structure are tied down securely to prevent wind damage and to promote good flowering. Cut back side branches to two or three buds.

Red rose 2

See how this Don Juan Rose is tied to the top of the arbour, producing many side branches and lots of flowers.