Beans, Beans, Bountiful Beans
Ever since I can remember, the 24th of May weekend was the peak weekend for gardeners, for that day was carved in stone as the time when our warm-weather crops could be planted, and the official gardening season was happily underway.
As all gardeners know, this year has been sadly different. I know that compared to the rest of the country and much of the world, we have nothing to complain about, but we are Canadian and complain about the weather we do!
The bottom line is that it is still not warm enough for tomatoes, cucumbers, basil, squash, peppers, and other heat-lovers to be moved into the ground, but they do need to be moved into bigger pots to expand their root systems, and hardened off before putting outside. Beans are typically seeded directly into the ground when the soil is warm enough to germinate the seeds. Planted too early, they are likely to rot before even thinking of germination, and this year even our beloved 24th of May weekend was still too early.
But there is an alternative to waiting. The critical point for the beans is not the actual growing of the plant, it’s the germination of the seed. Just like pea seeds, the bean seed is large and starchy, which easily rots and is great fodder for critters such as birds, rodents, slugs, etc. By pre-sprouting indoors in vermiculite (see blog on sprouting peas), that vulnerable phase is eliminated.
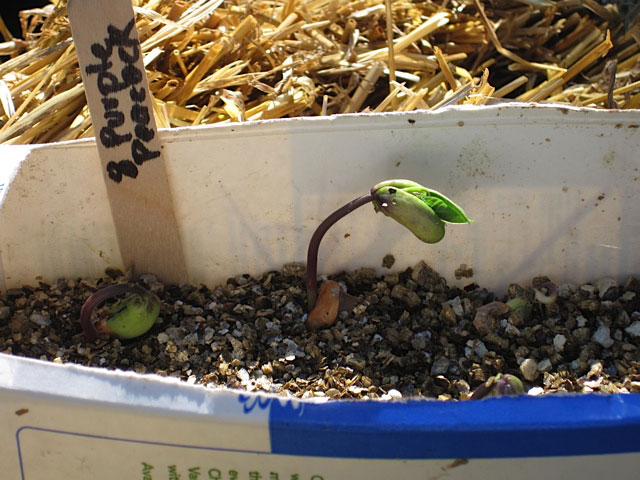
The process couldn’t be simpler; instead of starting the seeds in soil, plant in vermiculite. Add water, push bean seeds into the damp vermiculite, and put in a warm spot in a sunny window sill or green house. My beans emerged within 5 days. Very cute little guys, the seed comes up on top of the stem, splitting and releasing its amazing cargo of leaves.

Bean sprouting in vermiculite

Look at the amazing root system of this bean started in vermiculite only 12 days ago! The seedling measures about 12” from top of leaf to bottom of that long tap root.
When the seedlings are about 4” tall or have three true leaves, it’s time to plant them into the garden. First step is to prepare your soil, digging in some bone meal and compost.
Beans, as with all legumes, make their own nitrogen from the air, so it’s not necessary to give them overly rich soil, but it should have a nice well-draining texture.
If you are growing pole beans rather than bush beans, I strongly advise installing your climbing apparatus before planting, and I’ve found that a simple teepee of poles (8 feet is not too tall) works well, with about three or four seedlings at the base of each pole. Instead of a teepee, many people use netting or string against a fence or wall.
I tend to prefer pole beans rather than bush beans; pole beans will keep producing all summer, whereas bush beans have one crop and it all comes at once. Pole beans are more flavourful as well, at least in my opinion, with their intense, earthy bean flavour they are delicious plain, or simply slathered with butter and lemon. My favourite recipe includes minced garlic, sea salt, balsamic, and mild walnut oil. Mmmmm, I can hardly wait.
There are many excellent varieties of pole beans, but one I always plant is Purple Peacock, because it can handle less sun than others, and I have a limited area of full sun in my garden. I usually plant only about six seeds of three different varieties, and we are eating beans all summer
Pole beans are prolific! Just remember to pick when small, and pick often to keep the vines producing.
If you choose bush beans, netting or supports are not necessary, and to avoid the feast or famine syndrome, plant successive crops every two weeks.
The little glimmers of warm weather are encouraging; yes, summer is coming and so are the delicious fresh beans we have all been waiting for.

